
08/12/2013
08/12/2013
Scenery 101 - Retaining Walls
By Lynne Haines
There are a few positions on my track where concrete retaining walls were required. They make a fairly common appearance beneath bridges and fly-overs.
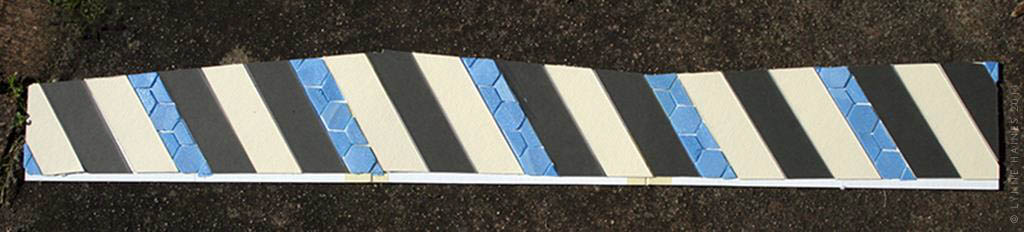
With my typical tendency toward a low budget solution I selected heavy mounting card of the type used by picture framers for the main substrate of the retaining wall. This selection was simply because I had some available. A thick pasteboard or light foam core would be equally suitable. After much measuring, cutting, trimming and tinkering the basic wall shape was cut out ready for detailing.
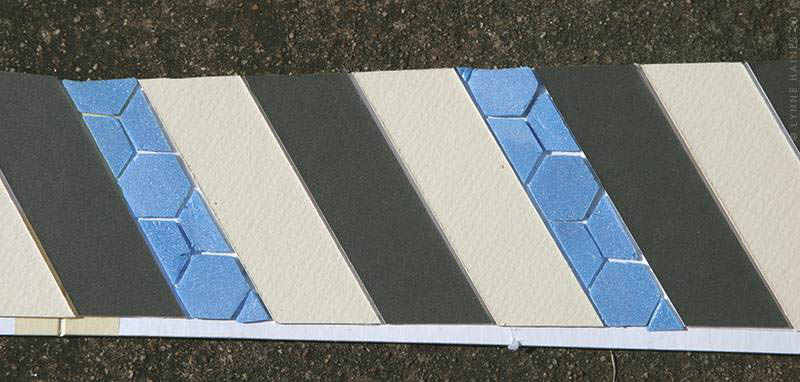
There is a tendency in freeway construction today to add pattern detail to pre-fabricated concrete construction. This detail is suitable for emulating in small scale.
A layer of pattern has been added to the base substrate. The alternating stripes were cut from more mounting card and the hexagonal "tiles" are styrene packing. The lot was glued with PVA and left to dry with some weight sitting upon it. There was a little bit of difference in the texture of the two colors of mounting board, hence the alternating pattern. This proved unnecessary in the long run, but it kept me amused while gluing things in place.
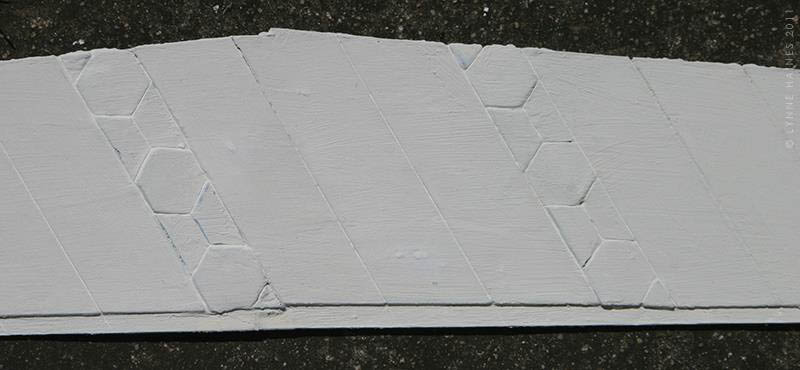
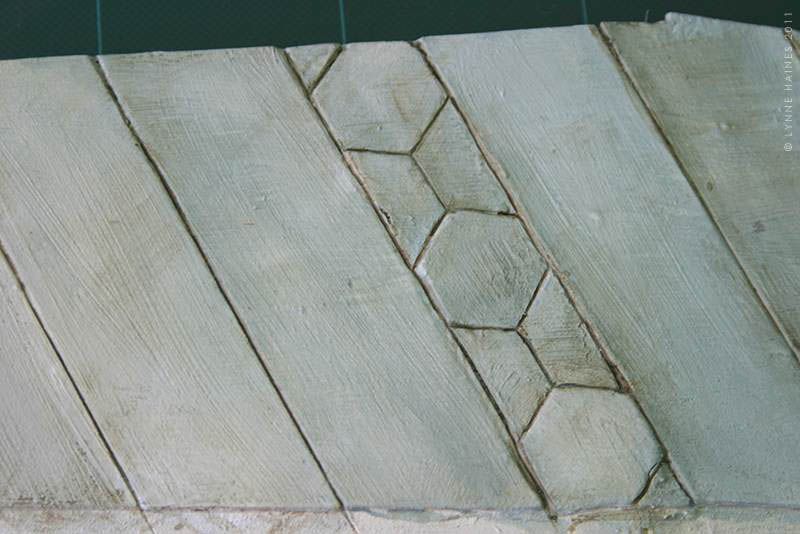
To turn the collection of cardboard and styrene into a concrete whole and add another layer of texture I used my favorite plasterer’s joint compound. Tinted to a concrete blue grey colour with a little ultramarine blue and some raw umber, the joint compound was brushed liberally over the entire wall with a long bristled, flat brush.

Don’t worry too much if there is still color showing through the compound at this point, it becomes more opaque as it dries. I like to do a second coat of compound at a cross angle to the first coat, just to make sure of good coverage and texture. When dry it’s time to paint.
Painting is an easy thing, although some people worry about it needlessly. The idea with painting is to add color and bring out the texture of the piece. This is why it’s worth putting in the work of coating in joint compound. The first coat of paint will set a bit more texture and enhance the base color. I like to build up color in transparent layers and so I very rarely use black or white paint. Black makes colors muddy and white makes them opaque. The base coat for this concrete is an exception to my rule.
I mixed a blue grey similar to the tinting added to the joint compound with raw umber, a touch of aquamarine blue and a bit of white artist’s acrylic. To this I add matte medium to counteract a little of the opacity from the white whilst still keeping the paint fairly thick. Too much water would make the paint too thin. The first application can be painted quite roughly over the entire surface. Subsequent color washes of raw umber tempered with varying amounts of the blue are thinned with water and allowed to puddle into the low spots on the wall. When dry a little dry brushing with some warm white. Be very, very sparing with the application of white.
Another bit of dry brushing along the bottom third of this wall would be appropriate to represent the deposits from exhaust fumes. Pure raw umber and a light hand are required for the job.
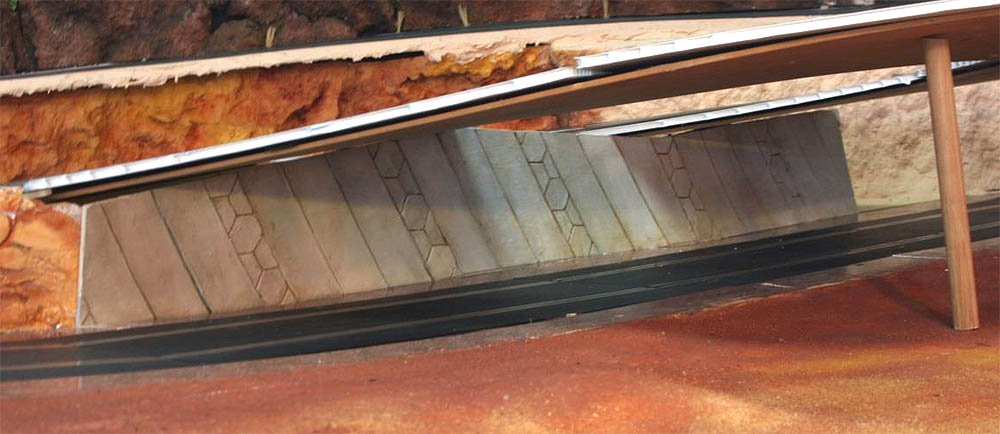
This wall has been designed to tuck into place between the track edge and supports for the track above. Thankfully it fits in place perfectly. I think it looks just like a pre-fab concrete wall. Installation could be completed with some backfill of expanding foam and a little extension to the rock wall at the left end.
Questions or comments about this article? EMAIL ME
- Lynne