
01/13/2014
01/13/2014
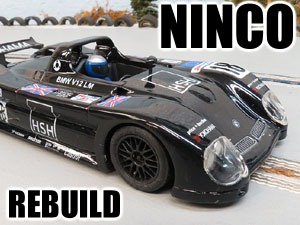
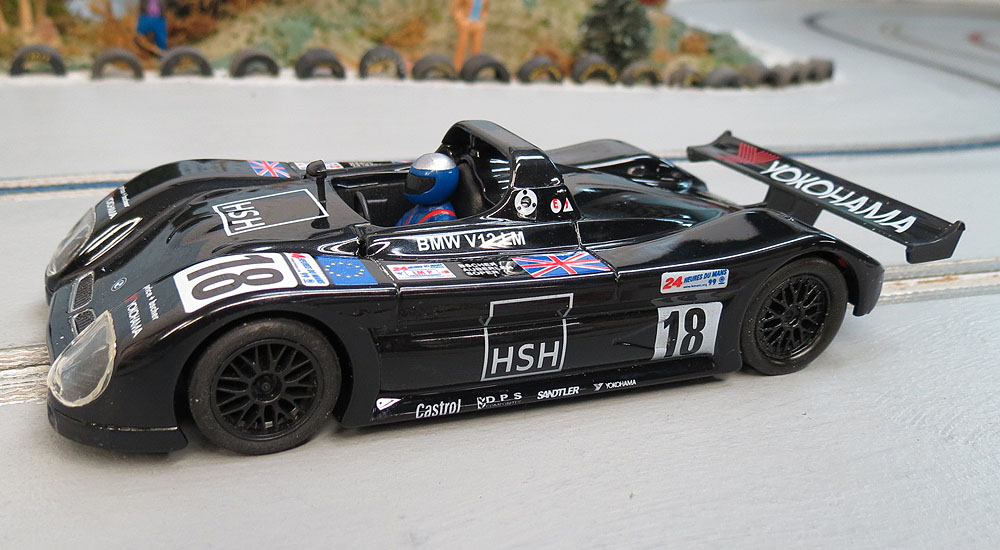
Back in 2000 NINCO released some really nice models to our hobby. Among them were a series of cars based on the 1999 Le Mans winning BMW V12 LMR car. At the time these models were not that popular, but NINCO was still a young company back then and the presence of our hobby on the web paled in comparison to today.
Over the years these models have become some of my personal favorites because with very little tuning effort they can be very enjoyable models to race. In the past on plastic tracks I have even stayed with stock rubber and left the small button magnet in place. Magnet racing? Not hardly. With the magnet near the center, this car was far from being stuck down. I always referred to that magnet as simply "pinning" the model down a little. And on some plastic tracks including my own Dixon Hills Artin layout, it worked just fine and countless laps have been had with them.
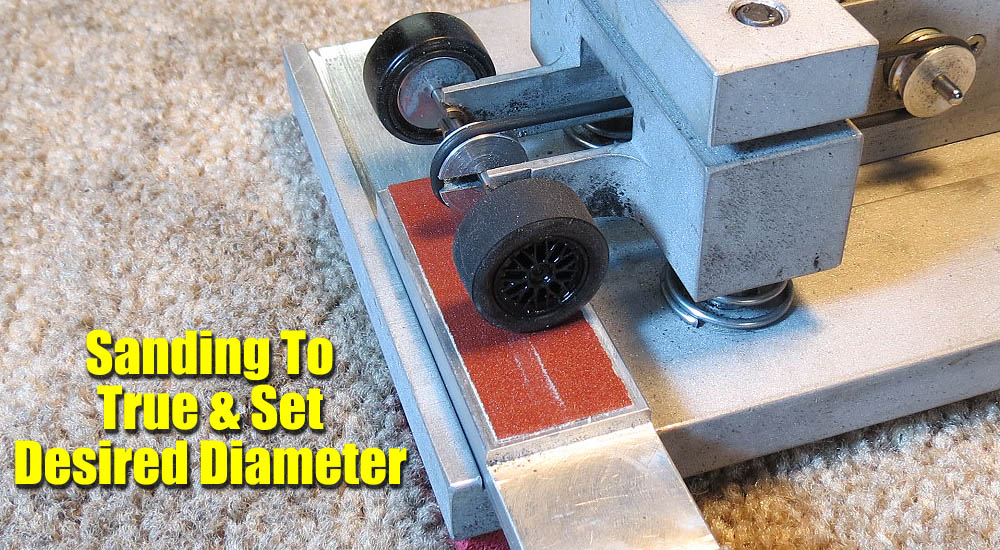
After switching to non-magnet and finally our own wood track, the models still provided us with plenty of fun. New tires were the big change, but tools like the Tire Razor really helped true up the wheels even more than we had them in the past.
Over time however it was clear they needed more attention. Wood track surfaces will let you know right away if things are just not "right. The freeplay in the bushings have always been an issue as well as the axles being notoriously bent. It was models like this that helped coin the phrase: "The Ninco Hop". But I stuck with them and had them running fairly well on our wood surface.
The idea of scratch-building a chassis or using an after-market one is not what I wanted. I felt they deserved to be kept in as original form as possible. With the parts surplus we have in our hobby I knew I could tune one of these models easily enough. This time I wanted to use the best parts the hobby had to offer and attempt to make them smooth, wood track performers.
Building Goals:
1. Keep the original chassis with minimal amount of modifications.
2. Keep the original NC-2 as well as the standard 9/27 gear ratio.
3. Keep the scale/stock appearance as much as possible.
Parts List:
C.B. Design 17x10 Insert Wheels
NSR Inline Kit (27T Crown - 9T Pinion)
B-Nova Adaptor Kit Carrera/SCX
STEP ONE: Breakdown/Cleaning/Inspection
After removing the body from the chassis it was time for a bath.

This old warrior deserves a clean up. You can see the old setup we used on these cars by bracing the front axle to reduce vertical free-play. Original black label NC-2 is still here and it will be used again.
Remove all the components including magnet and bushings.
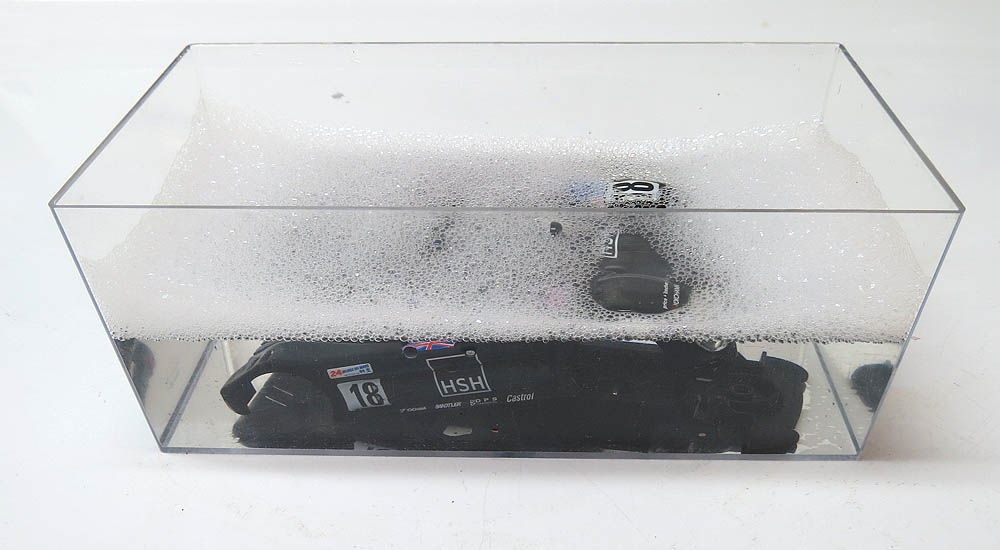
Using an old slot car case lid is the perfect batch tub. I use Dawn dishwashing liquid and warm water. I let it soak about an hour and then scrubbed it lightly with a old paint brush to get into all the little crevices.
After some drying time the chassis is ready for the B-Nova guide modification. I feel this step is as important to performance as new wheels or tires.
STEP TWO: Chassis Modifications/Repair
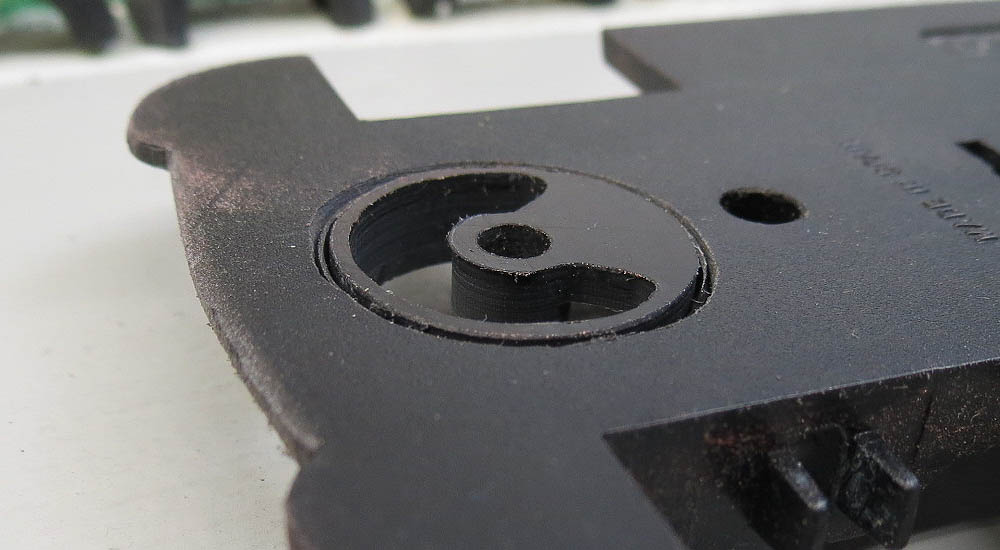
Instead of shimming and trimming the existing guide holder, my approach is to eliminate it completely and use the adaptors designed for Carrera/SCX. The truth is that this setup can work in just about any model if you have the room for it.
First you align the guide holder hole with the original hole. You cannot move forward due to the low nose of the body. Too far forward and the top of the guide and wires would rub or pinch. I clamp the guide holder after it is aligned and trace a circle as shown above.
Using a milling bit in my Dremel, I remove the material indicated above. You do NOT have to make it perfectly round. That is the purpose of the "trim" ring as I call it. it will be glued in place once it is fitted and it creates the concentric opening you need for the holder itself.
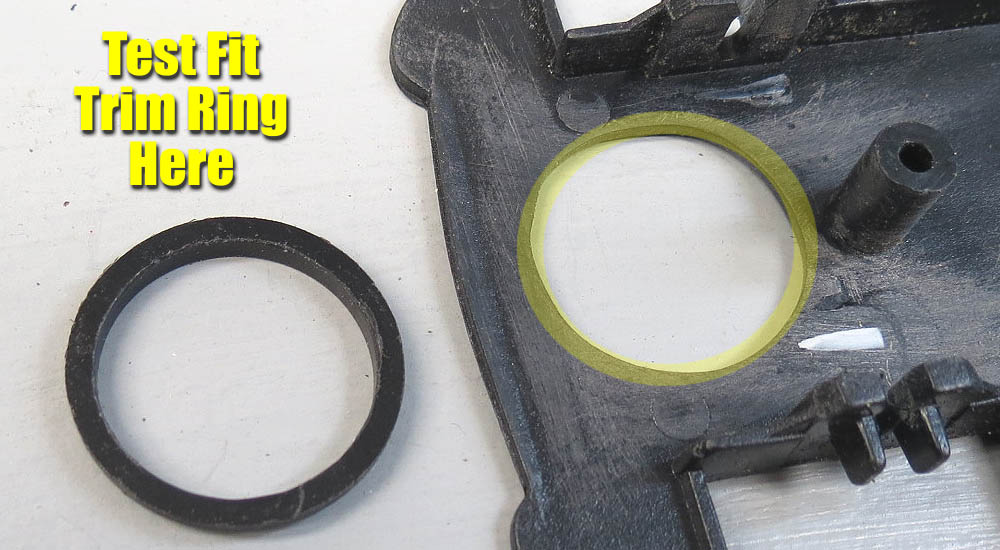
Using an Exacto blade, I finish trimming the hole until the trim ring fits inside smoothly. Make sure it is fully seated and then glue it in place. I prefer thin CA (Super Glue) for this.
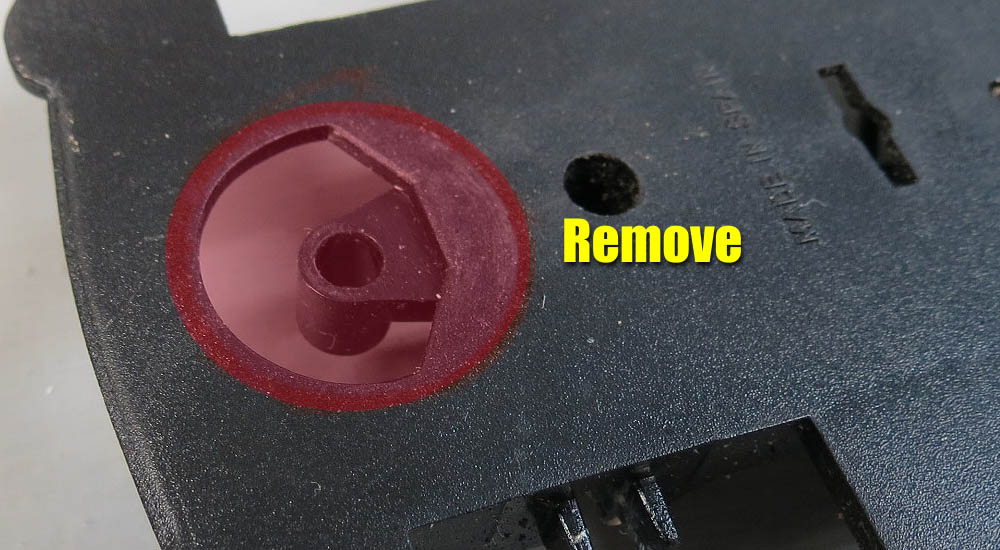
You can also see above where I have lightly sanded the area. I removed what was left of the axle supports just to make sure we had a smooth surface.
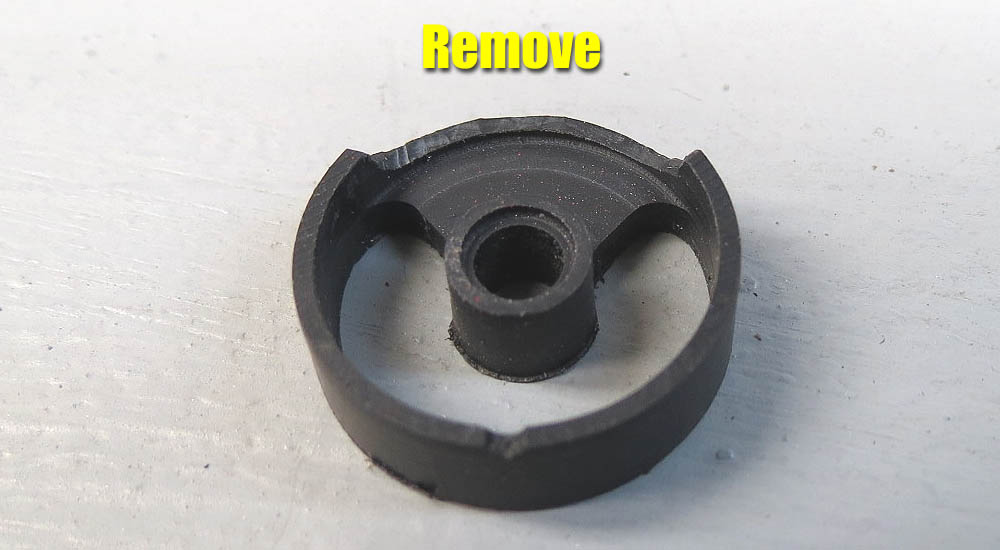
Before installing the holder, you need to remove some material. The photo above shows how much I removed. Using a Exacto blade is ideal for this task.
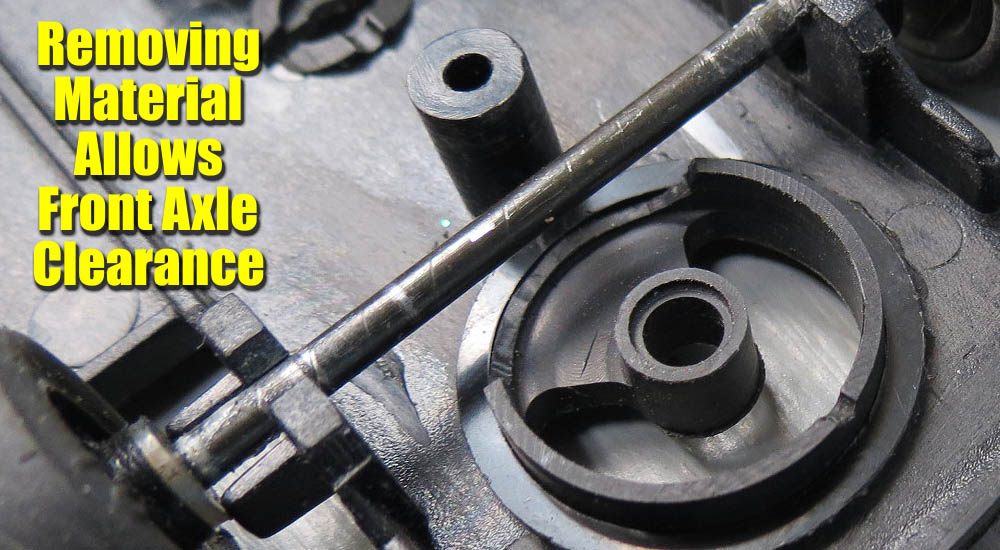
This step is needed so the front axle will clear.
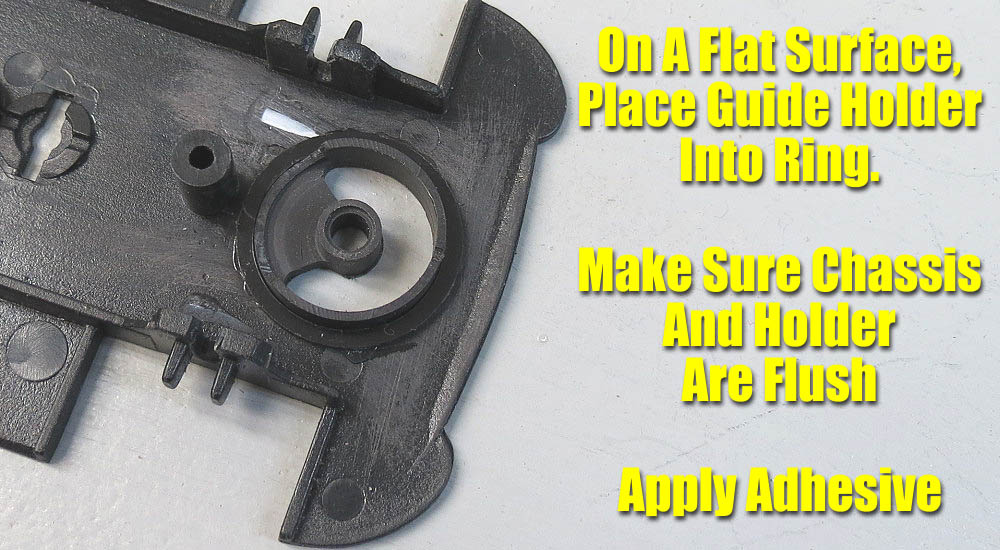
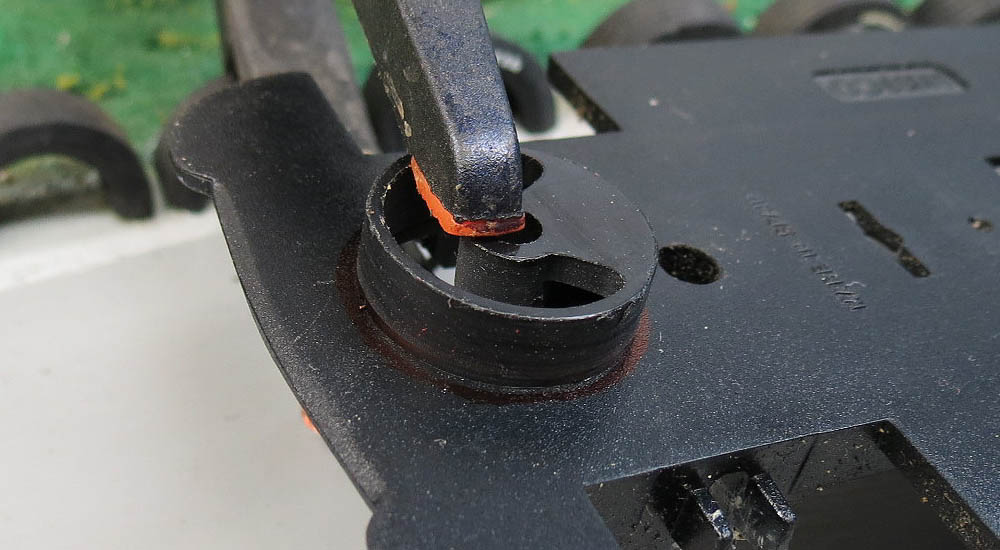
Now place the chassis on a FLAT surface. Install the guide holder as shown. Make sure the chassis and the guide holder are held firmly to the surface. This makes certain the bottom of the holder is flush with the chassis. When you have it where it needs to be, apply the adhesive.
This is what you are looking for. The guide holder flush with the chassis.
One area you need to inspect closely is the rear bushing mounts. In stock form these bushing mounts have molded "ears" or tabs that you must snap the bushings through. The purpose of these ears is hold the bushing in place. The problem is that most all of them are too tight. The ears are either too large causing extreme pressure on the chassis when installing the bushing, or the hole itself is too small that also causes excess pressure.
And what does all this excess pressure result in? You guessed it: CRACKING.
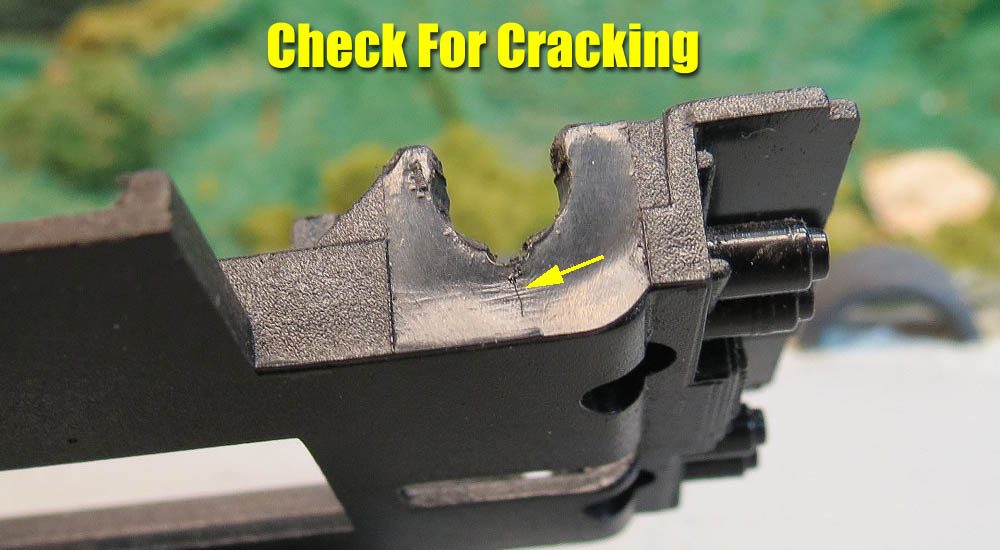
Above you can see the hairline crack that has occurred.
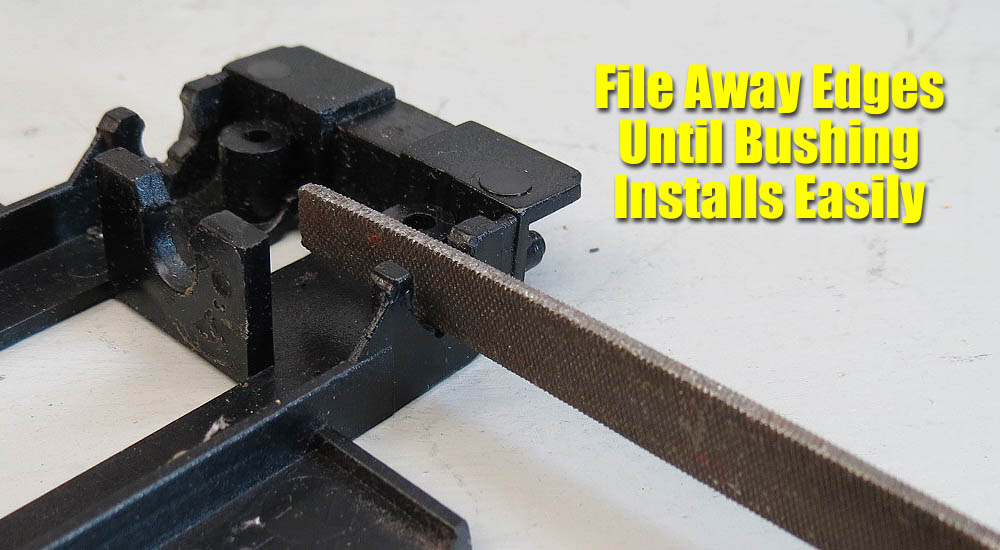
Before we repair it, let's reduce the pressure for installing the new bushings. We don't want or need a lot of pressure to hold the new ones in place as we are going to glue them.
Take a small file and remove most of the material (ears) on the sides. You don't have to take away all of it, just enough so that the bushings drop in rather easily.
Just file and test fit the bushing as you work. I usually go almost all the way until the bushing almost falls out if you tip it over.
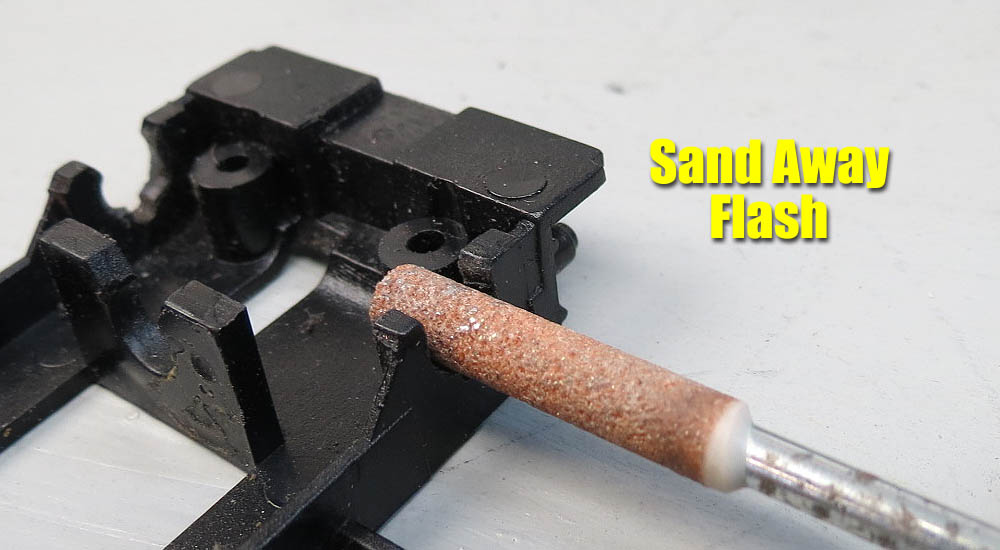
Now the other area, the bushing pocket. Using a Dremel 3/16" sharpening stone I lightly sand this area to make sure it is clean of any flash molding and to enlarge a little if needed.
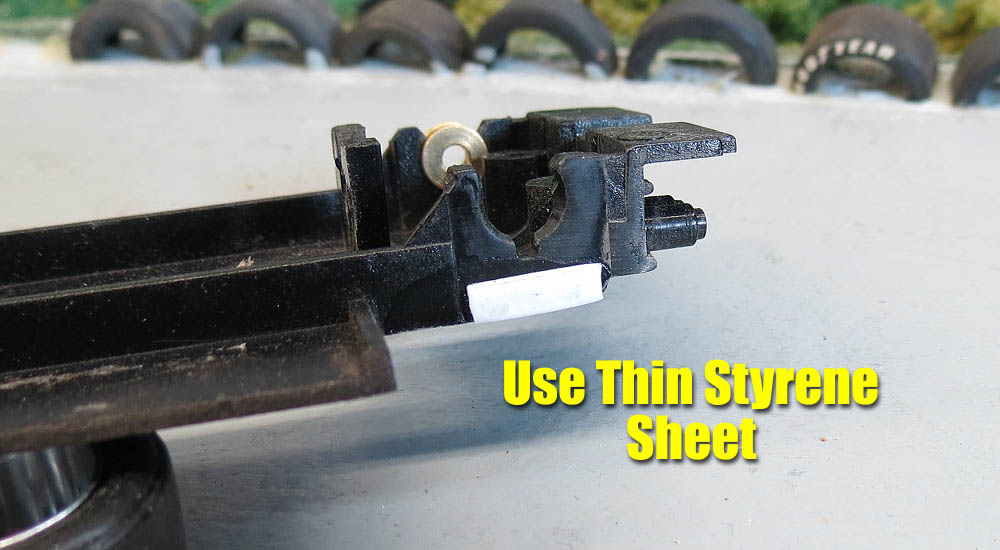
Using a 1mm strip styrene section, I simply glued it as shown above.
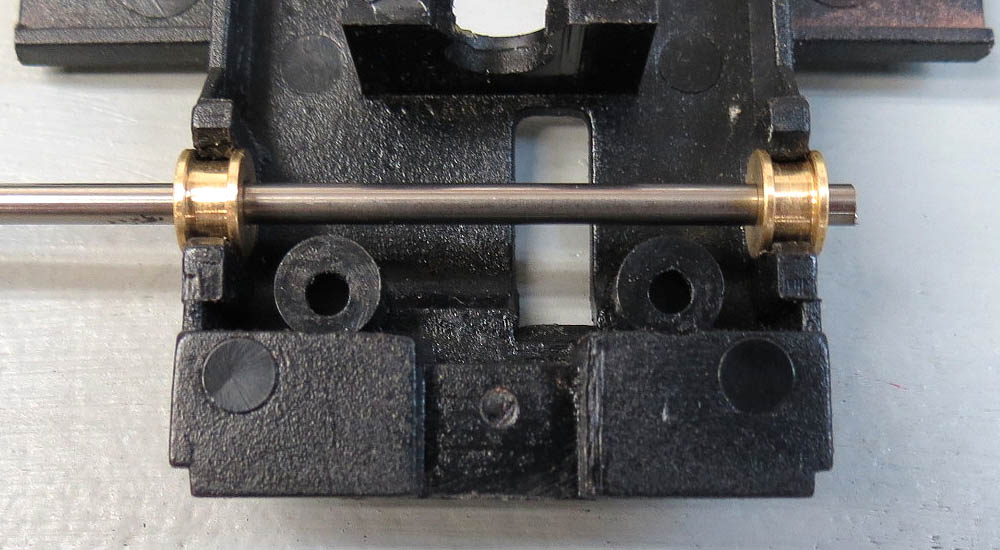
Test fit the bushings with your axle in place. Make sure to lightly oil the axle and then check to make sure it moves freely from side to side. Now use a light drop of CA (super glue) on the tops of the bushings. Spin the axle with your fingers to make sure no glue has found it's way onto it or the face of the bushings. This is why you want to oil it first so if you do have some glue spill onto this area, it is less likely to stick and seize the axle. After a few seconds you can remove the axle and start getting your wheels ready.
A good test is to take the chassis and tip it on it's side. The axle should slide out by itself.
Why CA? (Super Glue) These bushings are very precise. The fit of them with a standard Slot.it axle is as good as I have ever seen. Once these are installed there is likely no reason to ever remove them.
STEP THREE: After-Market Parts

I could have turned down the original wheels for inserts, but there is another option. Slot.it makes inserts for the 17mm series wheels that fit perfectly and look fantastic. I do not mind making them but for the few dollars they cost, the time and effort saved is worth it to me.

They fit pretty well but I used a light coat of Testors model glue to make sure it stays put.
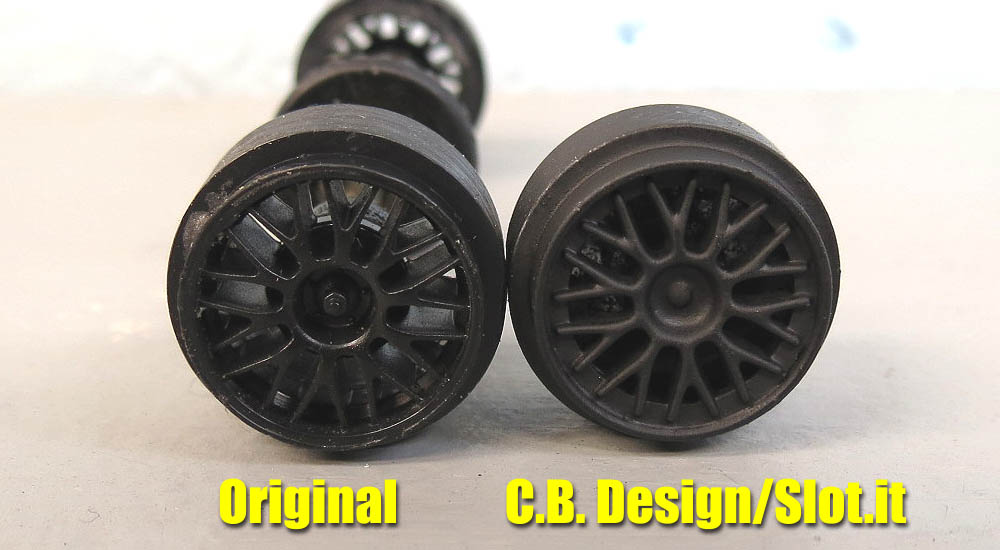
Once installed I painted the complete wheel with flat black first as sort of a primer coat and then followed with a light coat of gloss black.
I am setting the width to stock specifications. Some prefer to go wider but having the wheels/tires stick out from the body is not to my taste.
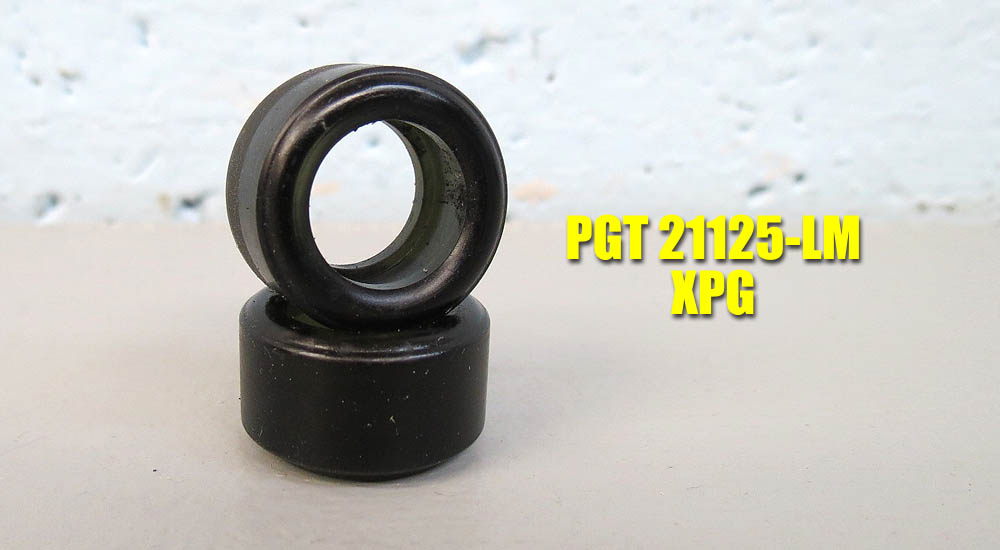
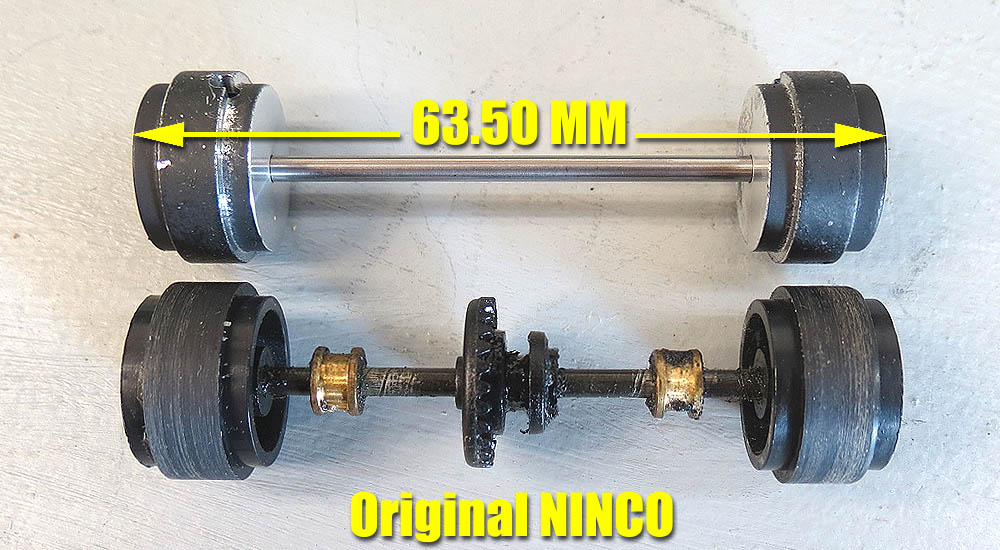
When it comes to tire sizes I like to start with a larger tire than required. I prefer this as I can then set the diameter to my own personal preference.
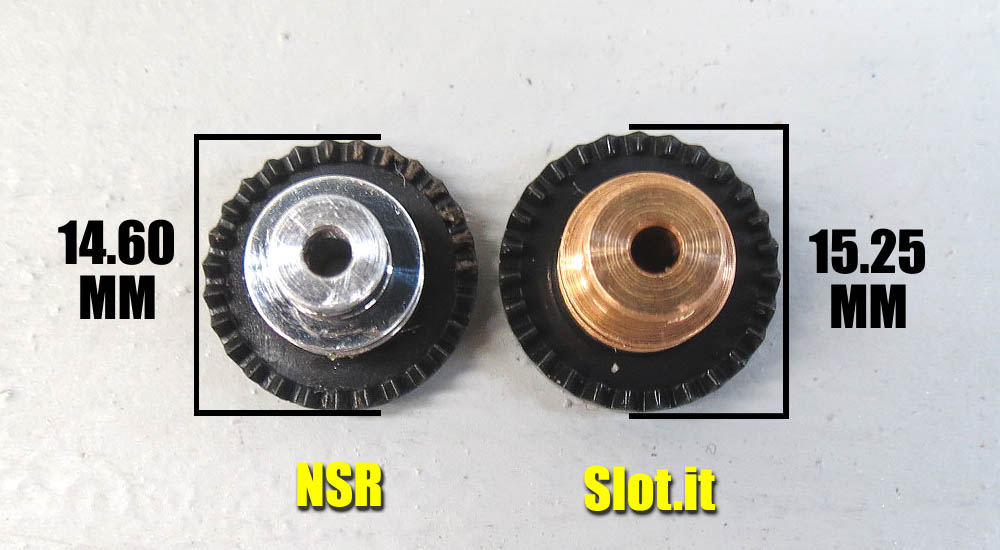
The reason I chose the NSR gear instead of Slot.it is the size. The Slot.it gear is larger in diameter and can sometimes require you to trim the chassis for clearance. I decided to use the NSR to avoid this. The size difference is something you might find handy on other models as well.
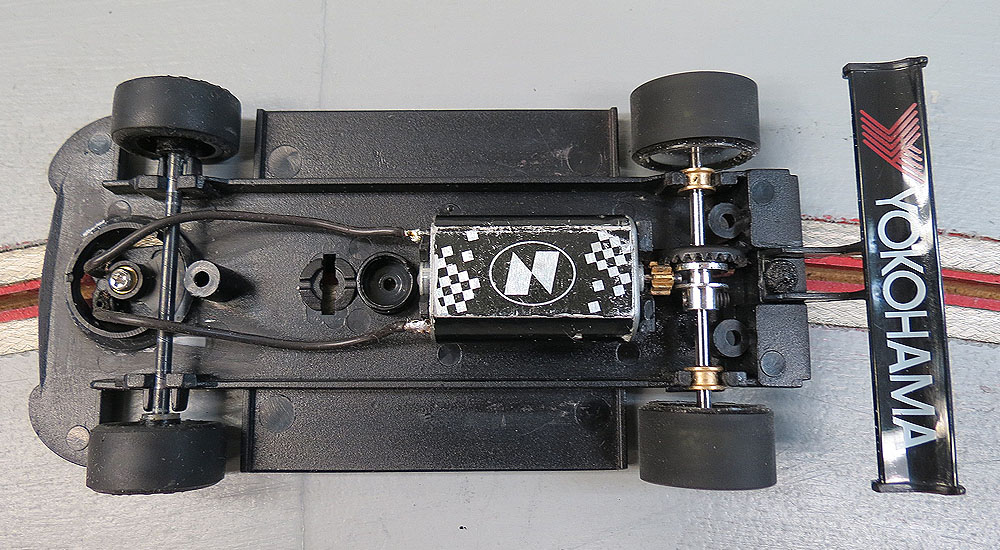
All finished. I used the set screw method to install the lead wires to the guide.
In the end I am very pleased with the results. It runs very smooth and handles much better as you might imagine.
These are still great slot cars that deserve serious consideration by veterans and newcomers alike. Now I know many of you longtime enthusiasts have them laying about here and there. You remember how much fun they were and the close racing they provide. Dig them out and work your magic. I think you will enjoy both the rebuild process and the end results.
Newcomers should know that these can still be found, at decent prices as well. I purchased two models recently and paid less than $50.00 each. About the same as some new releases which would need work as well for most wood or non-magnet racing. With Arrow Slot announcing that they are bringing this model back in updated form, perhaps the desire to race these models will just increase. I am betting some of you can make these old rides just as fast and fun.
Hope this helps some of you.
-Harry
Contact ME here about this review or the hobby in general.
Copyright © 2014 HomeRacingWorld.com All Rights Reserved