
01/02/2014
01/02/2014
Now that your old foam wheel is ready for new shoes and you want to switch to urethane/silicone based tires, how can you glue the tire in place to make sure it is straight and at the depth you want? Depth is important for me because I always use wheel inserts for added scale realism. The tires he makes come with a nice sidewall and I like to try and match the wheel insert to the sidewall. Just setting the tire flush with the outside edge of the wheel leaves the insert looking like it is sticking out too far and takes away from the appeal for me.
NOTES:
1. This is for scale home racing. The motors we use are milder than any commercial track motor you might be using in this scale. Our models are meant to be fast enough to race, but mild enough to have more scale appeal.
2. We do not use ANY glue on our track surface. It is clean flat latex that has a well worn rubber groove. These tires grip very well, yet allow a little drifting action we really like in our oval series.
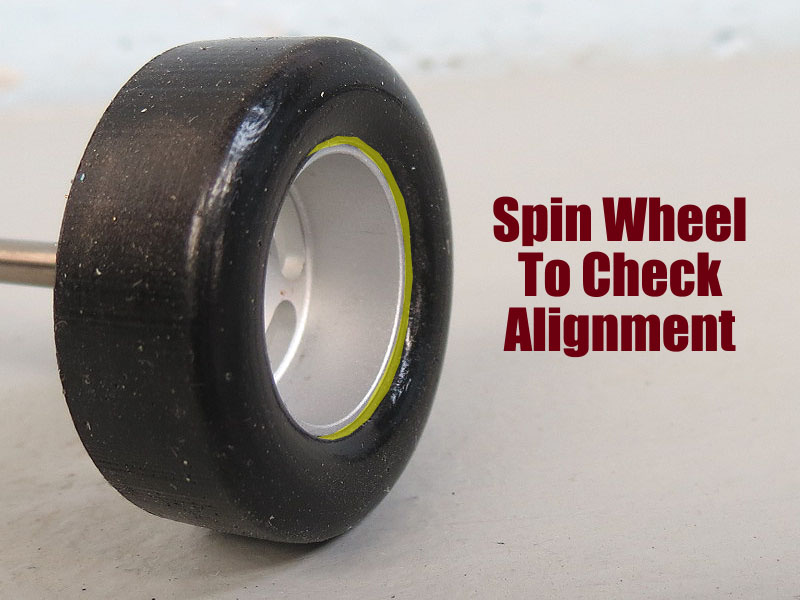
First you want to mount your wheel on an axle. You do not have to, but I find using an axle as sort of a "handle" makes it easier to mount. It also helps after you have glued the tire to spin it by hand and checking your work.

By using the large thumbscrews on my Razor Jig, I set the depth I want by simply turning the screw and checking it.
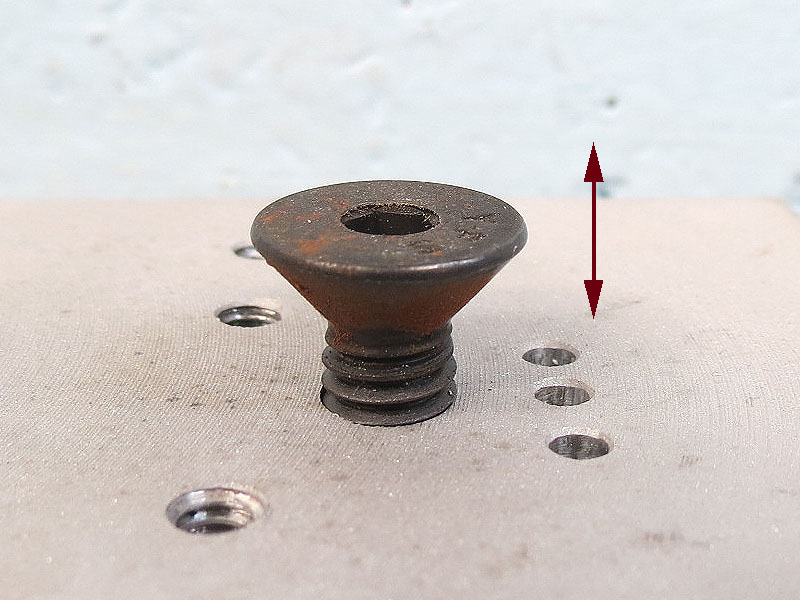
As you can see this is a very simple approach. If you do not have a jig like this, you can easily make a setup yourself. I have used large deck screws found at any hardware store, drilled a small hole in some scrap MDF and that works just as well. All you are looking for is a screw head surface large enough to support the inside of the wheel evenly along with a true/flat surface.

Always check your depth. Different tires need different depth, so you will just have to test for each tire. I start out with a small gap as shown above as a starting point.
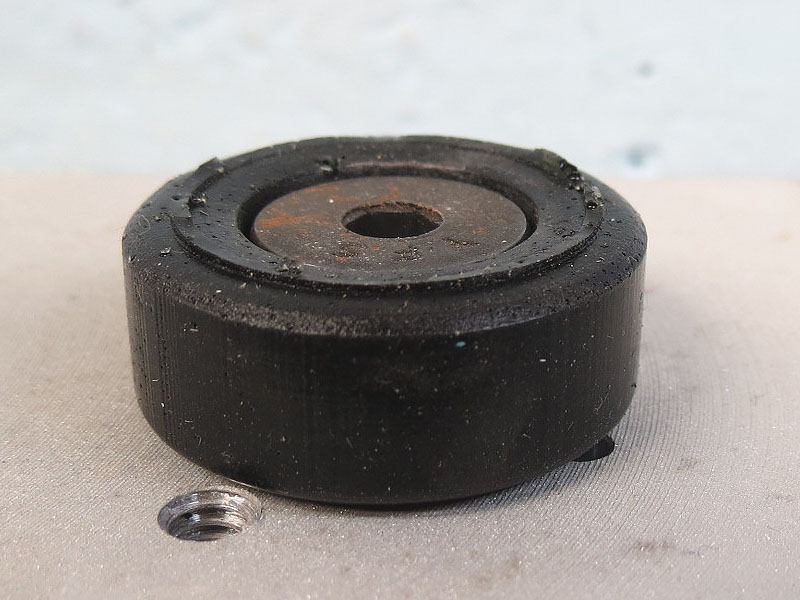
Now place your tire over the screw with the "release" side up. This is rougher side where it was pulled from the mold. The excess flash you see is quickly removed with a little sandpaper when you true the tire so don't worry about it.
Test your fit by pressing the wheel into the tire. Make sure you have it fully seated. Then press the other edges of the tire down to make sure it is level.

Now remove it and check the distance. Take your wheel insert you plan to use and set it inside. The rim of the insert should just touch the sidewall and give you a smooth appearance.
If it is set where you want it, remove the tire and return it to the block.
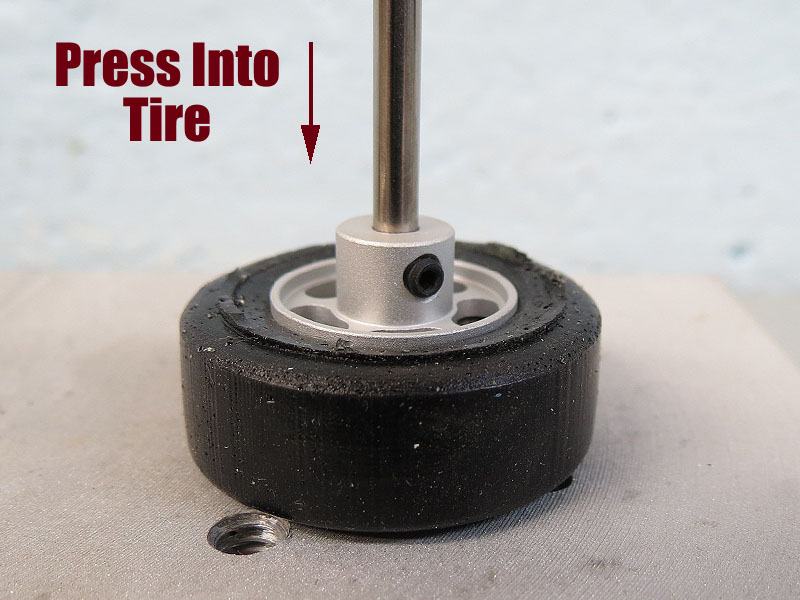
Time to apply glue to the wheel and reinstall it.
ADHESIVES: I have tested these tires and adhesives for the past year. Here is what I feel works the best.
1. Clear nail polish hardener.
This tip direct from Paul:
Hansen's Hard As Nails Clear Hardener, (HANs), in a red and white bottle at Walmart for about $4.00. It is designed as a top coat and hardener for the colored layer of nail polish the ladies use. Very similar to the old model airplane dope only cheaper and packaged more conveniently.
I pre-clean the wheel and
tires with a Q-tip cotton swab dipped in acetone. Wipe the inside of the tire
and the outside of the wheel. Glob on the HANs so it oozes out after sliding on
the tire. Turn the tire on the wheel to evenly spread the HANs and press out the
excess. Half hour curing time and they can be trued. Care should be taken when
gluing tires on plastic wheels. Installation technique and finger placement can
significantly reduce spill over on your plastic rims. Remove any inserts in
alloy wheels before installing tires. I have not had a tire adhesion failure in
5 years of installing and re-installing using this method. That includes 1/24
scale stuff too.
Removal is as simple as dipping a Q-tip in acetone and rubbing along the tire
bead, on the backside of the wheel, until the tire starts to lift off. Care and
practice will eventually allow you to install and remove tires from plastic
wheels without any visible damages.
2. Testors standard model glue.
3. Slow setting medium CA (Super Glue) gel.
Using standard super glue is not advised. You want a few seconds to make sure the wheel is fully seated as well as a little time to spin the wheel by hand and inspect the alignment. Using slower curing adhesives allow you to make these small adjustments if needed.
You do not need a lot of glue. Just spin the wheel and apply a light bead near the outside edge of the wheel. Now press the wheel back into the tire and making sure it is level and true.
There will be excess glue appear on the backside bead of the tire. Use a paper towel and just absorb most of it. Now just let it dry.
I allow the tires to cure for at least ONE HOUR. If you decide to use any other adhesive, then you should follow the directions for curing time. Most times I am not in that much of a hurry and I let them sit overnight.
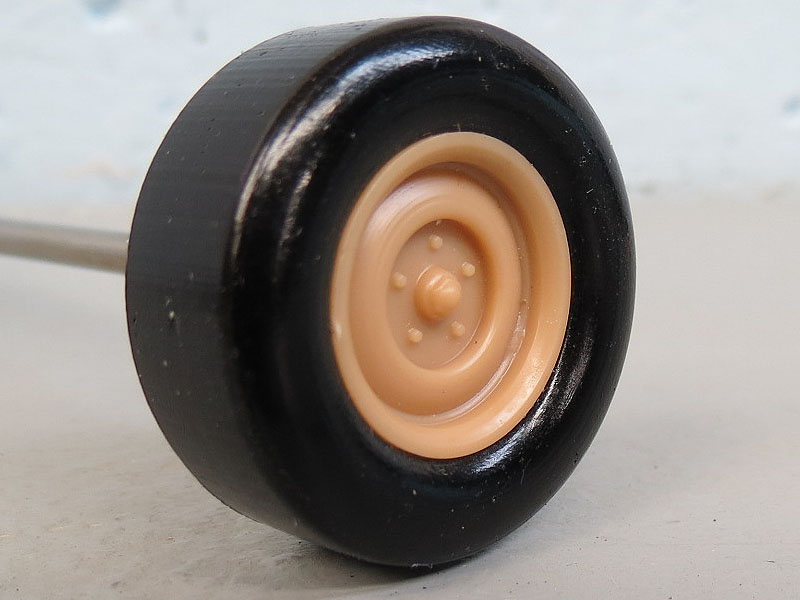
Now you have a new tire and insert that looks good as well as perform well.
- Harry
Contact ME about this article here.