
9/26/2011
9/26/2011
Review
By
Eric Cropper
In the immortal words of Arnold, “I’m back.” I’m going to show you the ins and outs of the newest homebrewed tire truer available for our hobby, the Tire Razor. This product comes straight out of Missouri and is built by a one man operation that just started off to show folks that they could make a tire truer themselves if they had the right tools in their garage or basement. The Tire Razor prototype caught the eyes of many and soon its creator started getting asked, “How much to make me one?” Thus, began Jon’s effort to produce and sell a quality product with an exceptional price compared to similar machines already on the market. He isn’t just making these to make a buck off up groove riders, because he’s one himself. He has a passion for toys cars just like the rest of us and his efforts with the Tire Razor show it.
So, let’s grab that plastic case fresh car purchase or an oldie, but wobbly and get to the truth about this tire truing system.
VIEWING THE VARIOUS PARTS OF THE TIRE RAZOR
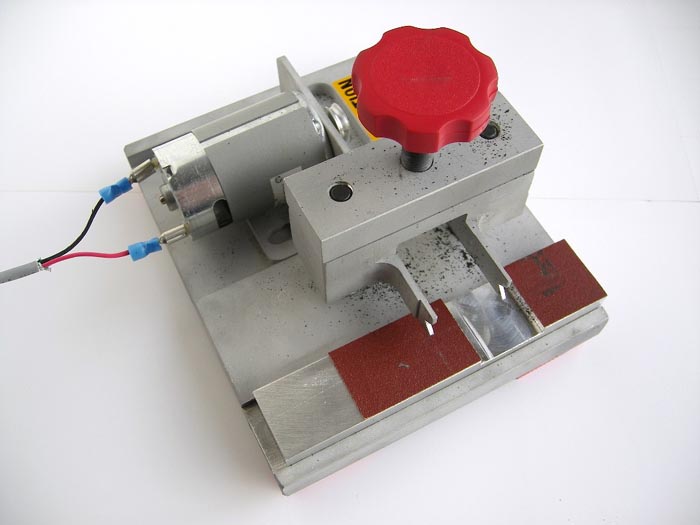
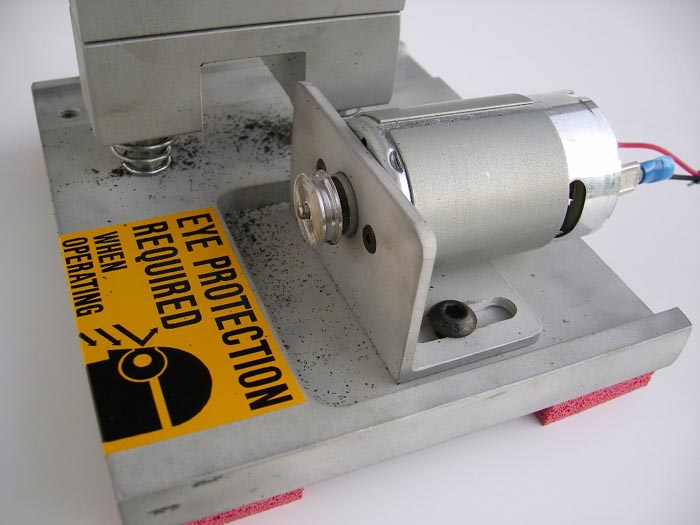
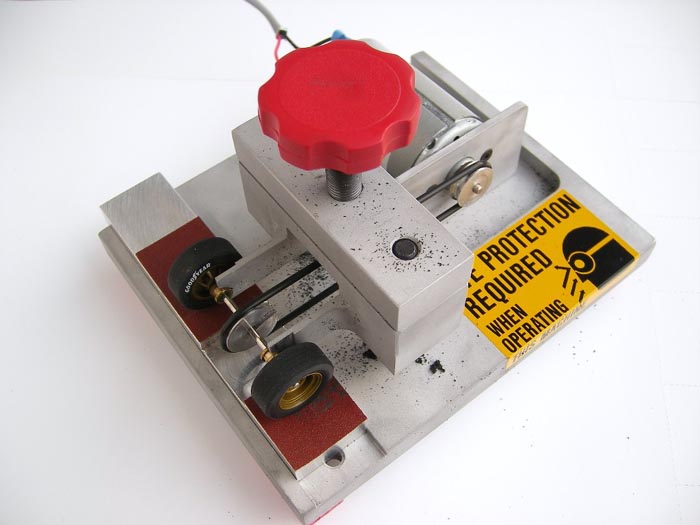
The Tire Razor is a beefy unit made out of 60-61 aircraft grade aluminum and it looks like it will last for years of use. The Razor comes with everything you need to start sanding your wheels and tires except for the wiring to connect it to your power supply. This allows you to wire it specifically for whatever brand or type of power supply you will be using to power it.
Personally, I only have my MG power supply located under the track table. I used about 10 feet of cable to give myself enough leash to comfortably use my Razor. The motor tabs accept 3/16” spade connectors and then use whatever best fits your power supply on the other end. I actually used ¼” spade connectors that I already had on hand and banana plugs on the supply end of my power leads. I just had to give the spade connectors a squeeze with a pair of pliers to make for a tight fit.
Oh yeah, upon removing your Tire Razor from the box and bubble wrap you will notice it’s already dirty with rubber. That’s Jon’s way of letting you know he’s tested your Tire Razor before it was shipped.
Note: I will be comparing the Tire Razor to the Area 3 several times within this review. This is only for comparison of two similar products and not to be taken as a bashing of the Area 3 product. I have only used these two machines and I find both to do what they are advertised to do. However, there are a couple of things about the Tire Razor that I personally think allow for a better experience while truing a set of wheels and tires. This is why I will be pointing them out to you.
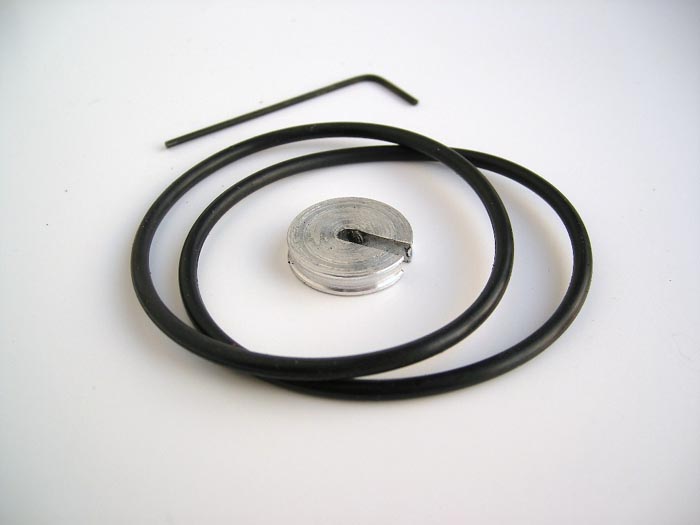
Above are the loose parts of the Tire Razor system. You get an axle pulley, wrench for the set screws and 2 power bands. Also, to help you get sanding immediately Jon includes a couple of pieces of sandpaper.
The TR’s axle pulley is smaller in diameter VS the Area 3. It gives a bit more clearance when sanding small diameter wheels and tires. The band can end up hitting the insides of the channel cut into the sanding block if you go too far back and forth with it. The Razor can still do this too, but the smaller diameter pulley gives you a little more room when sanding smaller diameter wheels. However, you still need to use caution with both machines and this is in no way a deal breaker to purchase either machine.
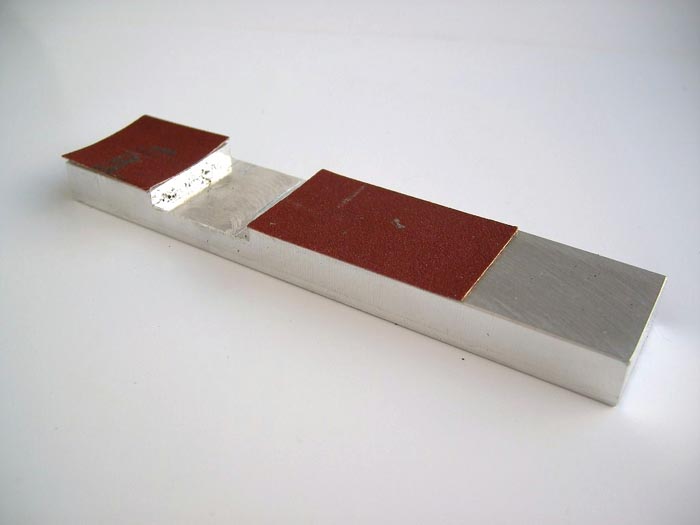
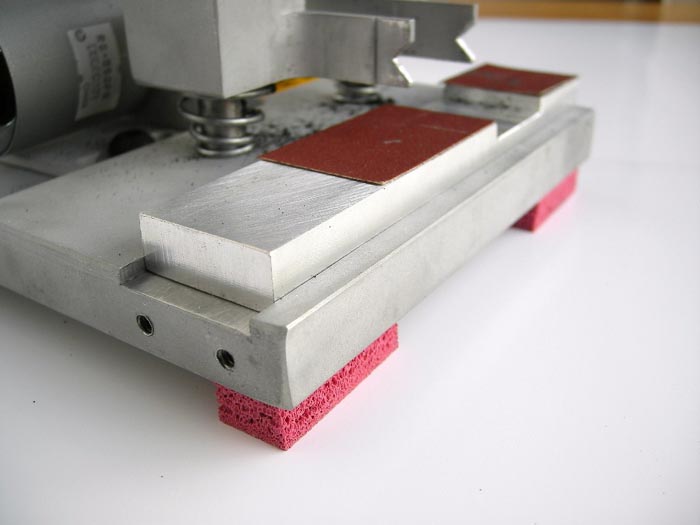
Below is the sanding block which is a solid piece of material. Jon’s version has the channel offset. So, you have a good amount of stock to place you fingers upon to guide the block during sanding. This helps keep those much needed phalanges clear of the wheels and pulley during operation. The sand paper is the sticker backed paper and can easily be pulled up and replaced with a new piece. This type of paper is available at your local hardware store. FYI: Drywall sanding paper works great on silicone type tires.
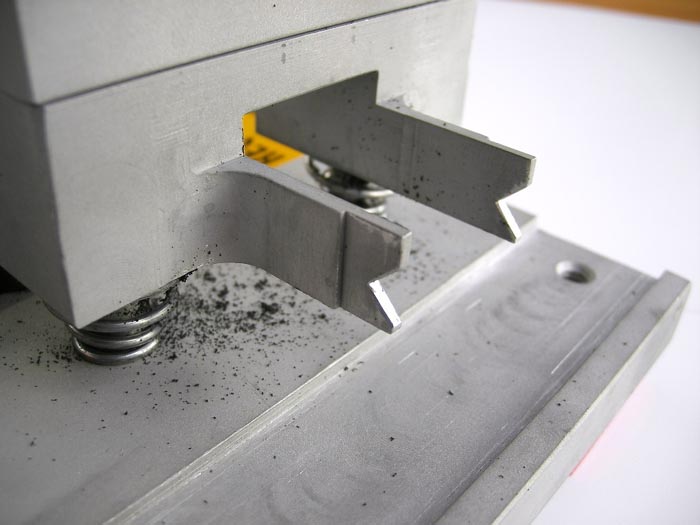
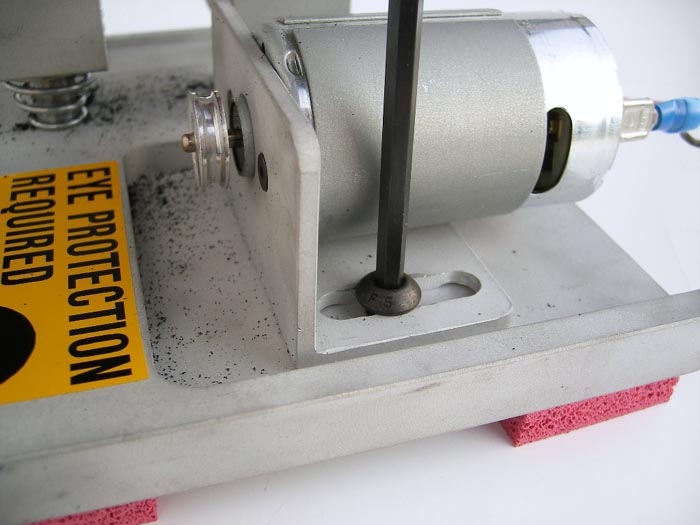
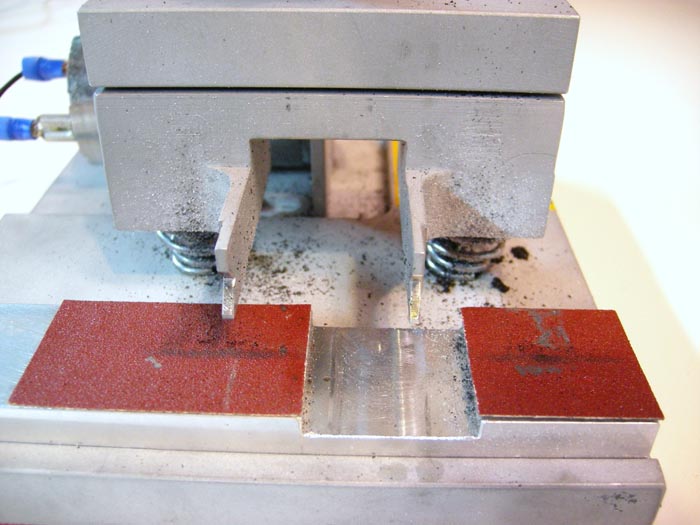
Here’s a close-up of the axle forks for lack of a better term. The cutouts hold the axle bushings in place and allow the axle to spin freely under power. These forks are going nowhere if you are concerned with bending or warping. Unless, you plan on dropping or taking a hammer to it you’ll be pleased with its construction.
Above is a shot of the channel that holds the sanding block in place. As you can see there are 2 screw holes on the end and 1 on top at the far end too. What are they for? That’s for Part 2 of this review, but it involves plastic wheels, cutting and very little time to do it from what I’m told by Jon. Ok, you broke me down!!! These screw holes are for a separately bought lathe attachment. There, you happy now?
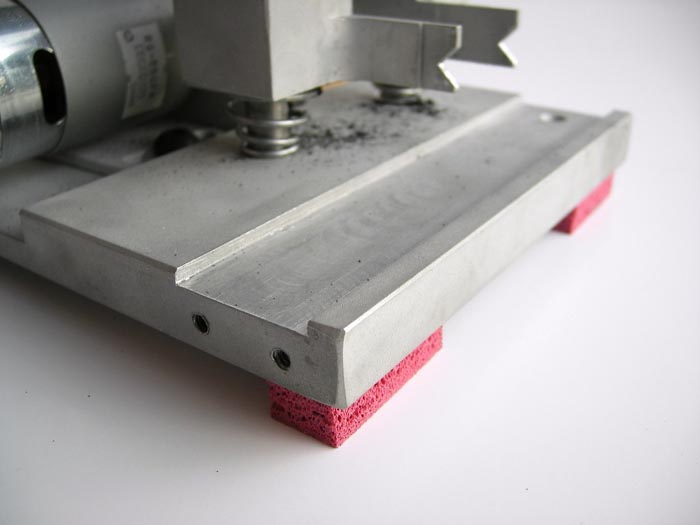
You can also see that the Tire Razor has foam rubber feet glued to the bottom of it. This greatly helps in keeping the unit planted upon the work surface. It doesn’t sound like much and anyone could add the feet themselves, but it is annoying when a tire truer starts to creep on you during use. This little detail just adds to the enjoyment of using this product.
Below, you can view the sanding block in its natural habitat. The channel and block fit together very well. There is no unnecessary drag involved when you slide the sanding block side to side within the channel.
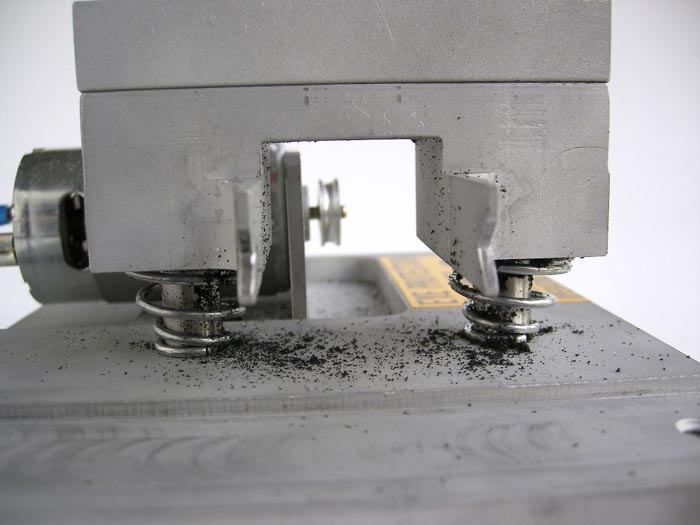
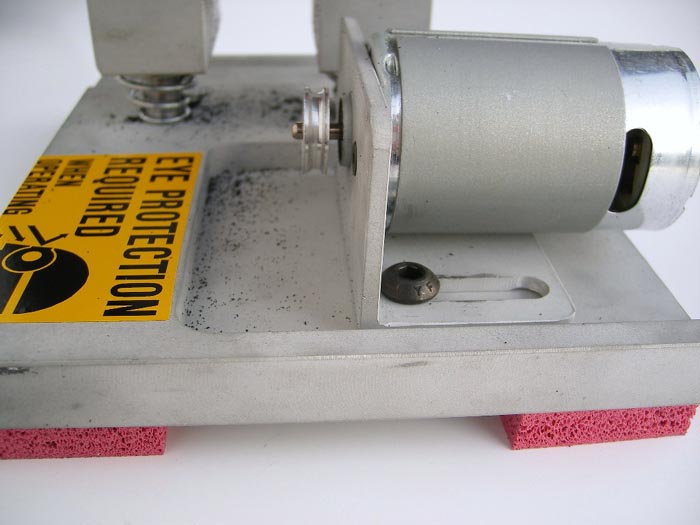
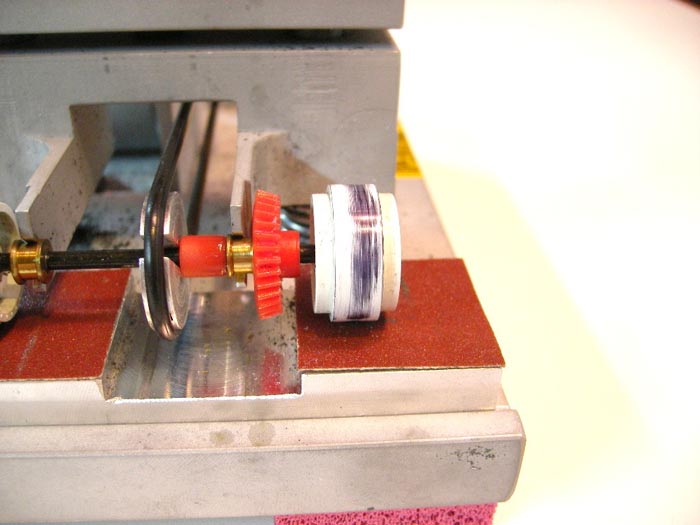
Looking at the shot below, I will point out another difference between the Area 3 and the Tire Razor. Until I used the Razor, the only other tire and wheel truer I had used was my buddy Matt’s Area 3. We were really impressed with it and considered it worth every penny HE paid for it. LOL. However, the one thing we came to dislike about it was the fact that it only had one tension spring. The more it got used, the side without the spring ended up touched the sanding block less than the side with the spring. You couldn’t get both tires sanded at the same time. We had to sand one wheel or tire and then undo the power band, flip the axle and then true the second wheel or tire to get the job done. It still did the job but, it added more steps to get a finished product. It was more annoying than anything.
The Razor could develop the same issue down the road, but I think the spring strength will diminish more evenly since there are two springs VS just one. As for right now, both tires touch and get sanded at the same time.
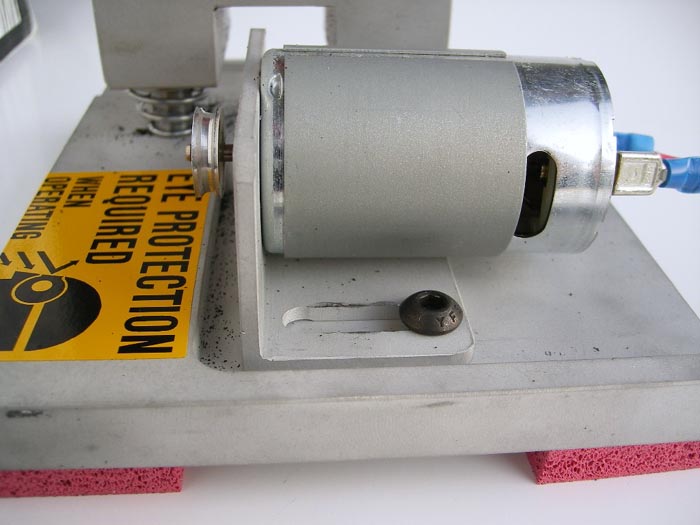
I don’t know the specs on the Area 3 motor but, I can say that the TR motor is more than enough and maybe too much. The motor is rated for use in the range of 5 to 15 volts. I can’t imagine turning this thing up to 15 volts. Jon said it will throw the tires and I’ll take his word for it. I’d like to keep my eyes and teeth intact. It’s also suggested that if you power supply doesn’t have circuit protection that you add an inline fuse while wiring yours up. Supposedly, R/C battery packs have been used to power the Razor too. I have no idea on long these would last, but it gives you another option to try if you’re into that hobby in addition to our beloved slots.
Below, the motor pulley is made of the same material as the axle pulley and it’s also held in place with a set screw. You’ll want to check it for tightness before each use as an added precaution.
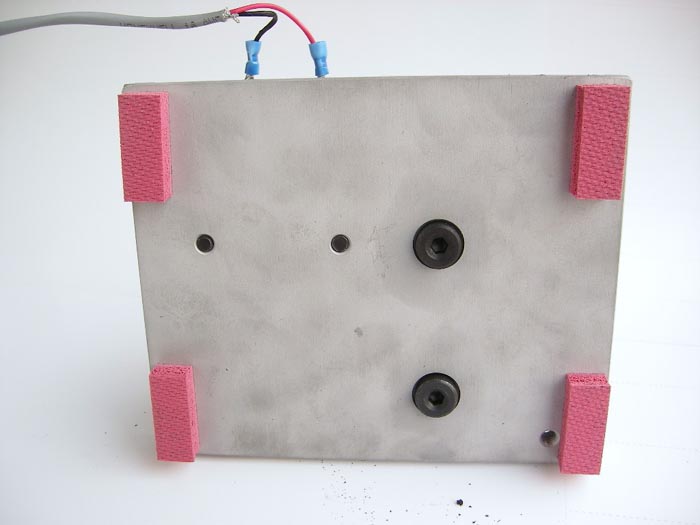
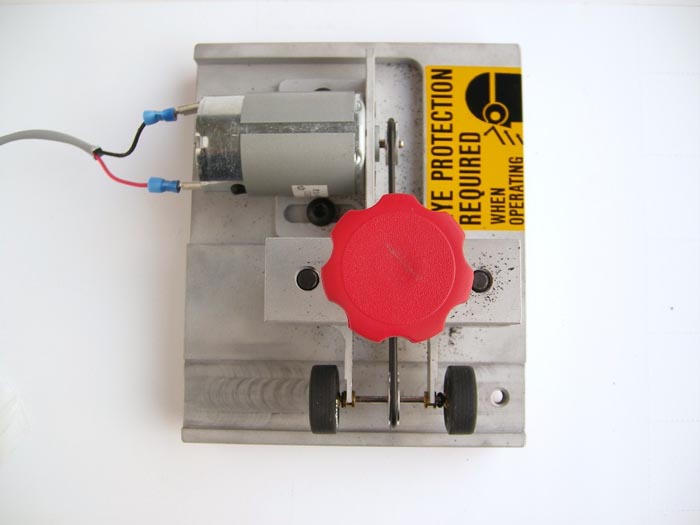
This is just a quick peek at the wiring configuration I did with my Tire Razor.

Finally, the bottom view of the unit. There is nothing that needs to be touched or adjusted under here. Those rubber feet I mentioned, also serve as clearance for the screws that the springs and such reside upon on the top side. They were added more for this need, but they still kill two birds with one stone.
THE SET-UP PROCESS
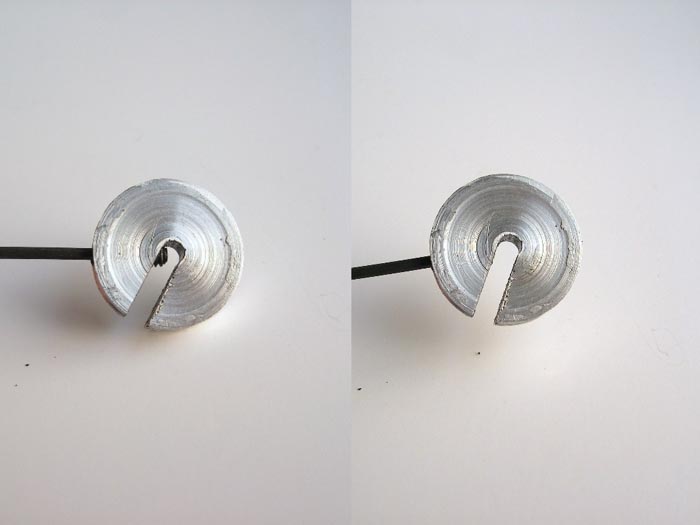
Above is the axle pulley. The left is when the set screw is in the secure position and the right when it is in the release position. It’s not pretty or as finished at the Area 3 but, it gets the job done and that’s all that matters to me.
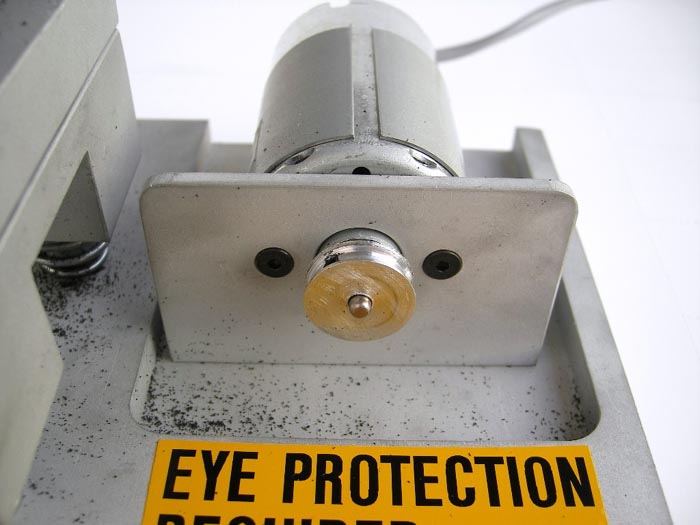
Below, you see the pulley fixed onto the axle. You’ll want to get it as centered as possible on the axle and make sure to make it fairly tight. When doing a rear axle you’ll want to place the pulley up against the gear on the side opposite of the gear’s teeth.
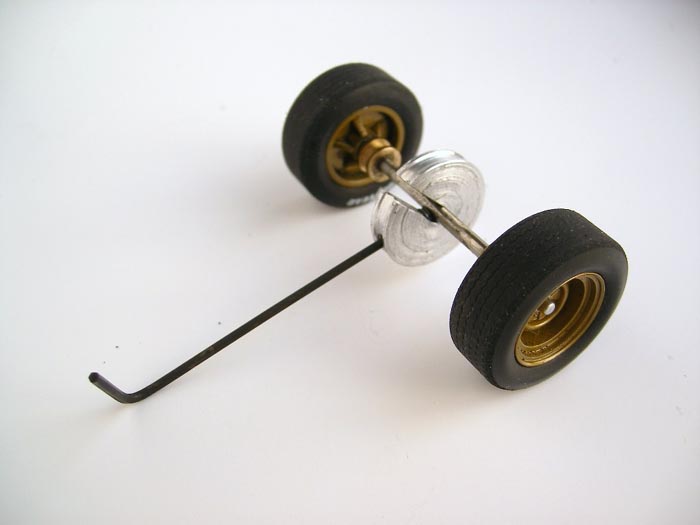
The pulley is held snuggly in place by the set screw and is ready for action. So, grab the power band and put it over the pulley and hold it in place with your fingers.

Next, you’ll place the axle into the forks and with your spare hand reach through the rear opening of the tower to grab the back part of the power band. Now stretch the power band back over the motor pulley.
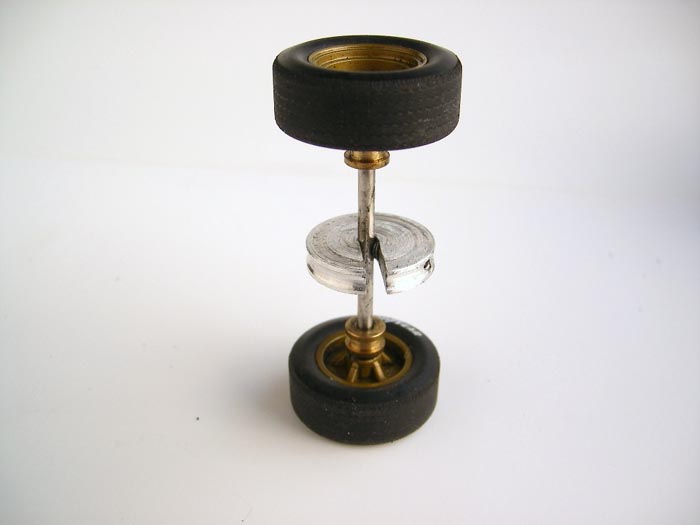
This is what it should look like below once the axle has been seated into the forks and the power band has been put into place.
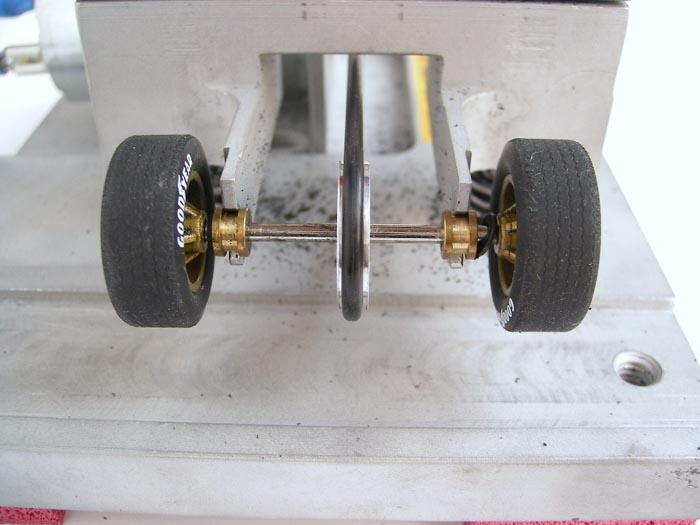
Make sure the bushing are fully seated and centered into the cutouts. The tension of the band will keep everything in place. The final set up check it to make sure both the axle and motor pulleys are aligned with each other.
This is important for a smooth tracking axle during operation. You’ll want to keep the wheels from rubbing up against the bushings during operation as much as possible. Sometimes it just can’t be helped on shorter axle assemblies but, it is something you want to try and strive for before powering the machine up. This is needed more so with plastic wheels. The added drag can cause the wheel to become loose on the axle and in most instances the hole will be opened up and the rim made useless. The axle forks are an inch apart. So, for the most part it’s easy to avoid parts from rubbing against each other.
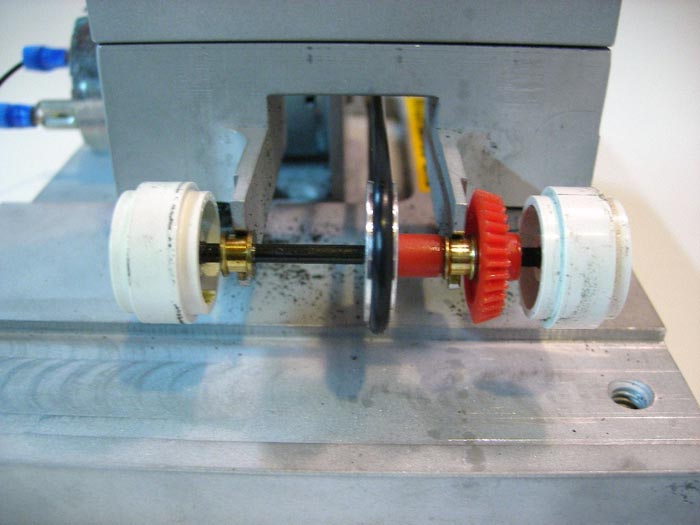
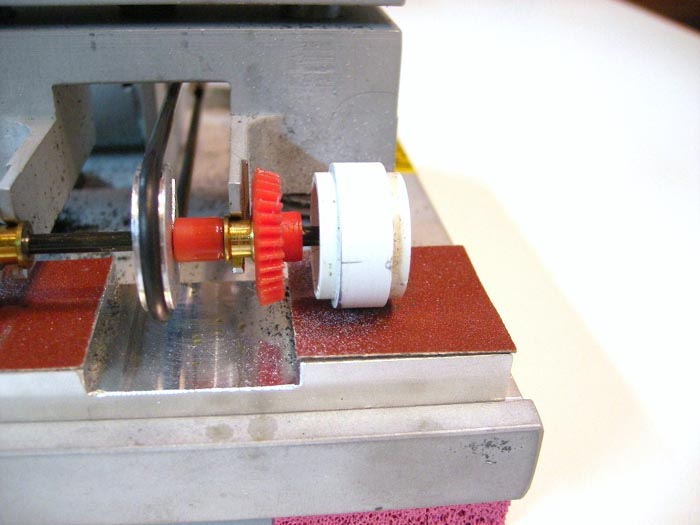
Above, you see a pretty well aligned drive train.
The picture above and below show an axle assembly that has been properly set up.
As I said above, it is very important to have the pulleys aligned up as close as possible to take any drag and possible angle of the power band out of the equation before starting to work on a set of wheels. This is another area where I think the Tire Razor rises above the Area 3. The motor mount can be loosened and the entire motor moved side to side for perfect alignment of the pulleys. The Area 3’s motor is stationary but, the motor pulley has 2 different grooves to place the band into to compensate for any misalignment of the pulleys. However, sometimes the 2 different grooves are just not enough to make up the difference based on my experience with the Area 3.
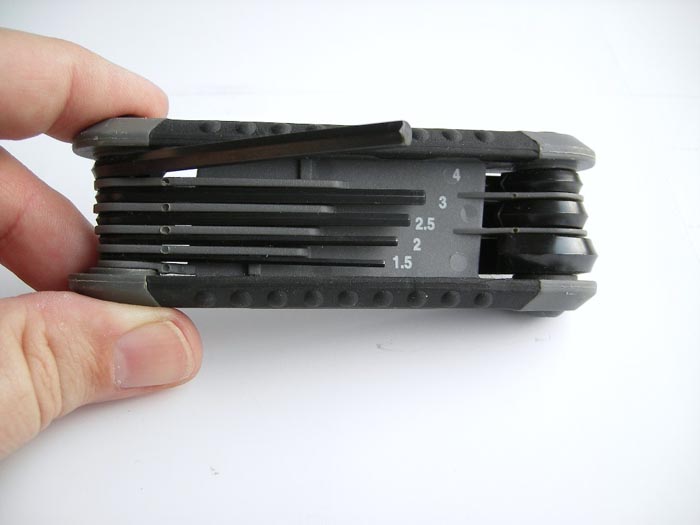
Simply unscrew the motor mount screws with a #4 hex driver. Move the motor to align the pulleys and retighten the screws. You don’t have to torque these screws too tight to lock down the motor bracket. I will warn you that the bracket also has some front to back play when loose. So, look down from above and align the edge of the bracket to the edge of the recessed area the motor resides in before tighten the screws. This will get you eyeball perfect.
This feature gives a lot of adjustability to the drive train for smoother operation.
The right tool for adjusting the motor mount.
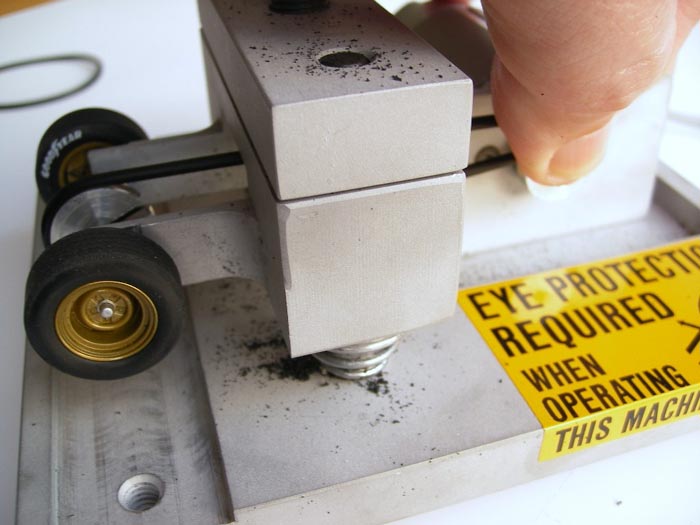
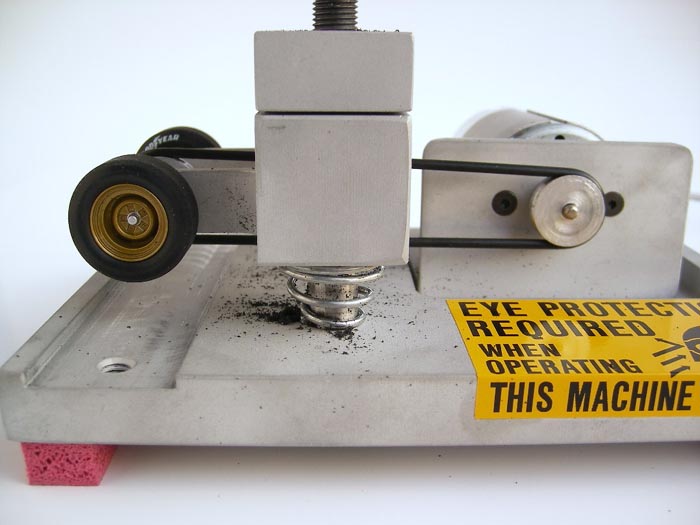
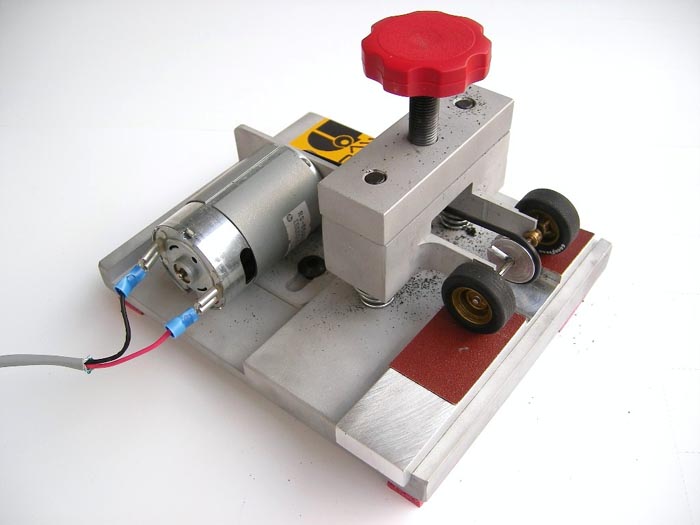
The shot below is to just give you an idea on the amount of vertical movement that the Tire Razor has to offer. Personally, I don’t see myself needing to ever use all of it, but it’s good to know you have it available if you do need it. You can actually take it lower than what I show here, but why stress out the springs any more than I have too.

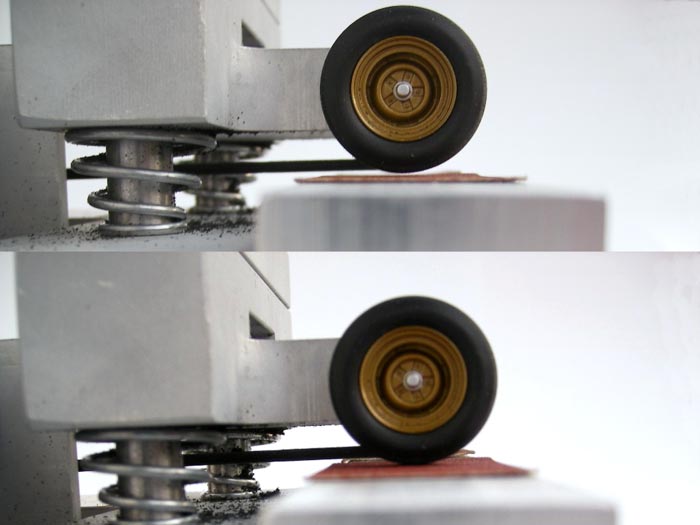
The above shot shows the distance between the wheel and the sanding block with the tower in its utmost position. It took about a full turn of the knob to make contact with the sand paper. This isn’t going to be the case with each and every tire, but the point is to take it slow. Patience!!!
SANDING THE RIMS AND TIRES
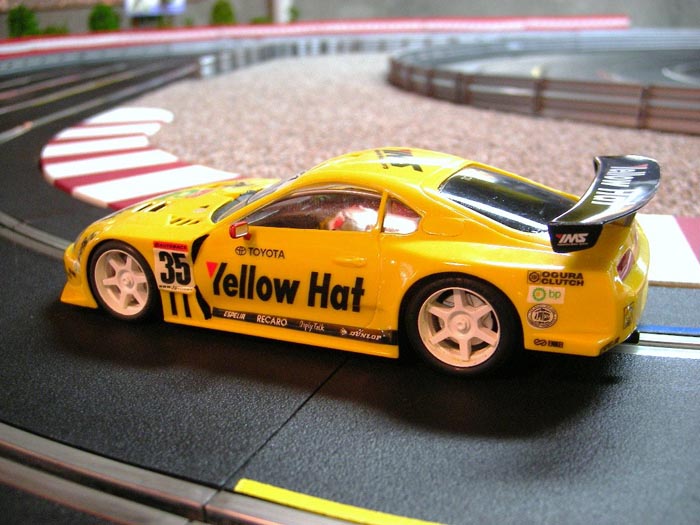
I’ll be using my recently acquired Supra’s rear axle for this demo because they’re white and it will be easier to see the progression during the sanding process. The first thing is to get the axle mounted and the drive band aligned as described above. It’s a tight fit with a NINCO angle winder set up, but it has enough clearance between the axle fork and the gear. Just be cautious before powering it up.
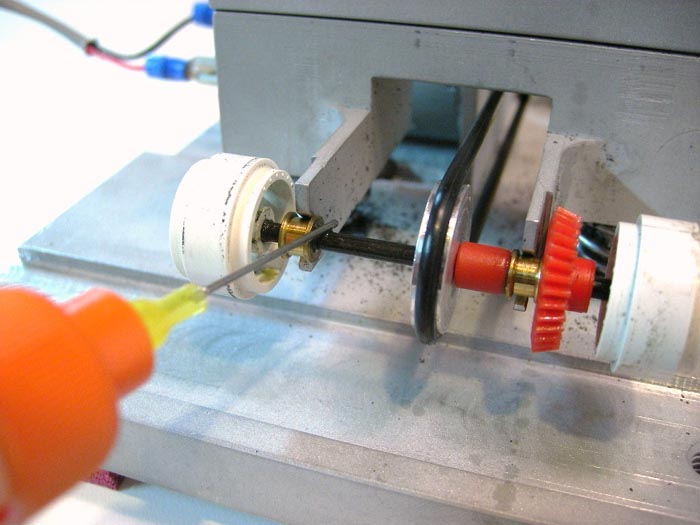
The MOST IMPORTANT step before you start the true anything is to make sure the bushings are oiled. DO NOT run the machine with an axle set up that hasn’t been properly lubed.
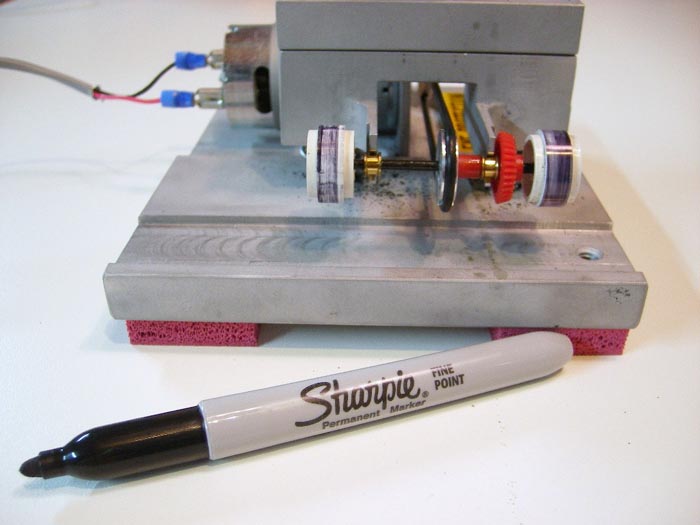
The next tip you can do or not do depending on your opinion of it. It doesn’t really work on dark colored rims, but on silver and lighter colored rims it really helps a person know how the sanding of the rib is progressing under power. Start up the Tire Razor and grab a dark colored Sharpie or other type marker and run the marker across the rim rib to color it. Why? Under power it’s hard to tell when you’ve finished without turning the machine off and on repeatedly to check your progress. This trick lets you know when the rim is perfectly trued. You’re done when all the color from the marker is gone.
Below is what you will end up with after running the marker across the rib of the wheel.
When you begin sanding the wheel and/or tire you want to take your time. Turn the knob to lower the axle a little bit at a time. If you go cranking the knob like a gorilla, you’ll risk ruining your plastic wheels. This motor has a lot of torque and if you bog the wheels down by putting too much pressure on them the axle will spin within the hub and open up the hole in the hub. It will happen before you can react too. Take it easy and take it slow or you’ll be kicking yourself in the butt.
Step #1
You can see that the marker is starting to disappear as the plastic wheel is starting to become true.
Step #2
We’re almost there. There is just a small amount of marker left on the outside edge of the rib.
Step #3
They’re done. So, how long did it take? No more than 3 or 4 minutes and remember I was stopping to take pictures too. This doesn’t mean this is the time for all types and brand of wheels. I’ve spent longer doing badly molded wheels. The worst ones I’ve done were the front wheels of a Sloter Lola. This was with Matt’s Area 3 and afterwards it was smooth as glass. Prior to using a truing machine on them, it bounced like a low rider with switches. It took a while to get them done because they were so bad that I had to constantly check them for tire fit. The one thing you need to remember is if you go too far, there’s no going back in the other direction. Take your time. I can’t stress this point enough.

Now that you have the wheels trued you are ready for the tires. Go ahead and put the tires on the newly trued wheels and put everything back into position. Now just repeat the same process as you did with the wheels on the tires. You’ll want to make sure to use even more patience now since the tires will take more power to reduce the drag that they make on the sandpaper. Since you can’t do the marker trick you’ll have to start and stop the machine to view you progress. You’ll want to do this to give the tires a break from the constant fiction of the sandpaper and allow them to cool down too. Don’t over heat your tires. This will cause them to become loose upon the rim and risk spinning them off the wheel under power.
Below, I overexposed the photo so you can see the progress of the sanding of the tires. The shiny area on the right side tire indicates that the outside edges are still higher than the middle of the tire. So, keep sanding.

The aftermath of a truing session. Each and every rim and tire is different. Sometimes you’ll have very little mess and other times it will look like you left no tire on the rim.
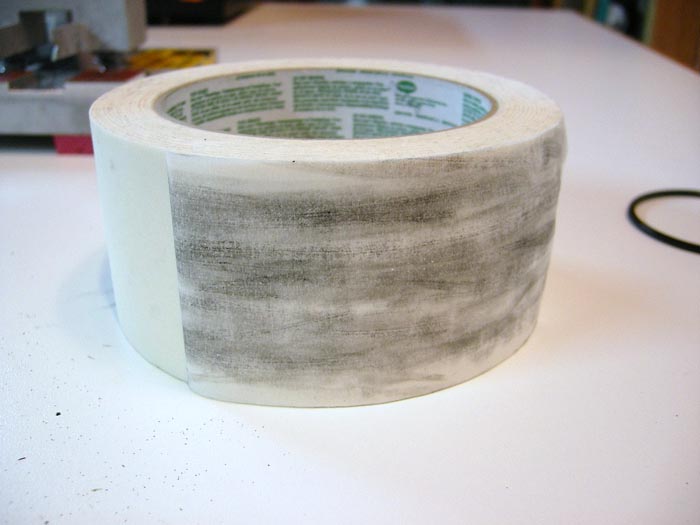
Now take your newly trued tires and run them across some tape to remove the residue left behind from sanding them. After this step clean the tire with lighter fluid or whatever your weapon of choice is for this task.
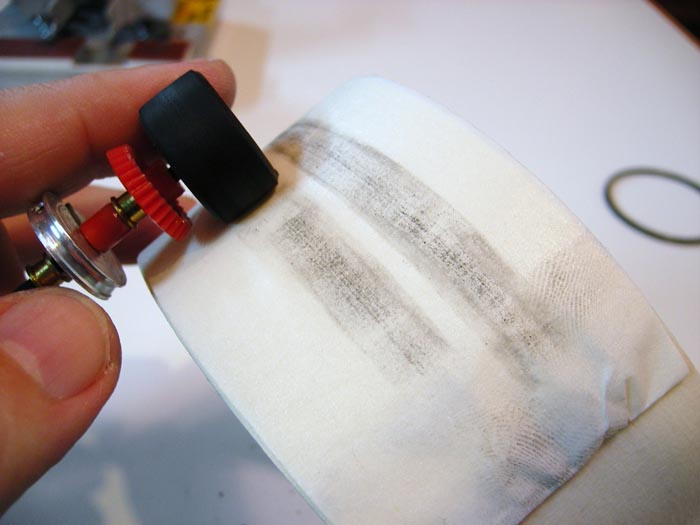
Yep, there’s more than you think there will be at times. It all depends on the type of tire you are truing. Believe it or not, the tires still were not clean after the tape. Even more came off with the lighter fluid.
JUDGMENT DAY
I know everyone doesn’t have the funds to buy a tire truer not matter who makes or sells it. However, I approached Jon about doing a review partly because I thought his machine would be well received by the folks on HRW. I know that when the Area 3 came out, the common statement was, “It’s too expensive for me!” and “Does it really work that good?” It took several folks dropping around $250 to find out that in fact it was worth it. They posted their experiences with it (including myself) and the news spread and caused several others to save and buy one themselves. I’m simply trying to do the same with the Tire Razor with this review.
This is where I will compare the Tire Razor to the Area 3 for the last time in this review. The price!!! You get everything I showed you in this review for around $150 shipped. This adds up to about 3 Slot It cars instead of 5 to get the Area 3. When it comes to people making hard decisions on what to spend their hobby funds upon, this $100 difference is a substantial savings to the consumer. I think it’s a price more folks can stomach and rationalize when it comes to making such an investment in a product such as a tire truer.
If you are in the market or on the fence about buying a tire truer I hope I provided enough information about the Tire Razor for you to consider it as the weapon of choice. It’s a quality machine that gets the job done like the others on the market and you can’t beat the price.
Now for the bad news. Jon (aka scrjon) is a one man operation. He is currently working with a shop to make some of the parts for him to free up more time for him to make the other parts needed and time for assembly. However, he makes them as he sells them. He tries to keep several in stock, but if 10 people contact him about buying one after this review, he’s not going to have 10 to sell. He’s a machinist by trade and is doing the Tire Razor in between work and life in general. So, you may have to wait for yours to be built. The question is, “Is the added wait worth an extra $100 in your pocket?” Only you can answer that question, but I know how my wallet would answer.
Feel free to contact me with any additional questions or concerns about this review and a big THANKS to Jon for supplying me the Tire Razor for this review.
Eric Croper
AKA Legionofone