I've had a large bag of SCX Compact guides laying around for a while and decided that I would like to use them with a similar contact as SCX. After a couple of attempts I came up with this idea.

With 3 cars left to do and the conversion successfully working, I posted the results in the 1/43 section and was asked to do a how to in this forum so here goes Go. :lol:
My apologies for some of the pics quality.

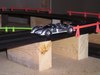
First of all. The Chassis mods.
Over the years Carrera has changed the Nascar chassis

The pin location was moved from in front of the axle to behind it. The front pin mount is the ideal location for the guide and makes hole location very easy. However Carrera left a locating mark (circular pad where the pin used to be on the rear pin mount chassis.)

After removing the braids, pin and front axle from the chassis set a vernier caliper to 0.485" and use the vernier jars to scribe lines from the front and sides on the bottom of the rear pin mount chassis. Then drill a small pilot hole (I used a #58 drill bit) at the junction of the lines, and remove the burr (hole should be more or less centered on the circular pad on the top side of the chassis). To form the guide post I used a leather punch and made discs from 0.060" (1.5 mm) styrene.

Using thin CA, glue 2 discs on the circular pad on the rear pin mount chassis or over the pin hole on the front pin mount chassis. To handle the discs I dipped a toothpick in a puddle of CA, picked up the disc with the toothpick, dipped the disc in the CA and positioned it on the chassis. While a perfect position is very difficult to achieve some care must be taken to not go so far rearward as to interfere with the axle

Once the CA sets up extend the pilot hole through the discs on the rear pin mount chassis, paying close attention to keeping the drill square and straight on both the f-b and s-s axis. For the guide travel limiter hole, set the Vernier to 0.330" and scribe a line across the bottom of the chassis parallel to the front face. Drill 2 small pilot holes on the line about 0.125" apart either side of the center line. To enlarge these 2 holes I use a #32 (0.116") drill which is also the final size of the guide post hole.

Shape the hole so the limit post can sweep approx 60-75deg. I used a dremel, a round file and a 3 side file

To complete the guide post on the front pin mount chassis, remove the pin boss rails until there is a solid pad (approx 0.040" high). To complete the post on the rear mount chassis, glue 1 more disc to the bottom of the chassis inline with the other 2 discs. To be able to tune guide height I sanded the disc down to 0.040" on an emery board. Extend the pilot hole through this disc. To final size the hole I used a #42 drill (0.093") which is the size of the guide pin hole in the front pin mount chassis, and finish drilled with a #32 drill (0.116").

Now the "trick" part. The braid contact
As I was using an SCX guide and as the SCX braid contact system works very well I wanted to achieve something similar in this conversion yet fit with the Carrera contact. I have a large pile of used Go braids and thought I would take a look and see if it would be possible to do something with them. Upon inspection I discovered that the holder is formed by simply folding 2 flaps over the braid to lock it in place.

I pried the holder open with a #22 blade exacto, using pliers I folded the first flap 180 deg taking care not to kink it. I then lifted the second flap just enough to release the braid. I fashioned the contact from a 0.125" x 1.125" x 0.006" brass shim stock. (I would have preferred to use 0.010" but didn't have any at hand)

I bent approx 0.090" of 1 end at 90 deg to lock the contact in the holder, then I bent 0.125" of the other end 180 deg towards the same side as the first bend and repeated that operation a second time so that a contact pad was formed. I placed the contact strip in the holder with the bends facing down and refolded the flaps .

Using a small flat screwdriver as a brake I folded the strip back across the holder. To finish the contact I used an emery board to remove any burrs or flashing. Once the contact is installed in the chassis a final adjustment can be made so that the contact pads are in line with the guide post. I also found that contacts seem to work better with the contact pad facing forward.

Install the contacts and install the guide (I used a 0.015" shim on the bottom side and a 0.010 shim on the top side of the guide post).

This whole procedure generally requires 2-2.5hrs
Please feel free to post any questions, comments or suggestions.
Happy Racing
Randy