The first photos of the kit that I saw had the black plastic wheels and gear, and was molded in white. This kit has a blue body and of course the aluminum wheels and gear. The blue color is all wrong for the famous Arnie Beswick drag racer on the box art, though. Still, it will be easier to paint than slick white, and the decals are old style, excellent decals that will not bleed through and do not require all the fiddly cutting that so many of the thin style decals do today.


What you get in the box.
Here's the layout, still in the bubbles. You can see the aluminum wheels and crown gear right away. Also, it should be noted that they could have done a lot worse with the packaging. There are a lot of tiny screws, washers, and nuts in this kit, and they are nicely corralled here. I've built hundreds of kits over the years and that kind of thing means a lot if you ever had a disaster in your history.


Scale comparison.
The white Cotton Owens car is a very highly detailed Trumpeter kit, and the scale is dead on. Its a 1960, which was just a bit longer than the '62 in this kit, and sure enough, the AMT's scale is quite good, including the “Wide Track Pontiac†stance the cars were famous for. It made me curious about the other two AMT kits I reviewed last time around. Here they are, side by side (they are heavily modified from the kits' original contents). Comparing the length overall measurements and the wheelbases of all three AMT cars, they are surprisingly true to scale. The Nova, for some reason is too wide, but the wheelbase is fine.
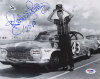
Some of us may remember that Arnie Beswick ran altered wheelbase cars in the wild and wooly days of the early 60s, running against famous outfits like the Dodge Ramchargers, The Virginian, etc. I looked it up, and this car, the blue '62 Catalina was not run as altered wheelbase, but he had a red one that was radically altered wheelbase, so the box art and the color are correct. Of course, the real car was metallic blue and this is not, in fact, I don't think any car ever came in this color.


Wheels.
Here's the big improvement. Gone are the ugly black plastic wheels that had to be pounded into place on the axles. They were nearly impossible to get trued in place. I used a rig I made on my drill press to get a square push for them. These aluminum wheels slip on perfectly, and the grub screw fixing is just right. That said, there is a minor hiccup from the old wheels that is repeated on the new ones. The channel between the ribs is very tight on the tires' center rib. The tire can be seated just right, then you turn the wheel around, and there is a pesky lump that was invisible from the other side. The tires are very tight on the wheels and it is a bit fiddly to get them on properly. You need to know that if you want to run these cars at all. Check them more than once.


Gears.
Here is where things get mysterious. If they were going to get rid of the cheap plastic crown gear, why not use a crown gear that matches the pinion? The new crown is not the proper pitch so after it runs for about 30 seconds at speed, the top land of the teeth rounds off, because the aluminum is very soft and the brass pinion just eats it up. All that is to say nothing about the chassis sounding like a wrench caught in a tree chipper. The last photo in this section shows the rounding after less than 30 seconds at 13 volts. I'm going to try a mild compound and see if I can make the gears work in my final version. The motor is the same sluggish, slow motor as the previous series.


Odd Parts.
Here is the guide, or guide kit. Its awkward, fragile, and essentially useless. Don't waste your time on it. My final version of the car will not have it. Also, here is the oddball separate endbell. I don't know what this is for. If the motor shaft was too long, why not cut it shorter and mount the motor direct to the chassis? Strange. No harm, really, but why?


Chassis.
The chassis is still made from very soft metal like the first series was, and will twist with so little force it is laughable, but the design is sound, and would have been great in a hardened brass or other stiff metal. For the Pontiac it is adjusted as long as it will go, and is still nicely square and solid, its just bendable as a noodle. On the other hand, torquing it back to level is easy, too. The axle bushings are Delrin black plastic again, rather tight, requiring some work to get them loose enough for the axles to spin. The best way is to chuck an axle in a drill and insert it through the bushings once they are installed. After a few seconds of spinning with the drill, they will seat perfectly. They even have a sound deadening quality, so the gear noise isn't as loud as it might be. Outboard of the rear bushings are another new addition, drill collar stops with grub screws to act as positioners for the axle, crown gear mesh, etc. They are a good fit and they work fine. They leave so much free room on the axle between the back of the wheel hub and the bushing, there is room for very wide wheels and tires if anyone wants to build one of the famous Pavement Melting Pontiac Performance drag racers. There were at least three of them in 1962.
You can see the two piece body mounts and brackets in this photo.
Note: The entire kit is assembled using same size screws and nuts, including the endbell and motor mount. These screws are not standard sized for metric or SAE, and you may go through your toolbox more than once trying to get a screwdriver that will turn them. Its a problem. I found that a size “0†Phillips will turn them, but you can't torque them with it. The actual size is somewhere between #1 and #0.

Body.
The body is from an old mold from the glory days of AMT some 40-50 years ago. The kit includes the hood, windshields, body, front and rear bumpers and light lenses, chrome bits, and a front grill. That's it. No interior of any kind, and the grill and front bumper are pointlessly in two parts. And the parts for the grill and bumper don't fit together without force. I had to clamp the grill to the bumper with a lot of force to get the glue to weld. There is a dark tinted vac formed window bubble included, I don't know why. The body is straight, well finished and with enough detail in the mold to paint or foil the chrome trim.


Final Assembly.
The body is mounted to double sided tape, and there is another improvement here. The body now has indicators for the placement of the tape, and eliminates a critical problem in mounting bodies this way. The theory is that by placing one side of the tape just right, the other side will more or less align themselves producing a good mount in one shot, no do-overs. After mounting, the screws that hold the mount to the chassis are used to adjust the mounts and in theory, dismount the body for maintenance, since the outboard portion of the mounts stays with the body.
But the big body mount problem from the first series of these kits still remains. The only way to remove the body for maintenance is to hold the tiny nuts inside the chassis while turning the screw from below. This is impossible. Since the kit has no interior, it is theoretically possible that a wrench or pliers 8 inches long with an opening for a tiny nut could be inserted through a window. I can't believe that Auto World thought that a reasonable slot car could be made that doesn't allow for a removable body, so how did they think that the body could be removed in a practical fashion? This situation could be easily remedied by a number of hardware solutions, so how did it get into production twice, including the second try represented by this kit?
This is the entire body mount instruction, quoted exactly, and it is the last instruction item in the kit, the rest is advertising:
“DOUBLE-SIDED TAPE (Stick to body mounting brackets on both sides)â€Â
That's it. The only other thing on that page that has to do with this kit is an insert near the top of the page that tells you to never lubricate the motor, spread your braids for good contact, and swap the wires if it runs backwards (which it will, because the red wire has to go on the left of the guide, opposite of normal). These are titled “Racing Tipsâ€Â. It remains to be explained how one swaps the wires after using their body mount method, since you can't put the body back on afterward without a miniature mechanic to climb inside the body and hold the nuts.
The finished car, exactly according to the kit. I'm not going to leave it this way, so I didn't use the decals. I'm going to build the Smokey prepared Fireball Roberts car.


Summary:
This is what is fixed, or is a good point of the original-
The scale of the body is excellent, nicely detailed, and chrome is heavily plated.
The packaging makes it impossible for parts to be lost from the box.
The wheels are now aluminum, as is the crown gear.
No press-on parts, all grub screws.
Widely adjustable chassis length.
The chassis now includes stop collars to keep the rear axle in position.
The bushings are unique, but seem to be very good, even before lubrication.
This is what needs improvement or just doesn't work-
The price.
The crown gear does not match the pinion, and eventually will destroy itself.
Tire fit is bothersome, but can be overcome.
The guide is useless, throw it away.
Pointless separate endbell for motor.
Very slow, sluggish motor.
Very soft metal for chassis front and rear halves, bends very easily.
Oddball sized screw heads that are difficult to torque properly.
Plastic body parts do not fit well.
Body mounting system that does not allow reassembly in any practical way after first disassembly.