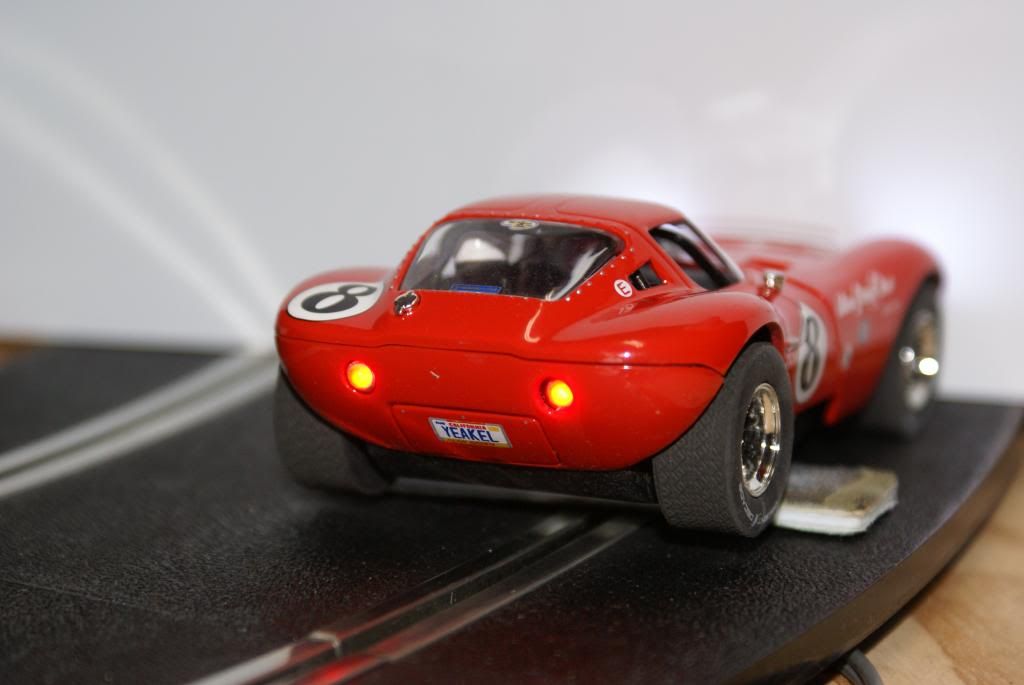
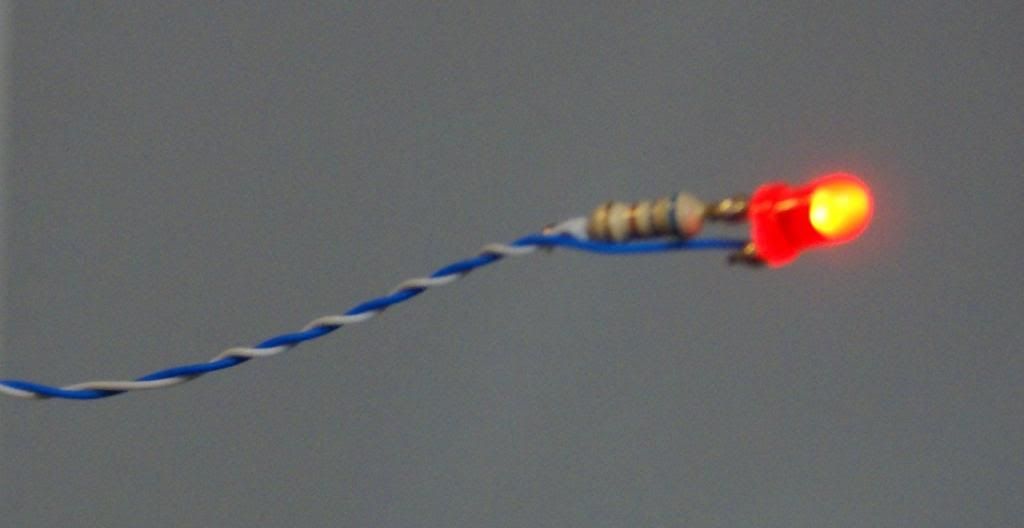
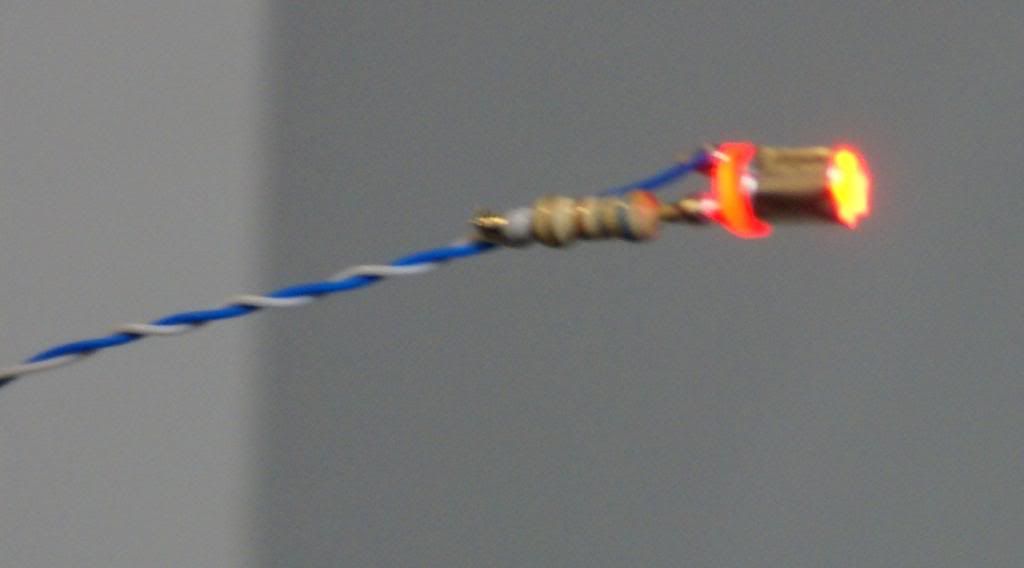
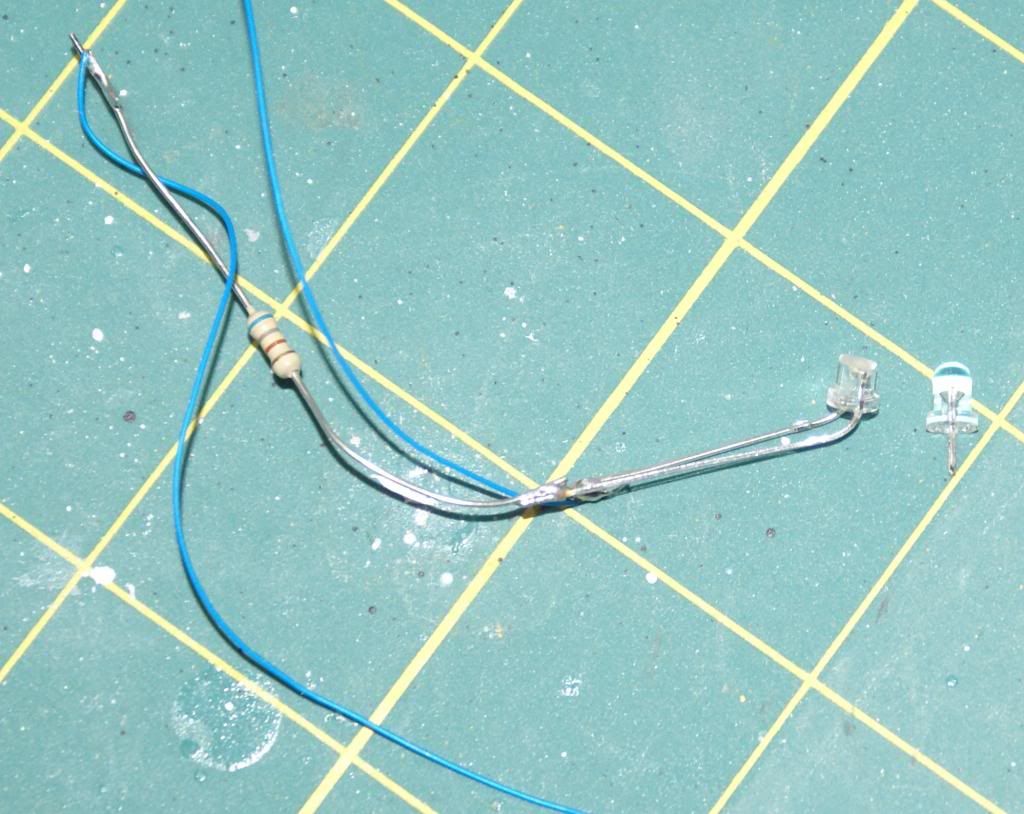
This is a standard 3mm white LED along with one that I have cropped and one that has the resistor added.
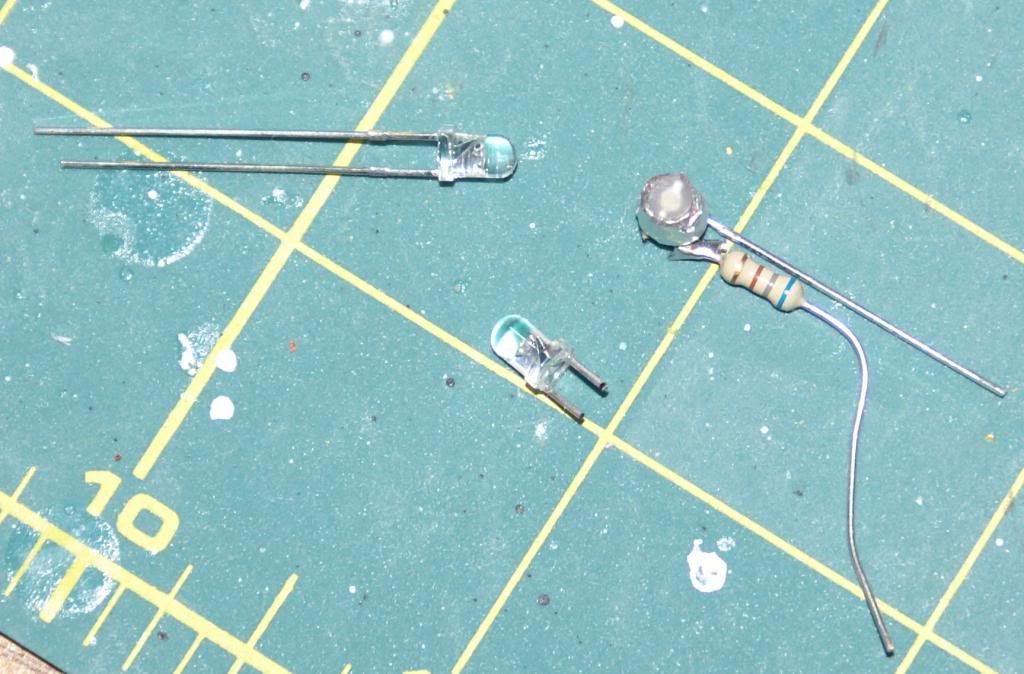
The longer lead is always the positive, and if you look inside you can see 2 pieces of metal, one fat and one thin. The thin one is the positive wire.
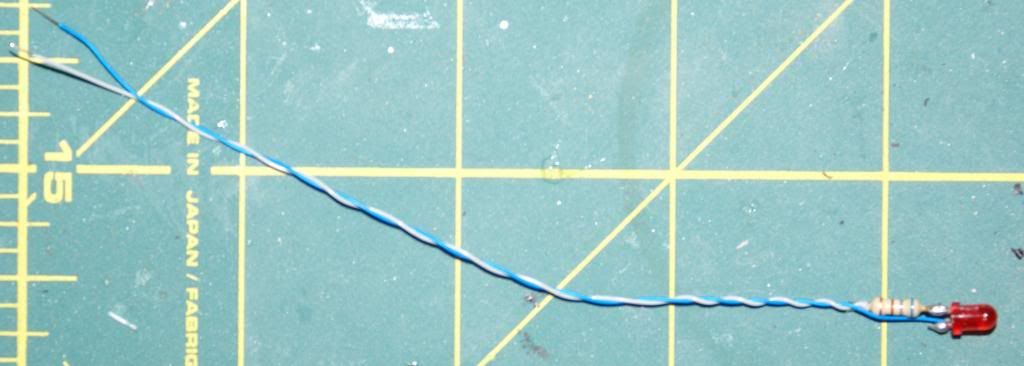
This is a simple light, there is the LED, a 680ohm resistor soldered to the positive lead, and 2 wires connected. Use one for each place that needs a light.
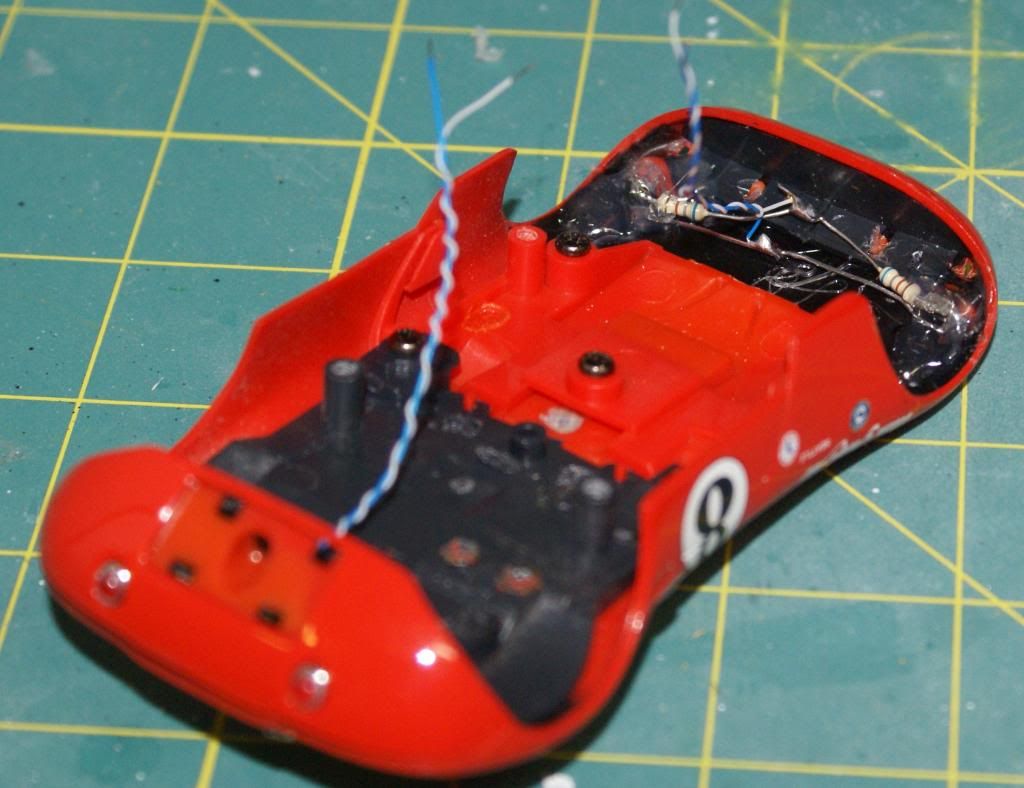
I solder the wire to a convenient point to pick up power. For me this is usually the motor. As I can never remember which side is positive on the motor I make sure that all the LEDs are wired consistently in color so at worst I need to swap the wires.
The main issue I have come across is that these LEDs radiate light in all directions when lit.
This means that portions of the bodywork end up glowing also – not so pretty. Carrera has got round this by painting the interior areas black or silver to provide some degree of shielding.
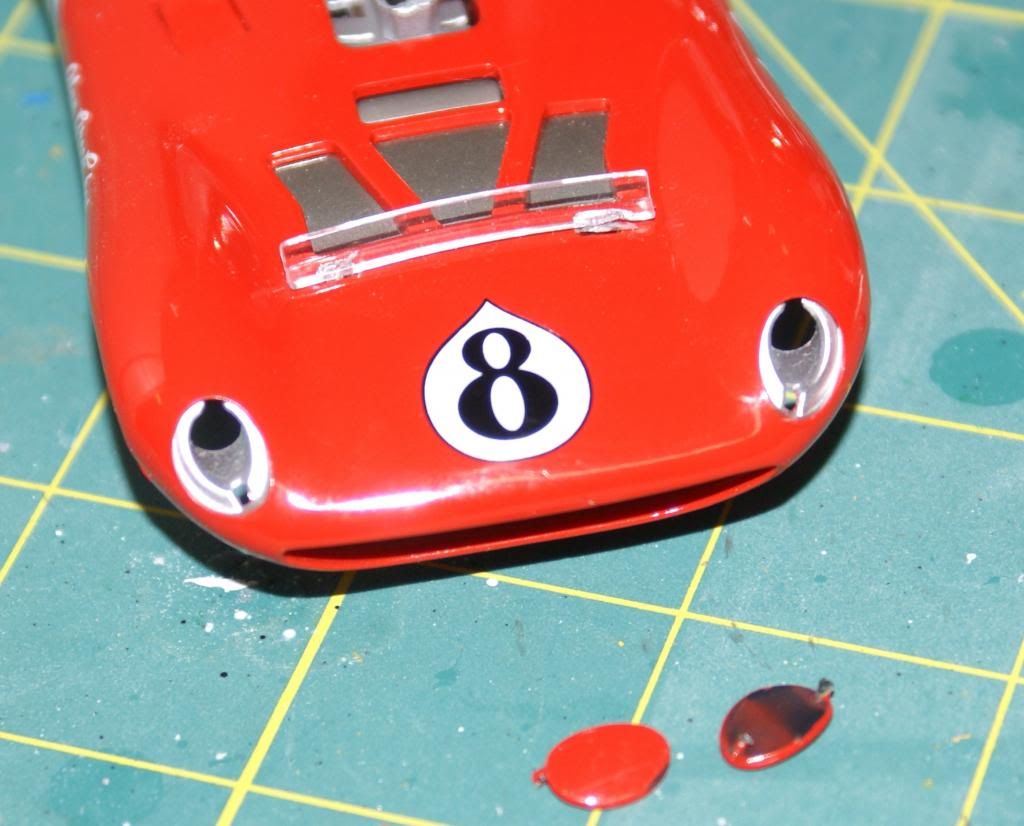
I find aluminum duct tape to be good for this purpose as once its stuck it’s pretty hard to get off. The only drawback is that you can short out the leads if you cover the back. No harm done, but obviously no light! When doing the test fit I check for light leakage and whether the body lights up. Usually I only have to wrap the LEDs but sometimes I need to place a piece of tape inside the body as well.
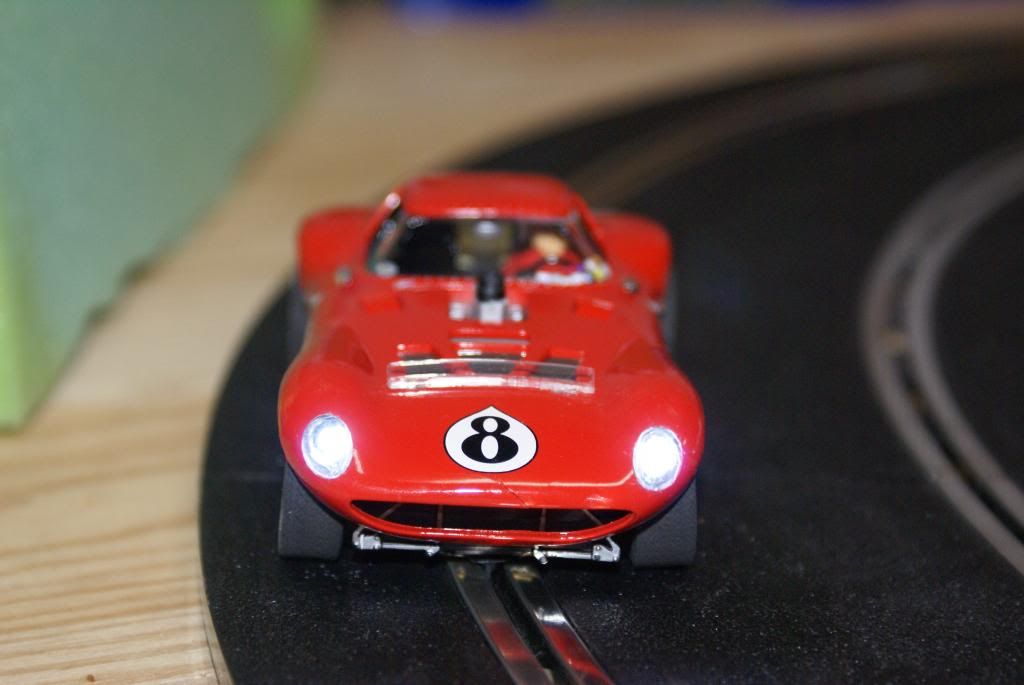
My usual approach to wiring a car is to join up the rear lights to a single pair of wires and then do the same for the headlights. This merely saves me routing lots of wires inside the car.
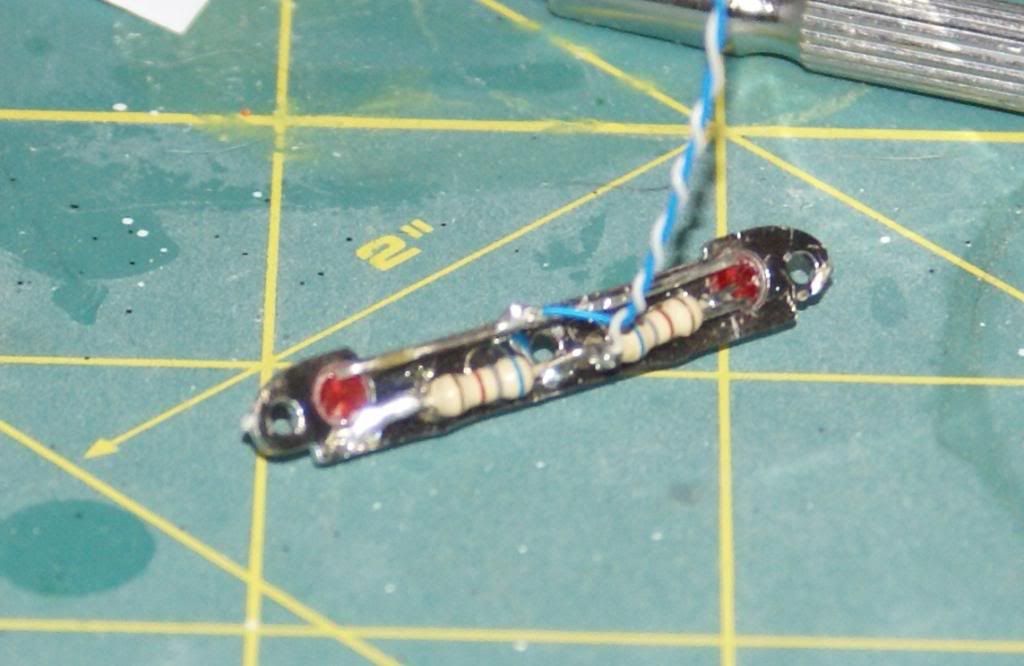
This is the front end of the Cheetah. Carrera put a light diffuser in so their LED board is quite narrow and close to the centerline of the car. I removed this and put the LEDs directly into the headlight holes. This gives me 2 bright beams. As you can see from the picture I use the negative lead of both LEDs to connect together as well as the 2 leads on the resistors so I then only have 1 pair of wires from the front of the car.
The silver thing is the Cheetah light diffuser. I removed this from my Cheetah.
I do a test fit first with the lights hooked up to a power supply to check that the lights are pointing the right way and that there is no unwanted light leakage. With The Cheetah and the Capri I showed elsewhere I wanted to have a shorter LED so filed the top down a bit.You can see this in the picture below. Do not expose the metal on the top as this will destroy the LED. However leaving 1mm or so is OK
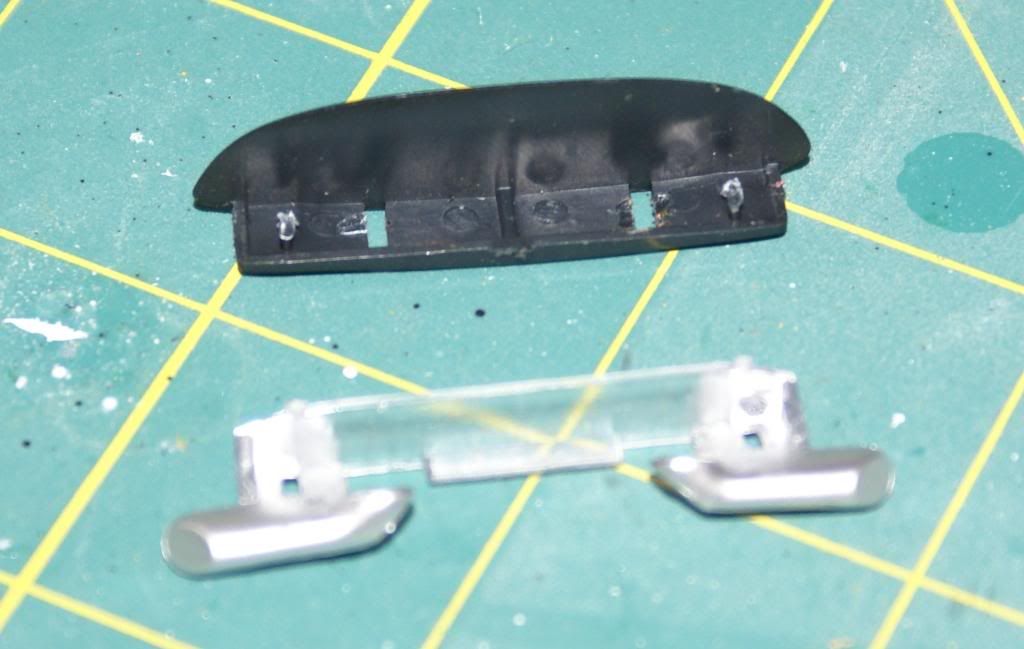
The Cheetah rear lights are mounted in separate chromed piece of plastic. The diameter of the holes was not quite 3mm so I ran through by hand with a #31 letter drill (just bigger than 3mm) and then sanded down the skirt around the base of the led. (This skirt is there to aid the LED to fit into a bezel which we don’t care about.)
This is the back of the chrome panel with the bare (and sanded) LEDs pushed into the holes and once again the negative LED leads and the leads from the resistors are used to join them up to 1 pair of wires.
(Blue negative, white positive).
The wire I use is “wire-wrap-wire†or kynar wire which is thin and single strand. It can be broken relatively easily if stressed but it does route around the car well.
The headlights and the chrome panel are held in with hot glue. I would assume other thick glues would work just as well.
The Evolution Cheetah has no lights, and the headlights are painted red. This is what is under the covers
I used some clear plastic from packing to make some new light covers.
These are the tail lights.