NSR Mosler build
I was asked to build an NSR Mosler to run in a club GT series that requires a 21.5K motor (max), and must utilize an all plastic chassis,.....so,....before it goes off to its new owner, a few pics.
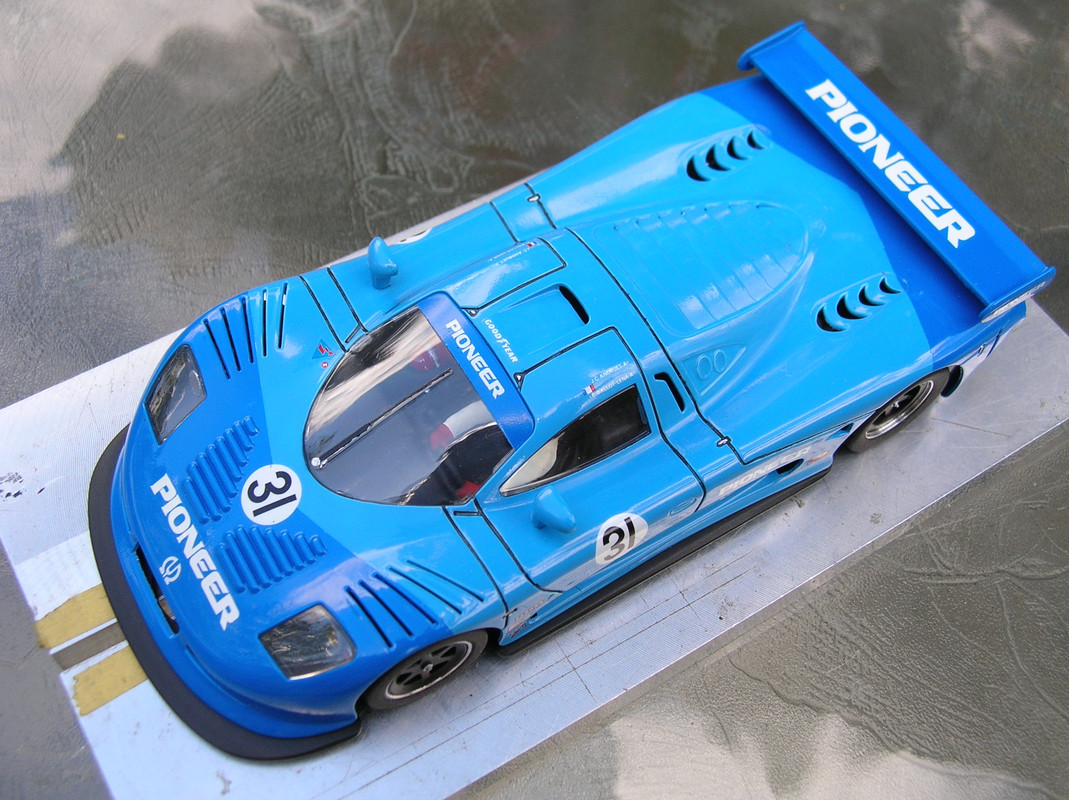
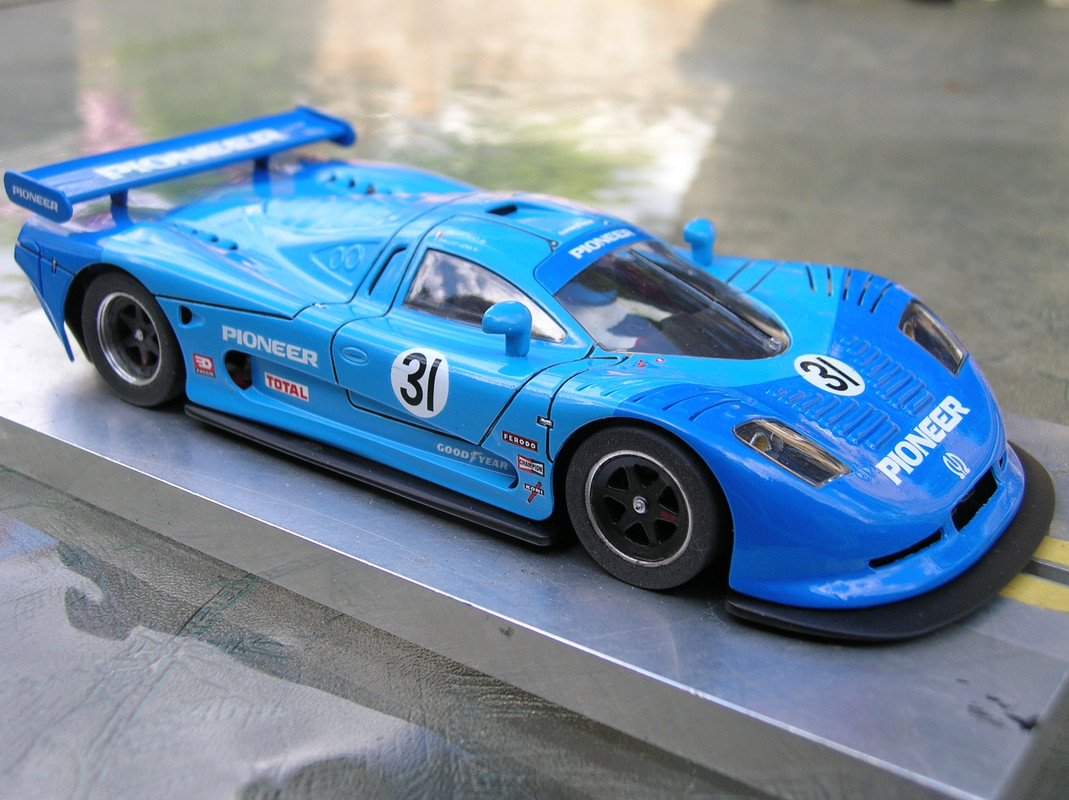
The livery is a fantasy one, with decals dug up from my decal stash...and a few bits added/subtracted from the body. I did use Tamiya panel line ink/paint on this car, and while it is dead easy to use, unless the panel lines are absolutely perfect, you may get some less than perfect results.......the NSR Mosler panel lines are not perfect ;) ., however, these shots were taken with a Macro lens, so in person the lines do look much better.
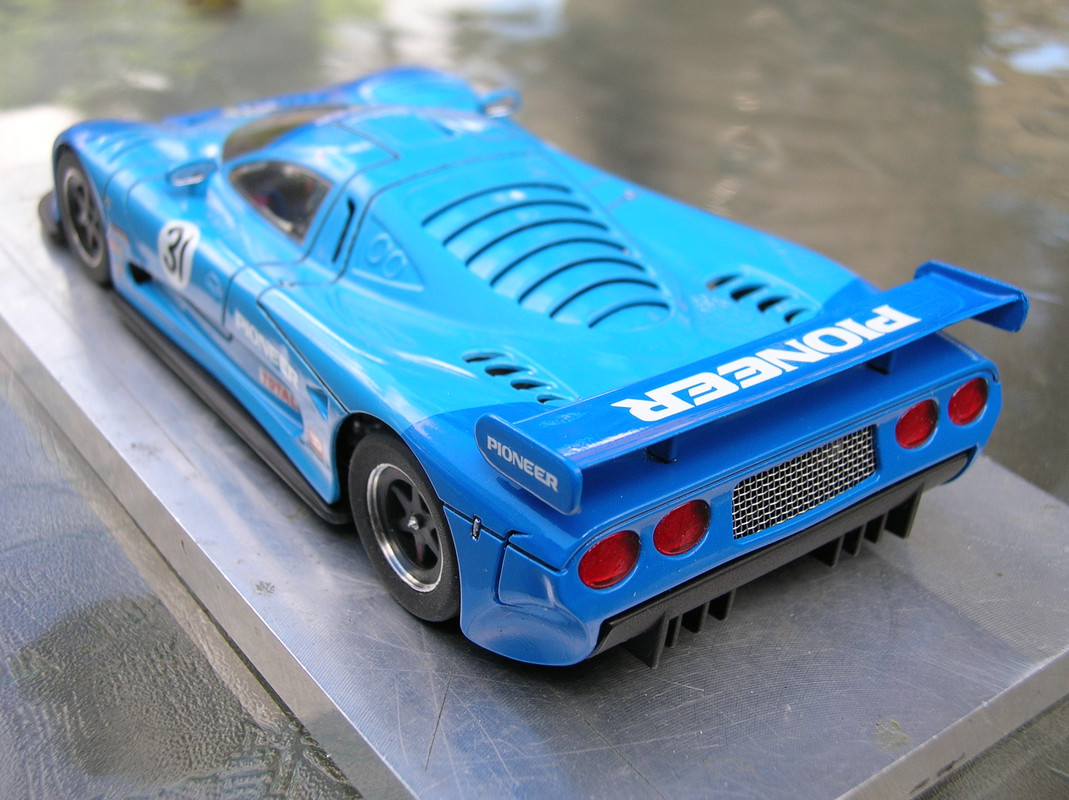
The solid center panel on the rear was cut out and a screen installed.....no reason, other than to look a bit different...
I had some Slot-it Sauber inserts lying around, and as it is purely a fantasy livery, they were used
As mentioned the car must utilize a plastic chassis, and a 21.5K motor (max).....so keeping that in mind, here is what was done.
The NSR Pod was drilled in order to allow motor screws to be used on the can end, and the holes were positioned in order that I could move the motor a touch to the rear, so that a 16.5mm MRSlotcar spur could be used. The slightly smaller spur provides a little more leeway in rear tire diameter without the spur scraping the track, and, as it is now level with the bottom of the pod, it is less likely to be damaged in an "off".
Nylok nuts/bolts attach the pod, with 25thou urethane washers used both above and below each pod lug.
Urethane washers are also glued to the top of each body mount lug on the chassis (between the chassis/body posts) which reduces noise/vibrations......the body posts are trimmed a few thou. to accommodate the washer thickness.
A Sloting Plus axle tube was used on the rear end.....these have been around for more than 10 years now, and while they were initially designed for the early Ninco Anglewinders, they are a godsend in any chassis where they can be made to fit....I use these in any car I can.
Two sintered bushings come in an aluminum double flanged axle tube (three lengths available), which is then glued into the chassis........this greatly reduces independent flexing of the rear axle uprights, ...which can/will lead to binding of the rear axle, mesh issues, and chatter.......none of which are all that good :)
Drill blank axles front and rear, foam filled Slot-it "air" hubs on the rear with urethanes (his club mandates urethanes), and an ind. rotating front wheel set up.
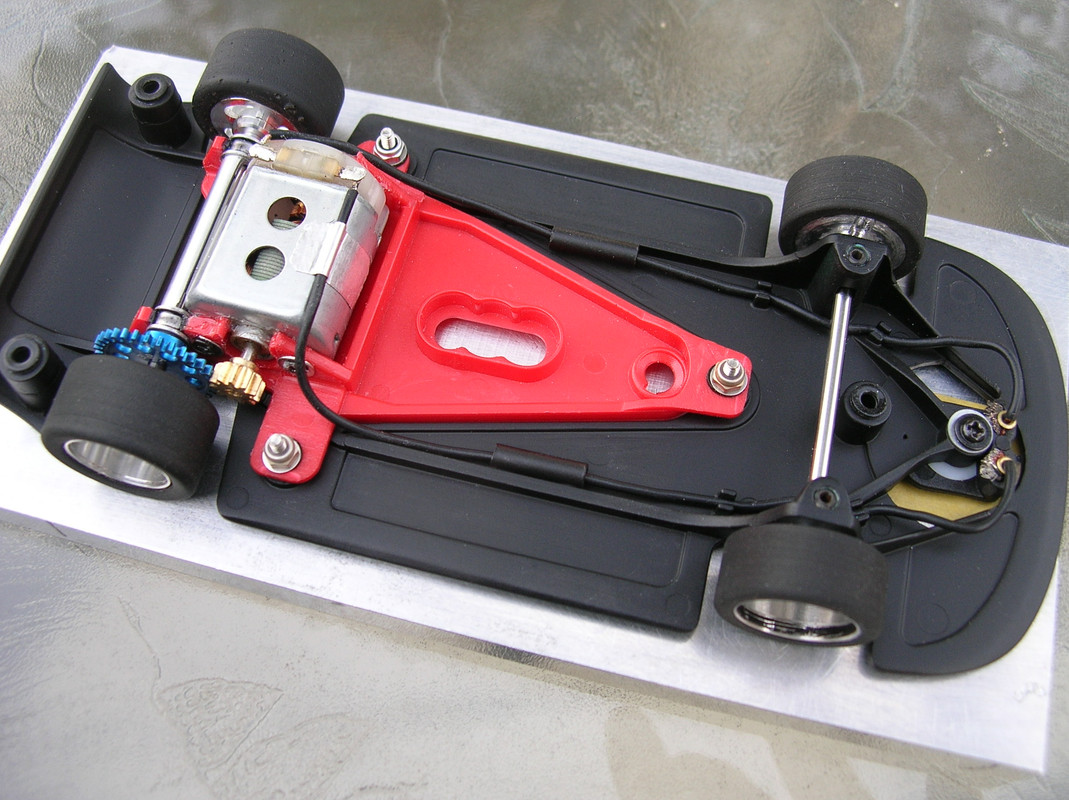
After a quick test. I have added a bit of lead weight, and in this shot, you can see where I had to notch the Sloting Plus axle tube to provide motor/axle clearance
Cheers
Chris Walker
The livery is a fantasy one, with decals dug up from my decal stash...and a few bits added/subtracted from the body. I did use Tamiya panel line ink/paint on this car, and while it is dead easy to use, unless the panel lines are absolutely perfect, you may get some less than perfect results.......the NSR Mosler panel lines are not perfect ;) ., however, these shots were taken with a Macro lens, so in person the lines do look much better.
The solid center panel on the rear was cut out and a screen installed.....no reason, other than to look a bit different...
I had some Slot-it Sauber inserts lying around, and as it is purely a fantasy livery, they were used
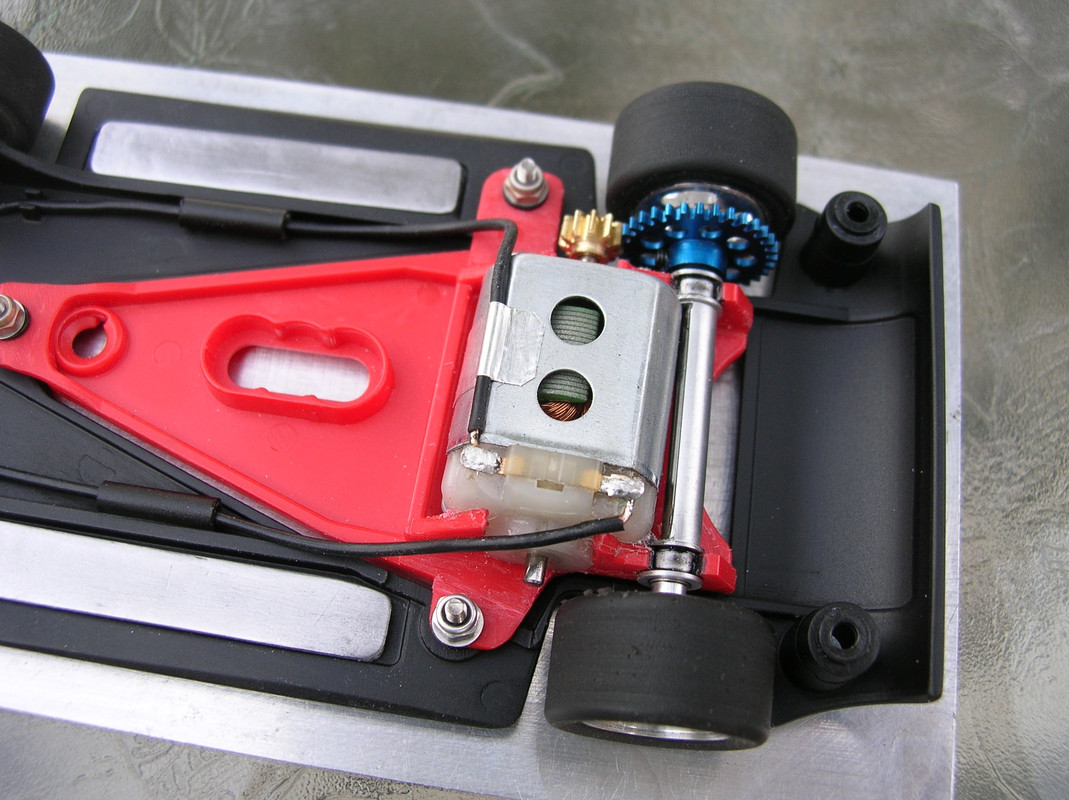
As mentioned the car must utilize a plastic chassis, and a 21.5K motor (max).....so keeping that in mind, here is what was done.
The NSR Pod was drilled in order to allow motor screws to be used on the can end, and the holes were positioned in order that I could move the motor a touch to the rear, so that a 16.5mm MRSlotcar spur could be used. The slightly smaller spur provides a little more leeway in rear tire diameter without the spur scraping the track, and, as it is now level with the bottom of the pod, it is less likely to be damaged in an "off".
Nylok nuts/bolts attach the pod, with 25thou urethane washers used both above and below each pod lug.
Urethane washers are also glued to the top of each body mount lug on the chassis (between the chassis/body posts) which reduces noise/vibrations......the body posts are trimmed a few thou. to accommodate the washer thickness.
A Sloting Plus axle tube was used on the rear end.....these have been around for more than 10 years now, and while they were initially designed for the early Ninco Anglewinders, they are a godsend in any chassis where they can be made to fit....I use these in any car I can.
Two sintered bushings come in an aluminum double flanged axle tube (three lengths available), which is then glued into the chassis........this greatly reduces independent flexing of the rear axle uprights, ...which can/will lead to binding of the rear axle, mesh issues, and chatter.......none of which are all that good :)
Drill blank axles front and rear, foam filled Slot-it "air" hubs on the rear with urethanes (his club mandates urethanes), and an ind. rotating front wheel set up.
After a quick test. I have added a bit of lead weight, and in this shot, you can see where I had to notch the Sloting Plus axle tube to provide motor/axle clearance
Cheers
Chris Walker