500!!! Whats Carrera gonna do this year? :lol:
Randy
Go!replacement chassis, fully customicable - it´s running!
39 posts
• Page 3 of 3 • 1, 2, 3
Re: Go!replacement chassis, fully customicable
![]() by Dodgefarmer » Tue Feb 25, 2014 4:36 pm
by Dodgefarmer » Tue Feb 25, 2014 4:36 pm
-
Dodgefarmer - HRW SlotCar Veteran!
- Posts: 818
- Joined: Thu Sep 06, 2012 10:11 am
- Location: Grindrod B.C. Canada
Re: Go!replacement chassis, fully customicable
![]() by Alan132 » Tue Feb 25, 2014 9:00 pm
by Alan132 » Tue Feb 25, 2014 9:00 pm
Oh I think Carrera will survive! I am small potatoes compared to them!
Alan
Alan
- Alan132
- HRW SlotCar Veteran!
- Posts: 133
- Joined: Sun Jun 23, 2013 10:31 am
Re: Go!replacement chassis, fully customicable
![]() by GMAN » Thu Feb 27, 2014 4:16 pm
by GMAN » Thu Feb 27, 2014 4:16 pm
This isn't the slot car chassis I remember
Holy COW
Holy COW
- GMAN
- Posts: 4
- Joined: Mon Oct 29, 2012 5:32 pm
Re: Go!replacement chassis, fully customicable
![]() by pfuetze » Sat Mar 08, 2014 2:35 am
by pfuetze » Sat Mar 08, 2014 2:35 am
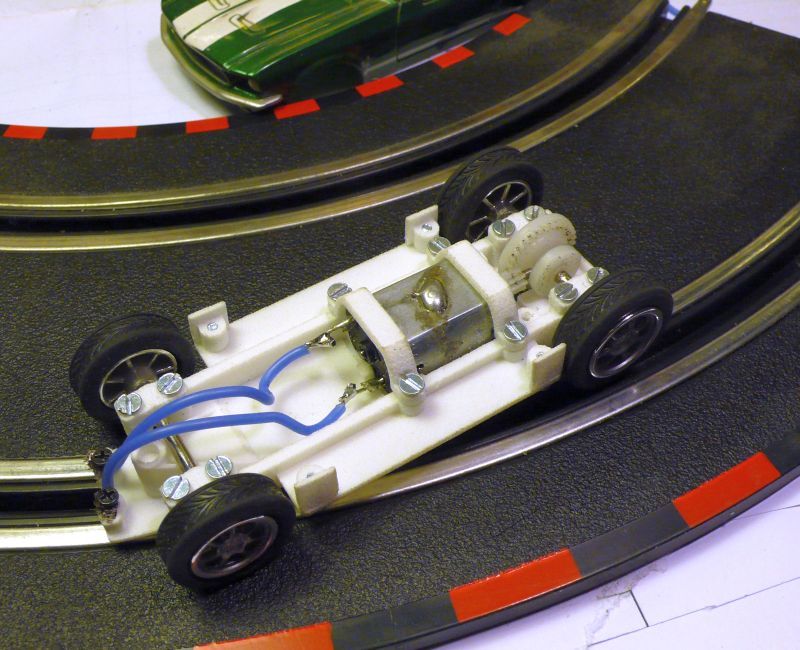
Building up the first GRC chassis for my Go!Mustang:
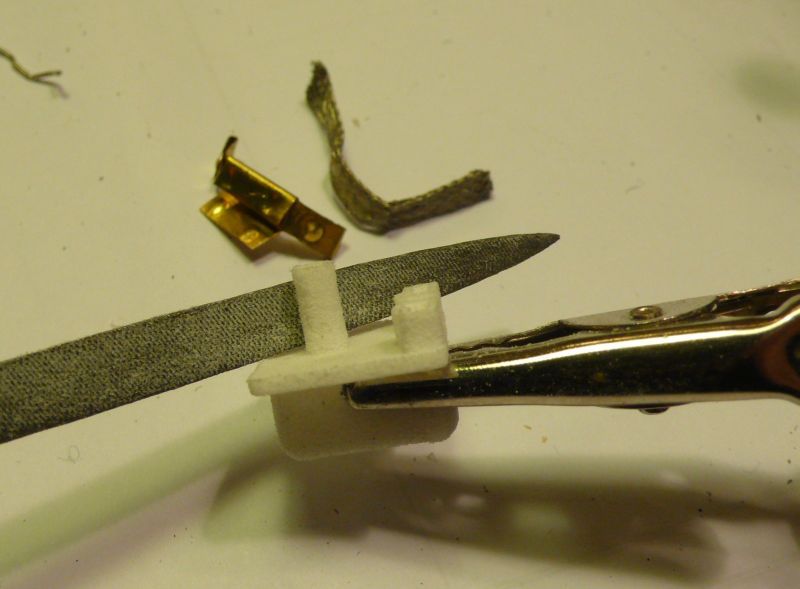
Cutting the parts with a cutter
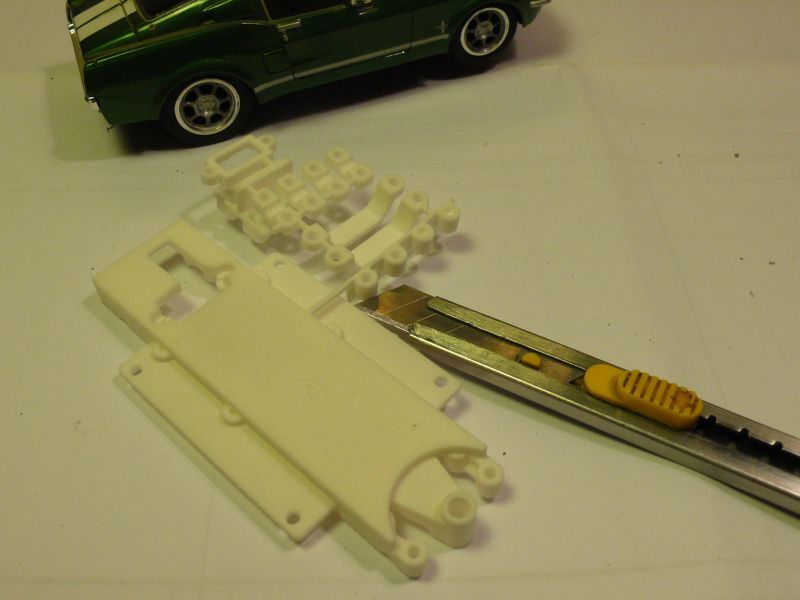
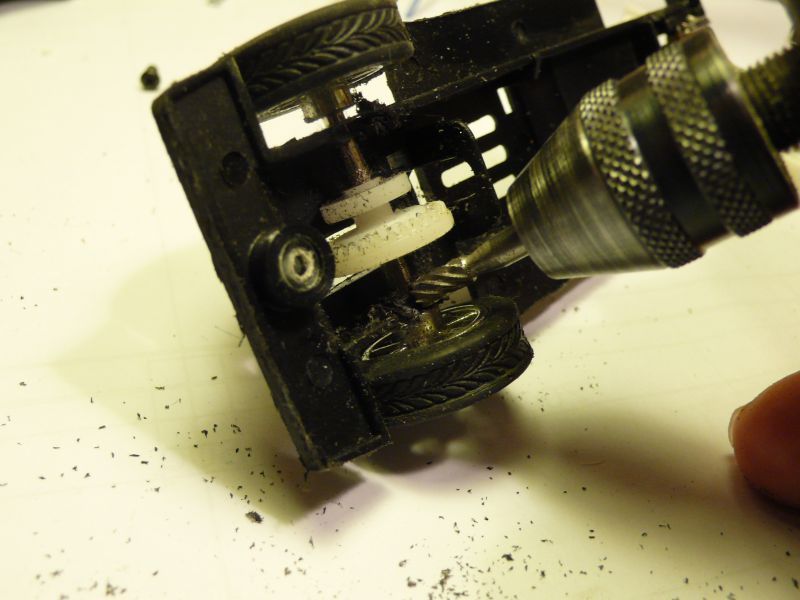
Removing excess material with a needle, also possible to use the air compressor. For fine holes, i use a needle pressed into a part of wood.
filing the underside of the guide to make a smooth surface for reduced friction in the slot. Cutting the motor wires with a side cutter and removing all those unnecessary parts.
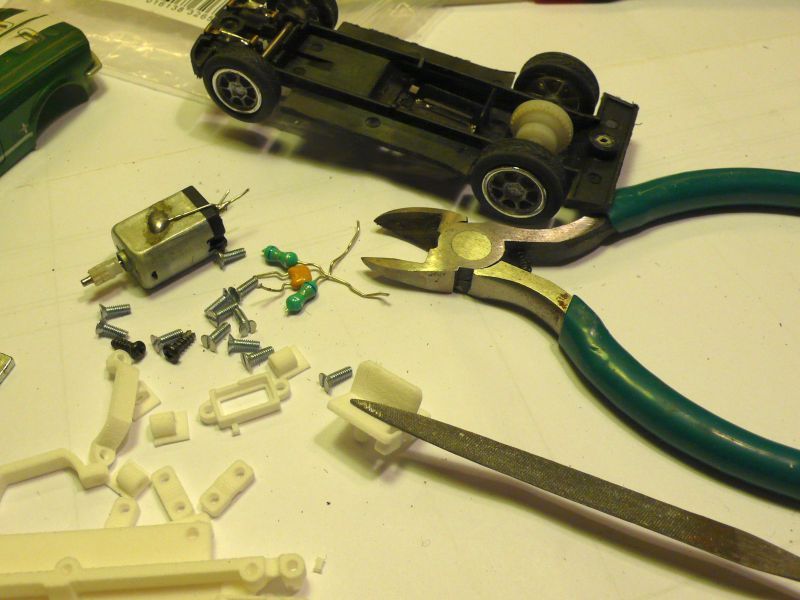
Filing the guide stem to enable smooth movement in the guideholder. Removing the clamp from the Go!braids
Cut the braids in half and inserted in the guide. using high flexible silicone wires for the motor cables. removed the isolation and inserted into the guide. Magnet put into the magnetholder, a nice press fit. pushed M2 screws into the upper halves of the bearings.
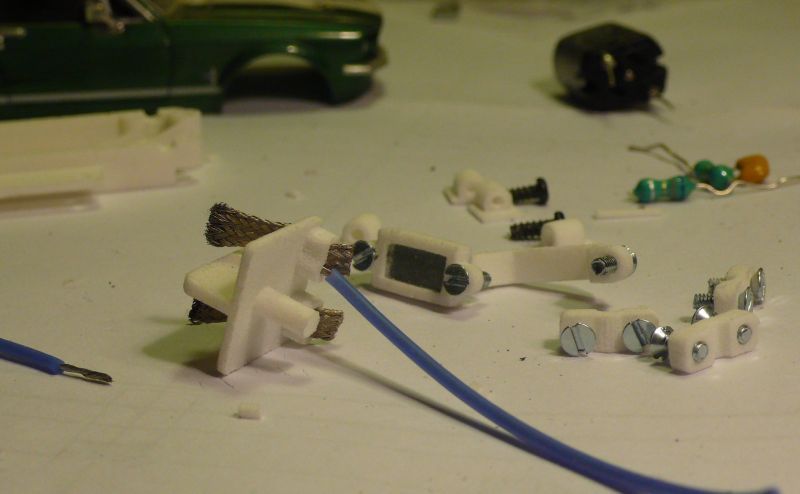
Fixing the cable and braid with a small screw. I use a DSlot screw, but any small screw will do. Important: Underside of the screw must be flash with the underside of the guide, not deeper
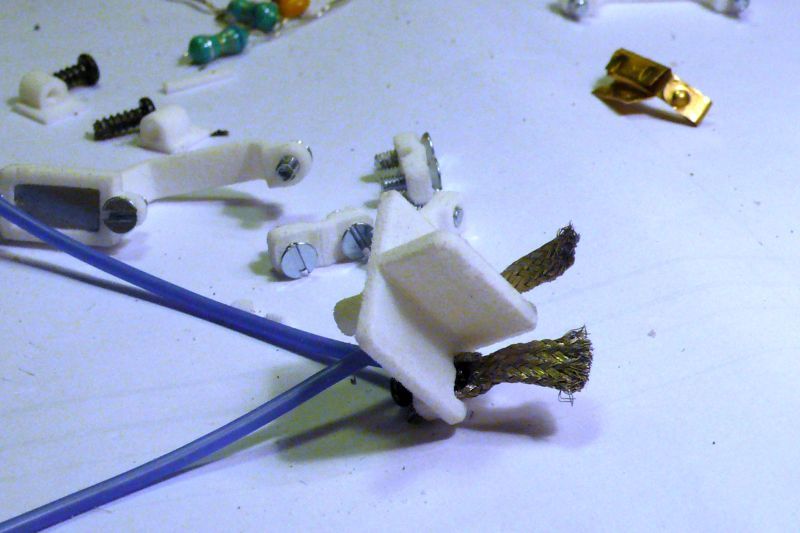
Setting the braids, guide is ready
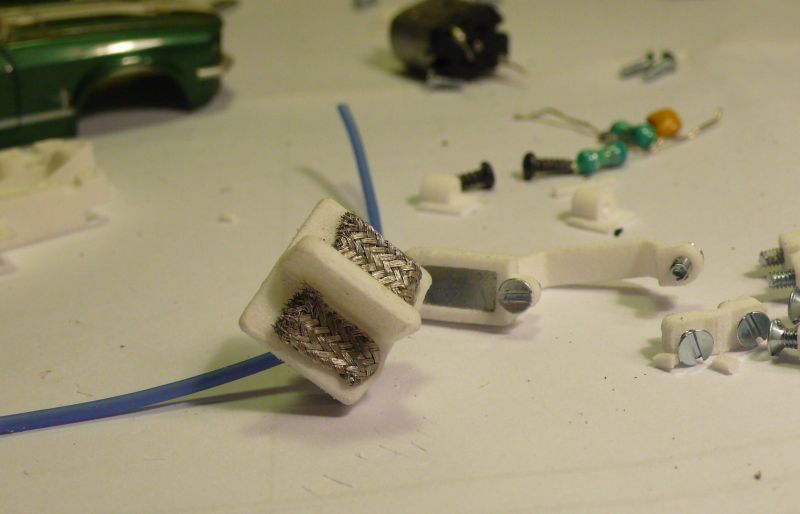
Motor inserted and fixed with the 2 motorholders
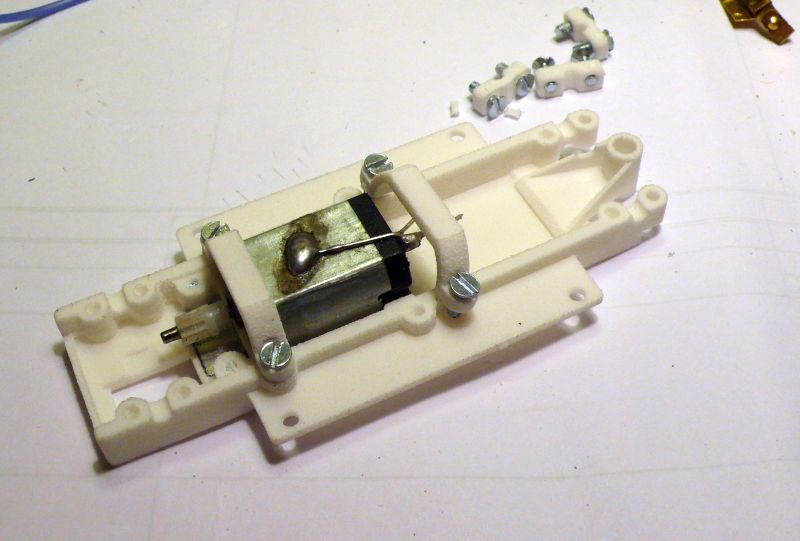
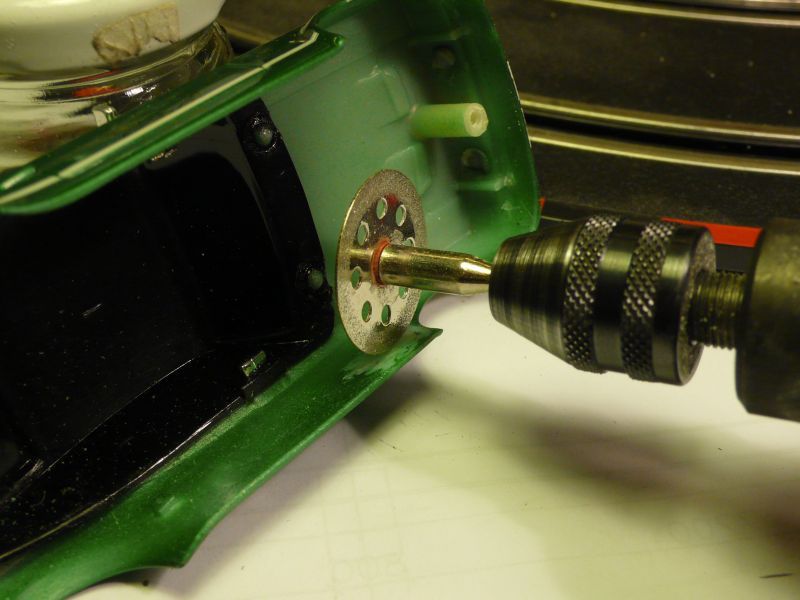
Bearings screwes to the chassis, 2.3mm drill bit ready for action
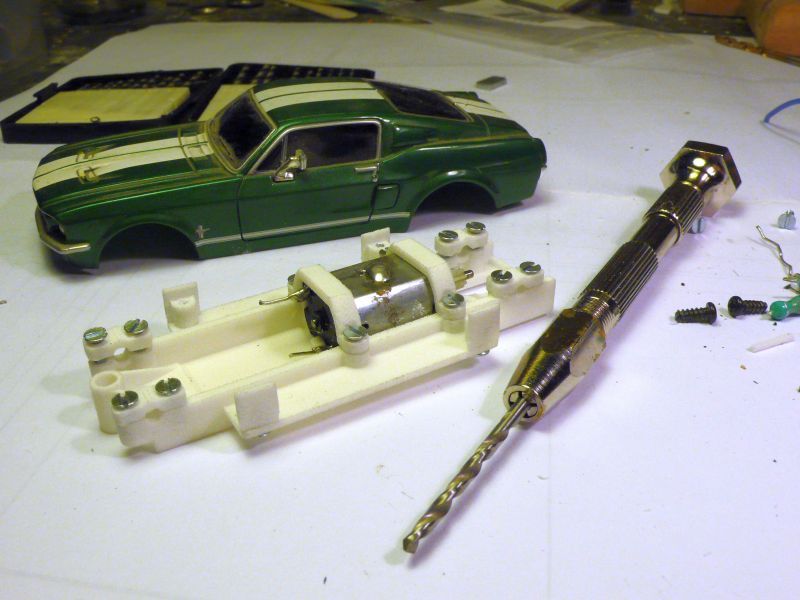
Some slow and carefull turns are enough to drill out the bearings, don´t use a power tool here.
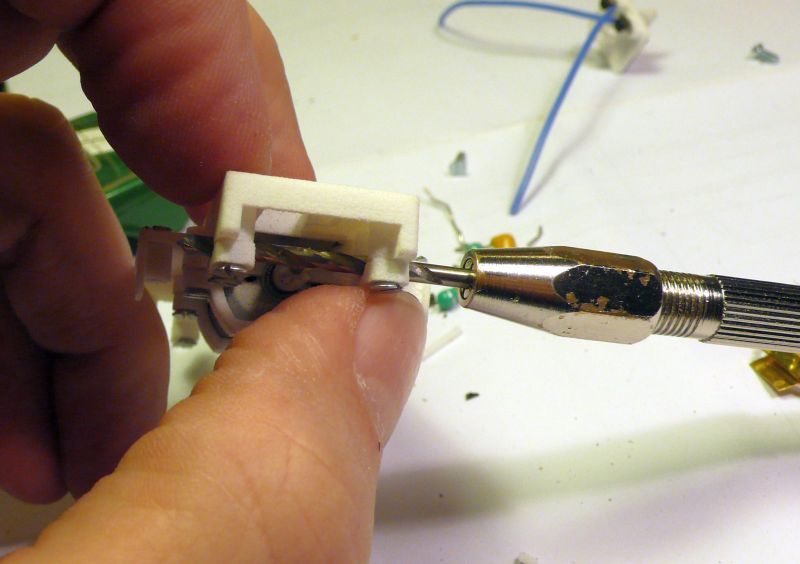
cutting the axles out of the Go!chassis
for getting out the rear axle, i remove some material with the milling bit of the dremel, cutter used for final removing
Mark each bearing on its position, in this was, the holes will fit together nicely
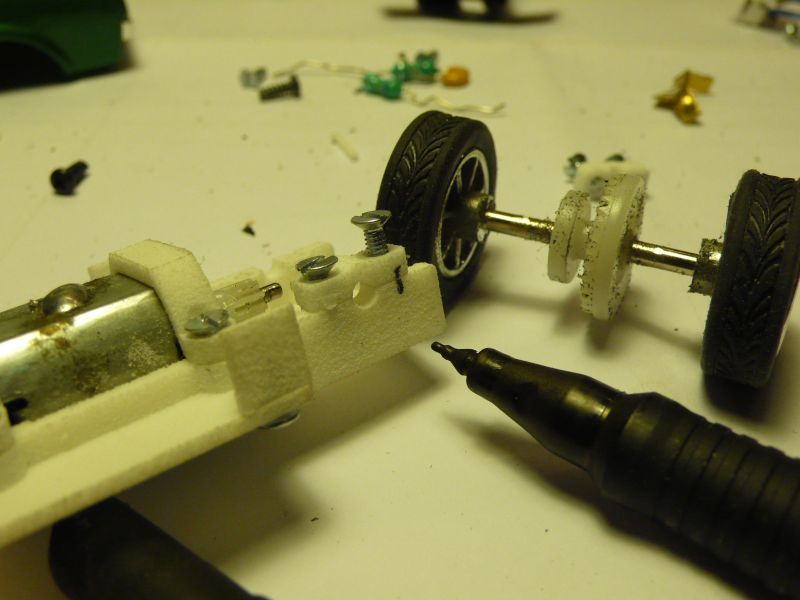
front axle mounted
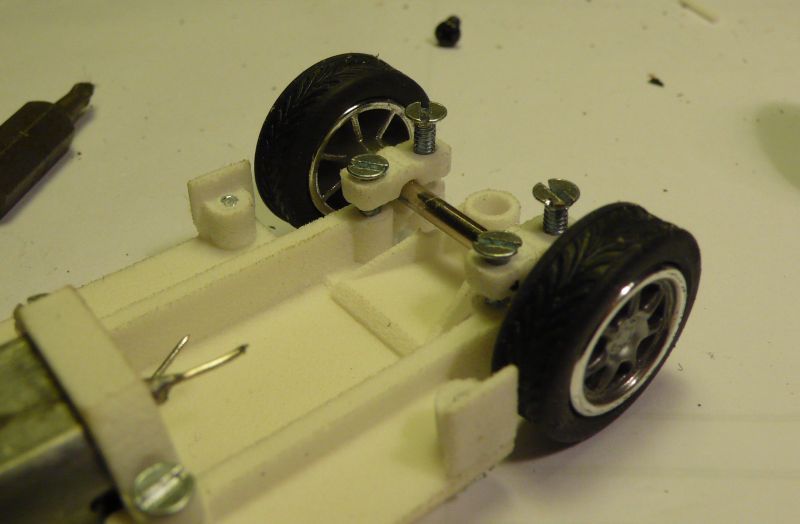
body holders screwed to chassis and guide inserted
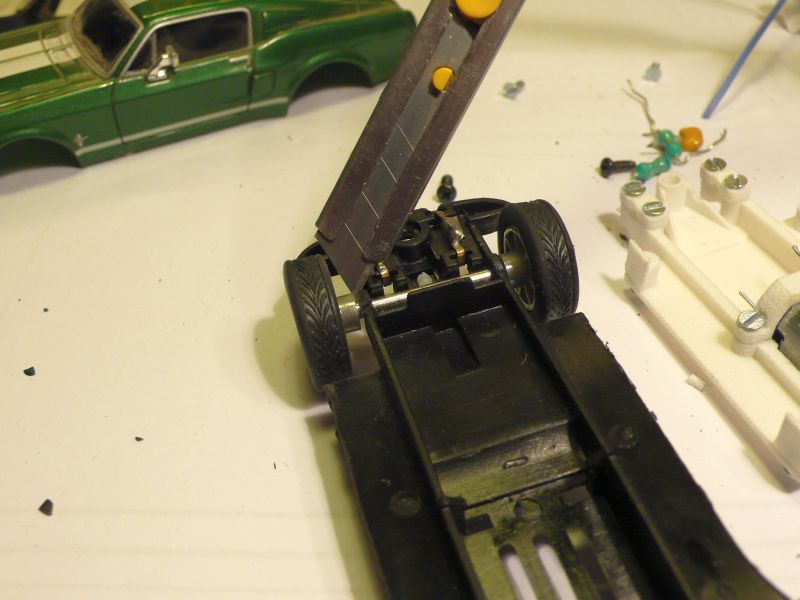
Check: front tires touch the track. if they don´t touch remove the ring under the guide holder with a cutter
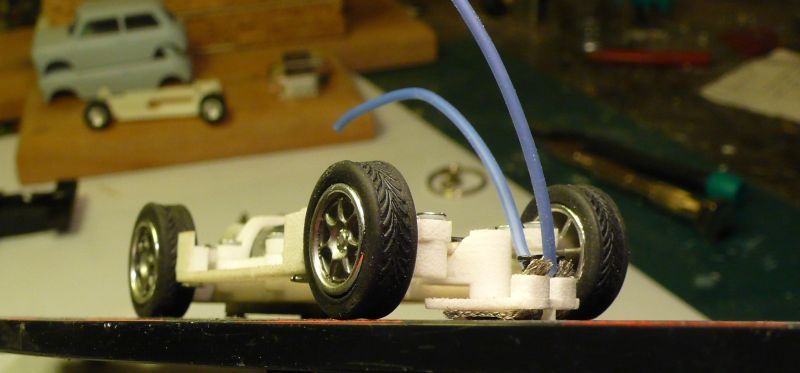
possible sliding angle: looks okay
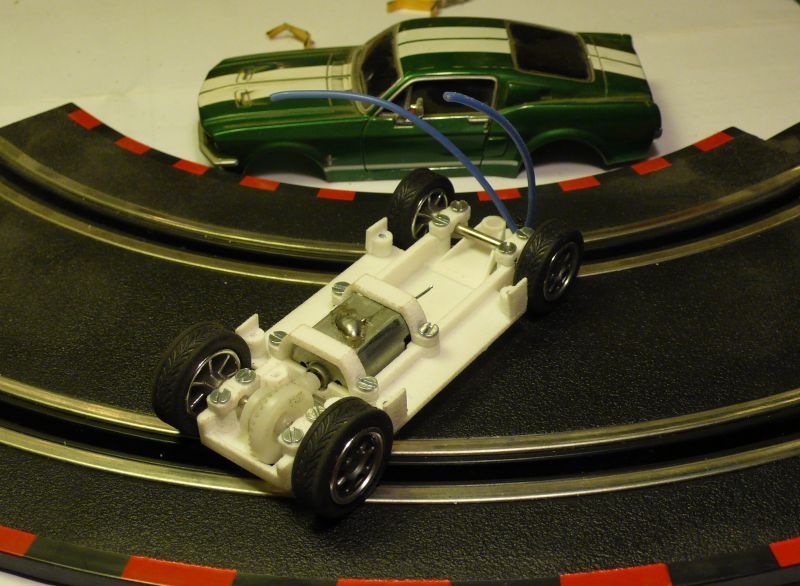
soldering motorcables, they look a little long
2 layers of masking tape over the wheels before glueing the chassis to the body. In this way, the tires should have enough place afterwards
a little grinding on the inside of the body to give the glue some grip
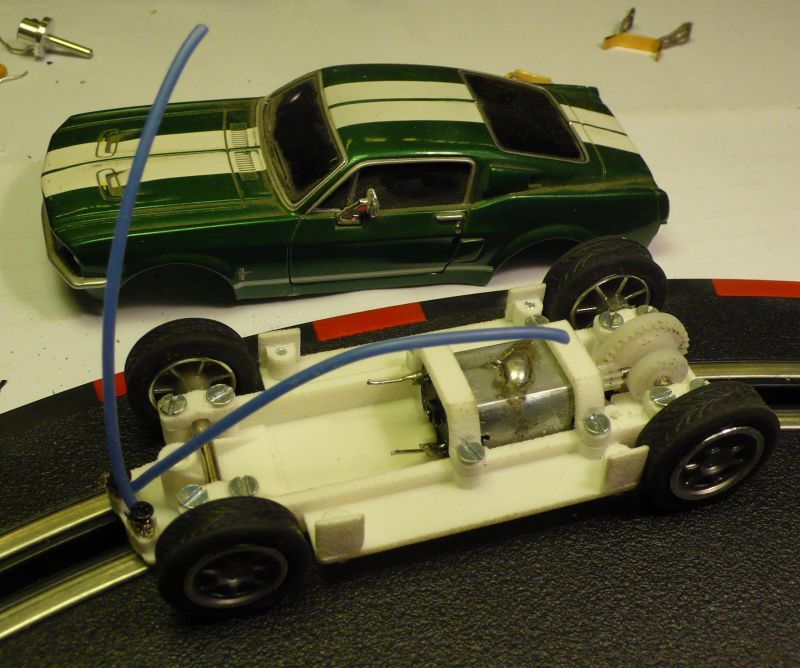
2K Epoxy to the body holders and to the inside of the body, insert chassis into body, check and wait
remove masking tape after the glue has settled
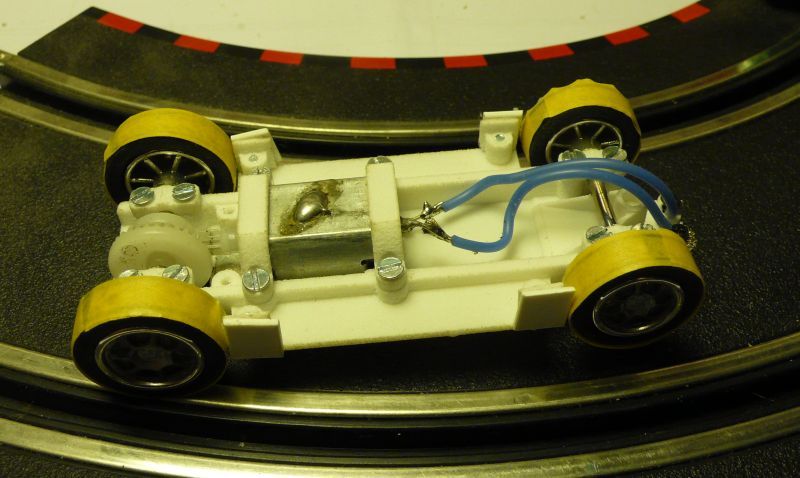
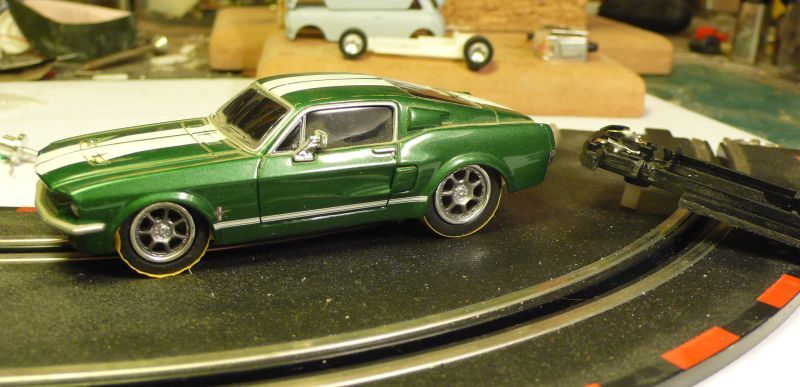
Ready to go!
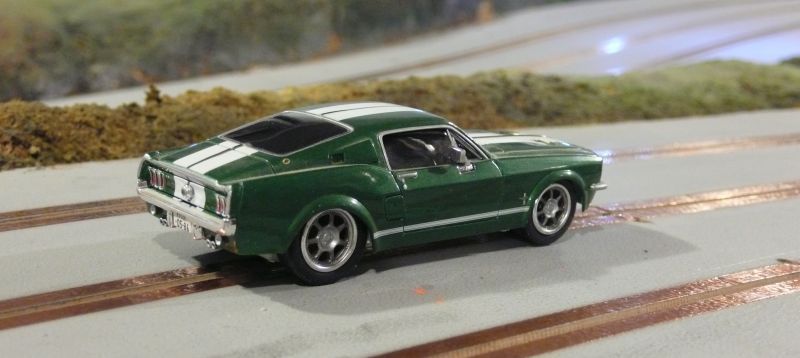
14V, 90 Ohm Parma Eco and after 13 laps i got a best time of 12.9. Some cars did not make this during the last ProNoMag. this time is with stock parts, not even lubricated.
with the untrued tires, the Stang is jumping on the straigts, but stays in the sltos. controll is nice and there is good feeling of the car, nice controlled drifts
looks like this chassis is working really good :D
Cutting the parts with a cutter
Removing excess material with a needle, also possible to use the air compressor. For fine holes, i use a needle pressed into a part of wood.
filing the underside of the guide to make a smooth surface for reduced friction in the slot. Cutting the motor wires with a side cutter and removing all those unnecessary parts.
Filing the guide stem to enable smooth movement in the guideholder. Removing the clamp from the Go!braids
Cut the braids in half and inserted in the guide. using high flexible silicone wires for the motor cables. removed the isolation and inserted into the guide. Magnet put into the magnetholder, a nice press fit. pushed M2 screws into the upper halves of the bearings.
Fixing the cable and braid with a small screw. I use a DSlot screw, but any small screw will do. Important: Underside of the screw must be flash with the underside of the guide, not deeper
Setting the braids, guide is ready
Motor inserted and fixed with the 2 motorholders
Bearings screwes to the chassis, 2.3mm drill bit ready for action
Some slow and carefull turns are enough to drill out the bearings, don´t use a power tool here.
cutting the axles out of the Go!chassis
for getting out the rear axle, i remove some material with the milling bit of the dremel, cutter used for final removing
Mark each bearing on its position, in this was, the holes will fit together nicely
front axle mounted
body holders screwed to chassis and guide inserted
Check: front tires touch the track. if they don´t touch remove the ring under the guide holder with a cutter
possible sliding angle: looks okay
soldering motorcables, they look a little long
2 layers of masking tape over the wheels before glueing the chassis to the body. In this way, the tires should have enough place afterwards
a little grinding on the inside of the body to give the glue some grip
2K Epoxy to the body holders and to the inside of the body, insert chassis into body, check and wait
remove masking tape after the glue has settled
Ready to go!
14V, 90 Ohm Parma Eco and after 13 laps i got a best time of 12.9. Some cars did not make this during the last ProNoMag. this time is with stock parts, not even lubricated.
with the untrued tires, the Stang is jumping on the straigts, but stays in the sltos. controll is nice and there is good feeling of the car, nice controlled drifts
looks like this chassis is working really good :D
-

pfuetze - HRW SlotCar Veteran!
- Posts: 2255
- Joined: Wed Sep 05, 2012 11:35 pm
- Location: Austria
Re: Go!replacement chassis, fully customicable - it´s runnin
![]() by Cjent » Sat Mar 08, 2014 8:13 am
by Cjent » Sat Mar 08, 2014 8:13 am
Thanks, Peter! Great tutorial and chassis.
-

Cjent - HRW SlotCar Veteran!
- Posts: 1218
- Joined: Thu Aug 30, 2012 3:39 pm
- Location: FL & AL
Re: Go!replacement chassis, fully customicable - it´s runnin
![]() by Alan132 » Sat Mar 08, 2014 9:28 am
by Alan132 » Sat Mar 08, 2014 9:28 am
Nice feedback Peter. Time to get my final measurements together and order one up to try.
Question: Is just the surface of the parts granular?
Does filing remove this texture or is it better to order the polished chassis?
Looks great!
Regards - Alan
Question: Is just the surface of the parts granular?
Does filing remove this texture or is it better to order the polished chassis?
Looks great!
Regards - Alan
- Alan132
- HRW SlotCar Veteran!
- Posts: 133
- Joined: Sun Jun 23, 2013 10:31 am
Re: Go!replacement chassis, fully customicable - it´s runnin
![]() by dreinecke » Sat Mar 08, 2014 10:14 am
by dreinecke » Sat Mar 08, 2014 10:14 am
Great concept and I can't imagine the work that went into this. But the best part is hearing how it drives and your new laptimes. Congrats!
-

dreinecke - King of the Dum-Dums!
- Posts: 7360
- Joined: Wed Aug 08, 2012 5:39 pm
- Location: Colorado
Re: Go!replacement chassis, fully customicable - it´s runnin
![]() by FatUSStig » Mon Mar 10, 2014 3:50 pm
by FatUSStig » Mon Mar 10, 2014 3:50 pm
Very nice!!!
-

FatUSStig - HRW SlotCar Veteran!
- Posts: 164
- Joined: Wed Sep 05, 2012 8:20 pm
Re: Go!replacement chassis, fully customicable - it´s runnin
![]() by gedgeman » Fri Mar 14, 2014 9:55 pm
by gedgeman » Fri Mar 14, 2014 9:55 pm
Well, now I know what to do with my pull and speeds.
Awesome job Peter.
Awesome job Peter.
- gedgeman
- Posts: 9
- Joined: Tue Nov 20, 2012 2:37 am
39 posts
• Page 3 of 3 • 1, 2, 3
Who is online
Users browsing this forum: No registered users and 6 guests

Powered by phpBB® Forum Software © phpBB Group