The main concern with FDM is the lines produced. The good news is that with only a few coats of primer, a little putty and easy sanding, the body can turn out pretty smooth. I'll be documenting my Birdcage build here - and WARNING: It will go slow as I'm not able to do this quickly.
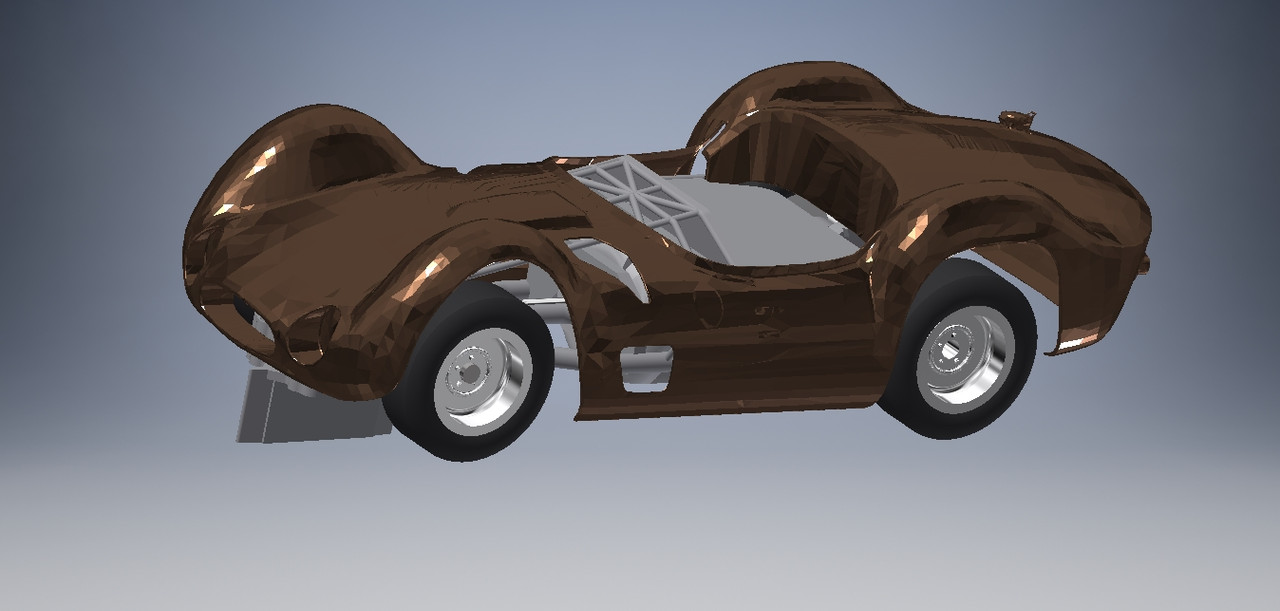
A basic print - notice this has the glass as part of the body - easily removable:

Glass now cut off using an X-Acto. This can also be done in a program such as Tinkercad, but I decided to leave it on so I can use it for vacforming glass later:

1st coat of primer on to see what we've got:

After sanding the above, I then used a little automotive red glazing putty to fill a few of the most textured areas, sanded and re-primed:

Now, right out of the gate, it is obvious with this much primer on, the door gaps, etc start to disappear. This is is obviously a by-product of the filler/primer, but can be remedied by either re-cutting the lines in or using decals.
So, that's where it is at, and hopefully helps those looking to print their own body.
Last comment: This is the ONLY correct 1/32 Birdcage model. All of the 1960's toys were horrible scale-wise and numerous resin folks have simply re-cast those over the years. This car model came from years of research. Lastly, the bulbous fenders on this thing are a B@$#@$#%$@$# to get right by hand. It required a model in 3D to ensure they were all symmetrical. My OCD couldn't deal with some of the terrible resins out there ;)