
07/30/2013
07/30/2013
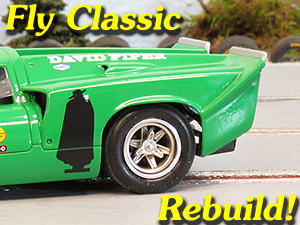
Fly Classic Lola T70 MKIIIB
It seems there are more old Fly Classics around than almost any other slot car. Over the years we have collected our fair share of them and we still enjoy them today. But some models have seen some really hard racing and somewhere along the line they end up in that place no slot car likes to be: "The Boneyard"
This car needed a full rebuild as the rear axle was bent and the spur gear cracked. One of the wheel hubs were also cracked with the other wheel already sleeved to fix that same issue.
Why not just use a new Slot.it HRS2 chassis? No challenge to it. I like to tinker and see if I can produce results given the chassis/model I have. With the availability of parts today it is much easier to restore than ever before. I also want the model to be as close to original as possible.
I am keeping the stock motor and using the same gear ratio as the model had originally.
This is an extensive article covering all the methods and parts I used for this project. I am NOT racing in a series or club. The tuning you see is to create a smooth operating car that is enjoyable to drive.
Links to all parts and tools are listed for those just starting out in this hobby who may not be familiar with all of the tuning techniques and tools we use.
This model is being tuned for non-magnet operation. When you start to remove the traction magnets in your slot cars you will discover why having quality components is so important. Traction magnets serve a great purpose for keeping your car planted on the track, but they also are good at something else: hiding poor quality. When the magnet comes out you discover that round wheels & tires, straight axles and proper bushings, along with a more precise guide fit is critical to a good performing slot car. These methods will also benefit those who enjoy magnet racing.
The following links are the parts and sources I used at the time of this article.
Take note of the part numbers and then you can support your local/favorite dealer.
PARTS LIST
19 mm diameter / 36 tooth spur gear - Slot.it Part # SIGS1936
15x11 Insert Wheels - C.B. Design
Paul Gage Classic Tire XPG compound Part # 21126
Wood Track Guide - Slot.it Part # CH07
Silicone Insulated Lead Wire - SCC
TOOLS
There are some tools that make tuning/restoring our models easier. I am listing these as recommendations only. You might be just starting out and looking to start investing in the right tools.
Basic Tools/Maintenance Set *includes wrench for wheels/gears/guide
Dremel *Variable Speed is HIGHLY recommended.
Hot Glue Gun - Craft Section at your local Wal-Mart
BREAKDOWN/CLEANING/INSPECTION

I would say it needs a bath don't you? The boneyard is not a very nice place to be for years on end.
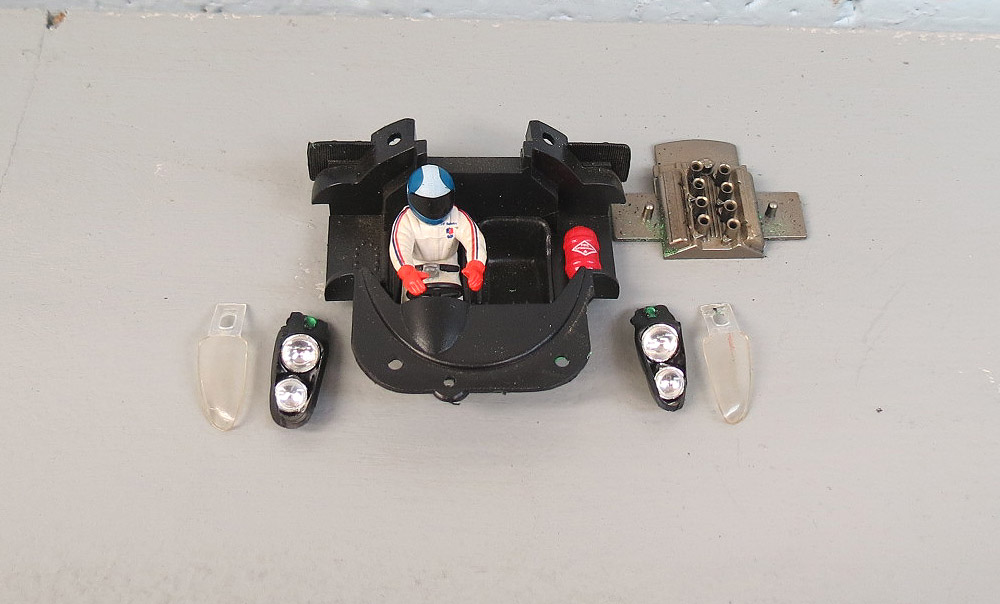
Remove the 4 screws that secure the chassis to the body. Set the chassis aside and we will remove the interior parts.
When you re-install these items I prefer to use a hot glue gun where possible. In smaller areas I use TESTORS model glue. If you have a cheap soldering iron you can also carefully melt them back in place. I highly advise you use adhesive until you feel very comfortable putting a hot iron near your prized slot car.
Even on a new car it is a good idea to look over these areas. With mass production we will always find some items that are not fully secured or are not installed correctly.
*Tip for a quiet model* Once you re-install the parts, shake it and listen for any rattling. If you hear some then start searching for the source and make sure it is secure.
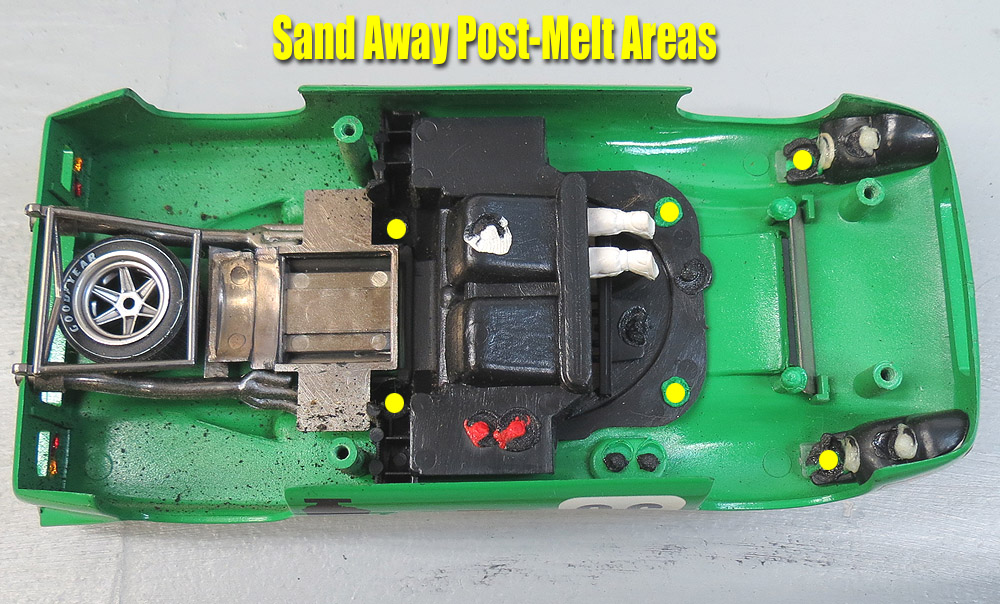
I use a small milling bit in my Dremel to sand away the areas shown. Then remove these parts and you are ready to clean.
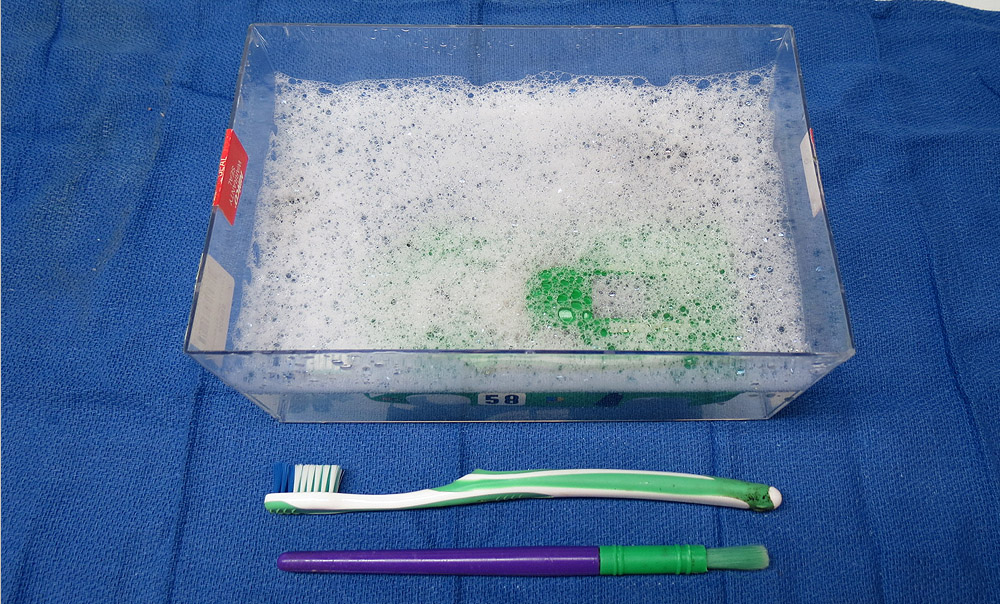
Using a slot car case lid, I mix some light dishwashing detergent and lukewarm water. I soak the parts for about 30 minutes. Then I use a soft bristle toothbrush or art brush for cleaning.
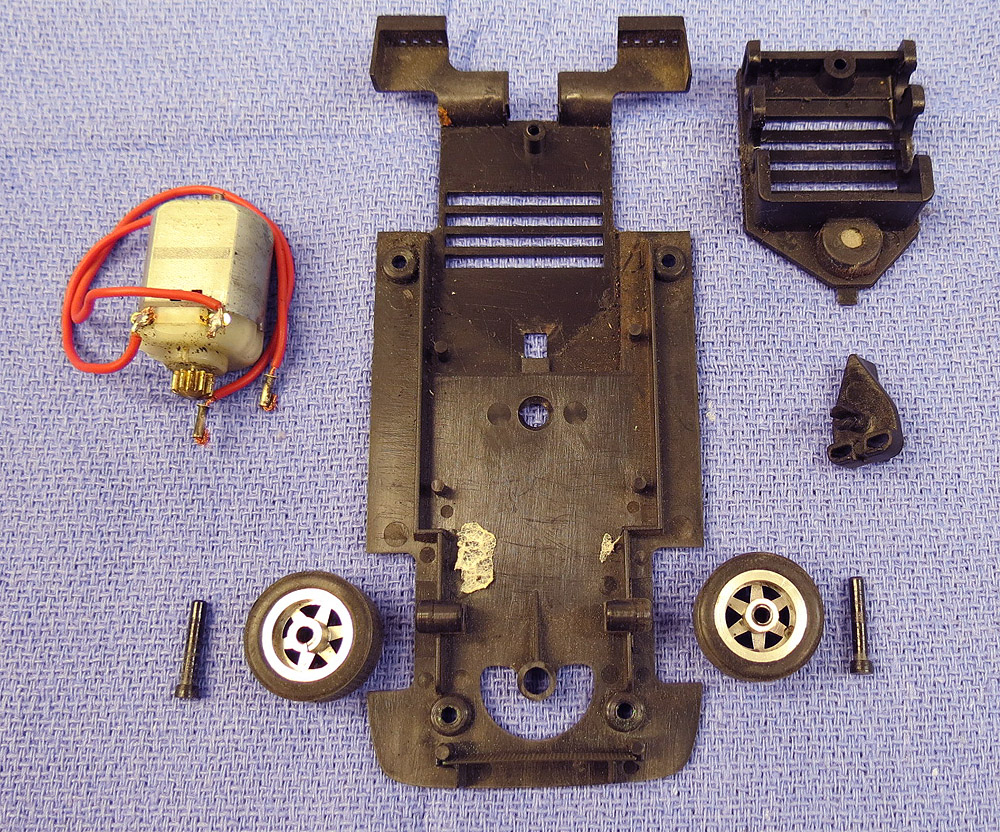
Time to break down the chassis. It needs cleaning too. The motor seems just fine and so does the pinion.
Now to inspect the rest of the chassis and running gear to see if there are any issues. These models go through a lot of abuse at times and seeing a cracked pod or warped chassis is not uncommon.
During inspection I did find a cracked wheel hub up front. Easy enough to repair and they will still work fine.
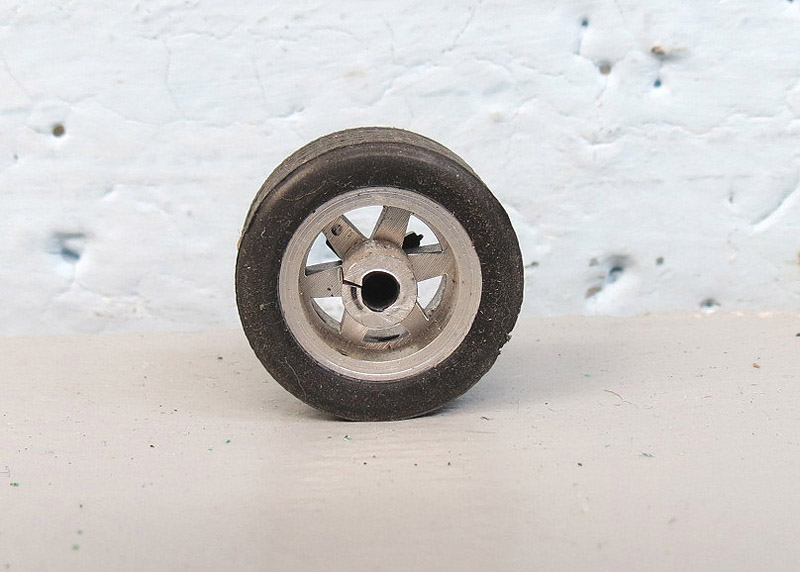
This is a common sight with many plastic wheels in our hobby. My approach is using styrene tubing.
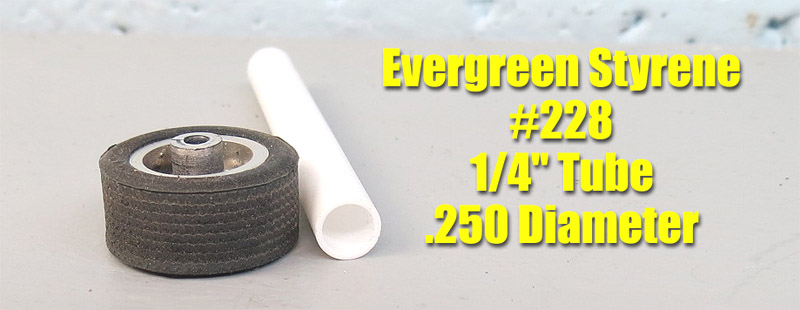
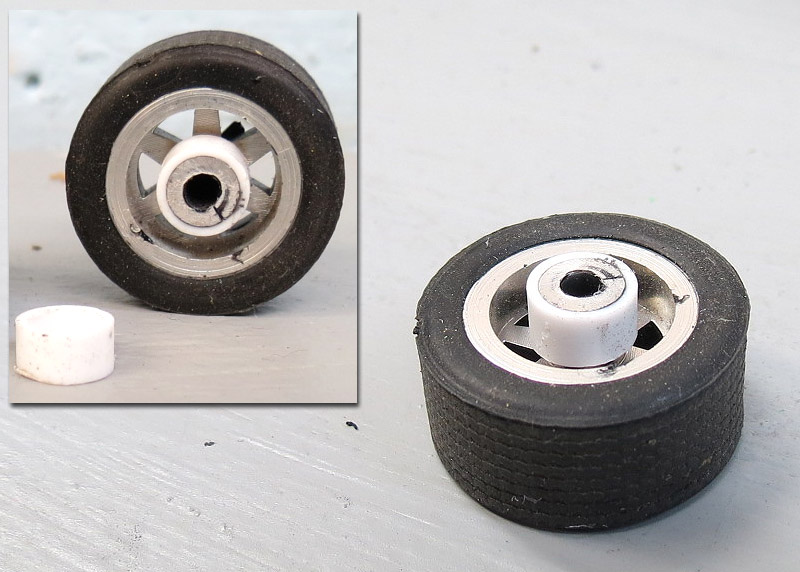
Just slice the tubing with an Exacto knife by rolling it on a flat surface. The just add a light drop of Testors model glue and press the sleeve in place.
CHASSIS/INTERIOR Modifications
*This step is NOT required. It is something I like to do to make sure there is no binding/flexing of the chassis due to the body or interior rubbing.
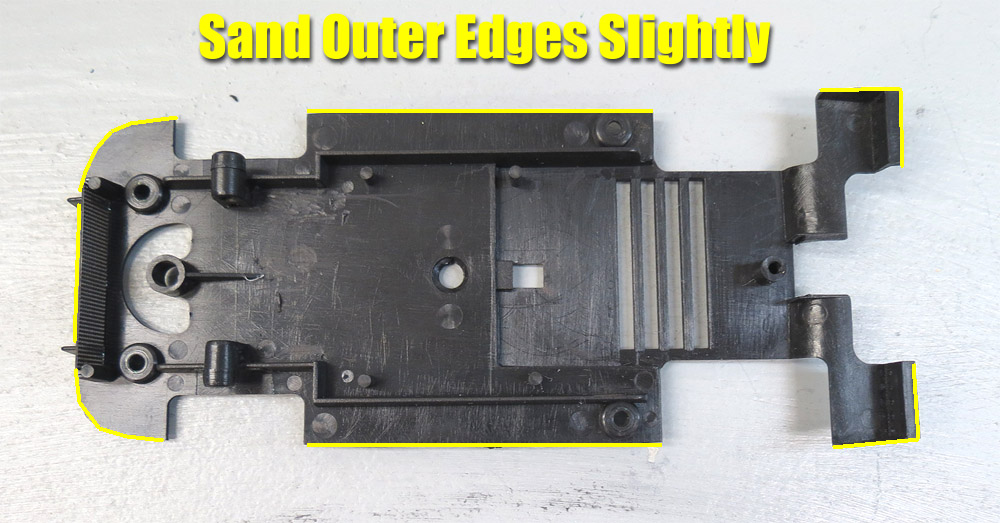
Using a sanding barrel in the Dremel, I lightly go around the outer edges of the chassis. Sometimes the body is actually spread apart by the chassis and it can cause some binding. Most competitive racers like this modification as it helps add body float. Good body float reduces chattering at high speeds and improves overall feel.
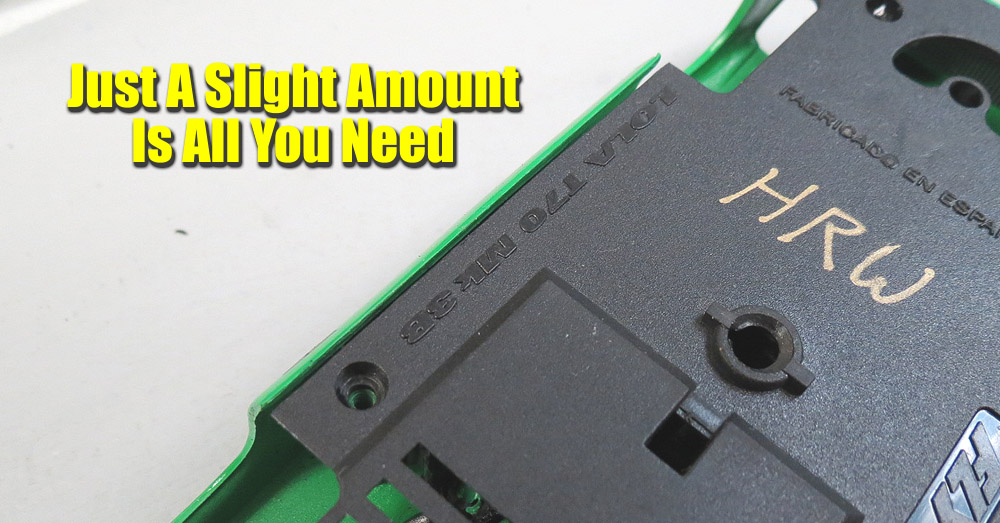
You will notice I do NOT remove a great deal of material. I want to the model to keep it's appearance as much as possible so I only remove enough to make sure there is clearance.
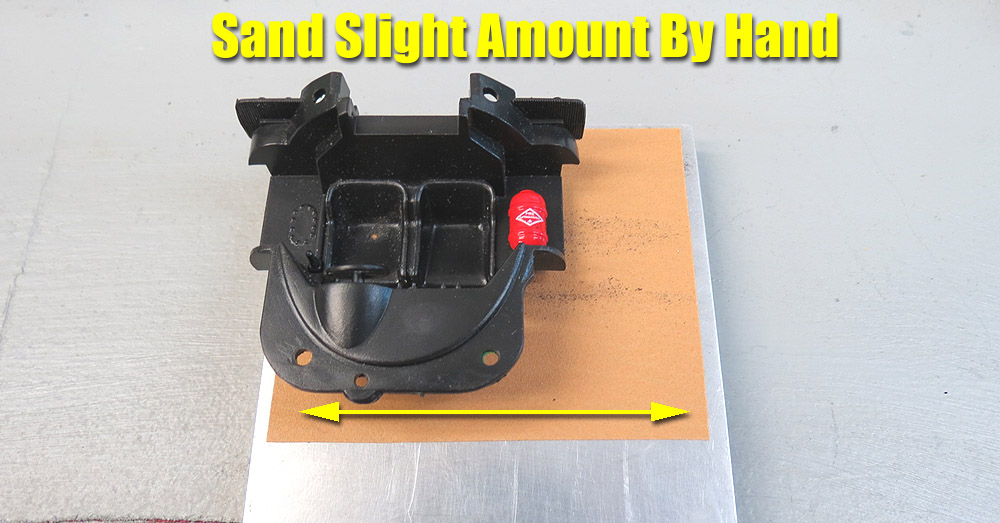
I also sand the bottom of the interior tray. Why? Because many times Fly will post melt the driver in place leaving a large amount of melted plastic hanging down. This will sometimes result in the interior flexing the chassis when you assemble it. I use adhesive-backed medium grit sandpaper applied to a flat and true surface. In this case I use the bottom of my SCC set up block.
I just sand back and forth until the driver pops free. I remove the driver and sand a little more to make sure it will clear the chassis.
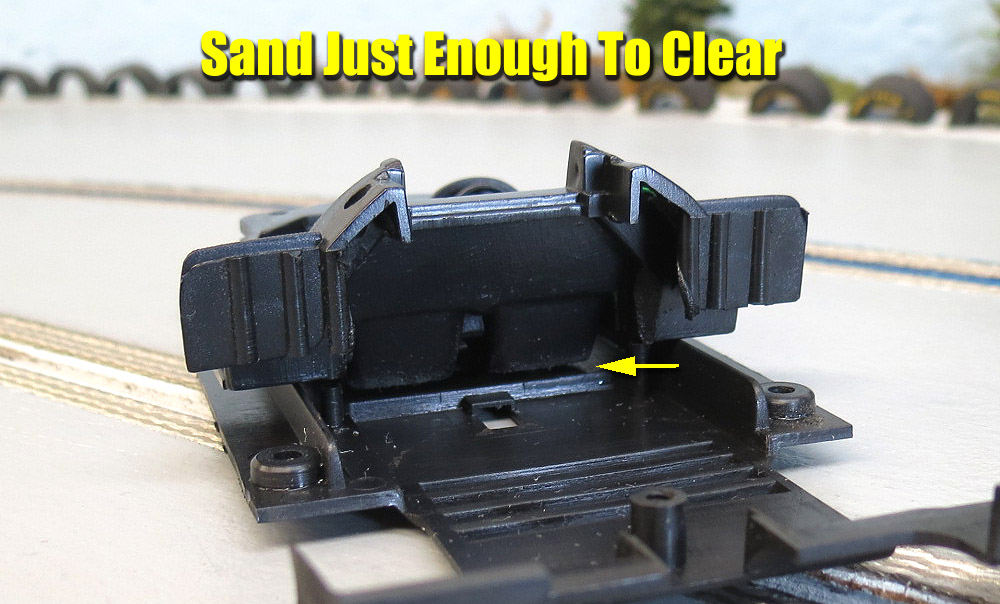
Sitting the interior on the chassis you can see if you have sanded enough. You do not need to worry about the vertical side rails on the chassis. When the interior is glued back into the body, it is suspended above them. I will repeat that you do NOT always have to do this. Some models have no issues at all. In the case of our Lola here, it needed it. The melted plastic was rubbing the bottom. Once completed you use model glue to re-install your driver.
WHEELS & AXLES
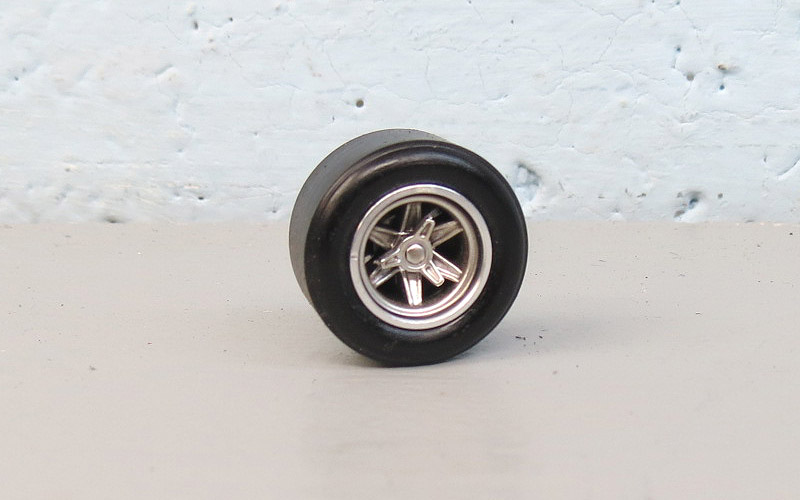
The C.B. Design insert wheel is a great replacement. Very close in size to original FLY wheels and allows you to add the insert inside to keep the scale detail.
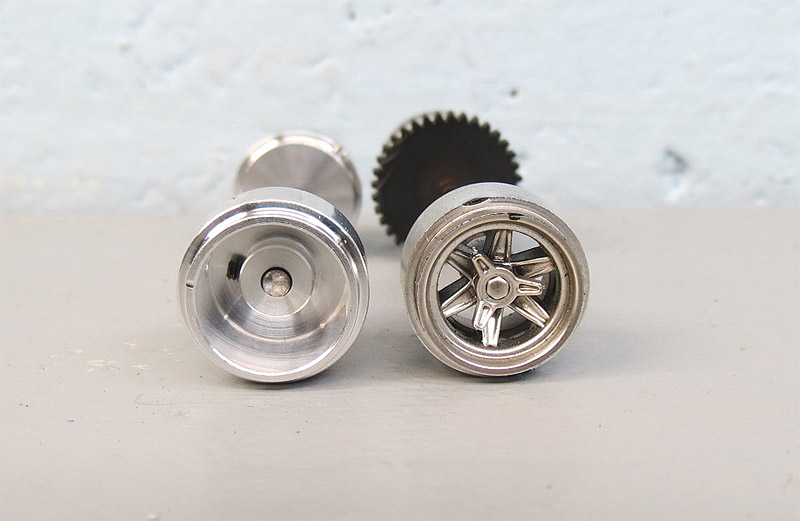
MAKING INSERTS
You can either buy resin inserts or make your own from the original wheel. Not every wheel is easily modified but the ones on our Fly classic will work fine.
There are many ways to turn down a plastic wheel and every enthusiast has a favorite method. I used to use a drill sort of like a lathe, but now we have a Tire Razor.
The Tire Razor has an optional lathe attachment you can purchase and it works very well.
In many cases I do not need to install my lathe as the amount of material to remove is not that much and sanding the wheel gives me finer control over the diameter I am trying to achieve.
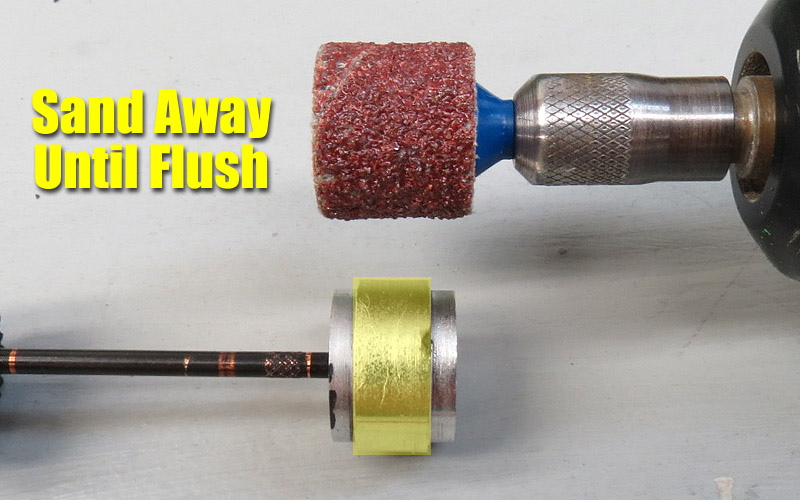
Before I mount the axle assembly for turning I use a Dremel with a sanding barrel to remove the large inner rib. This is much faster and it brings the wheel diameter down to where it is easier to work with in your Razor.
*TIP* If your stock wheel is loose on the axle then remove it and add a drop of super glue to the end of the axle and re-install the wheel. We are not going to use these old parts anymore, so using super glue is fine.
Now I can begin to turn down the wheel. I use the technique we show here on our Monogram models. I just sand the wheel until the new wheel slips over it.
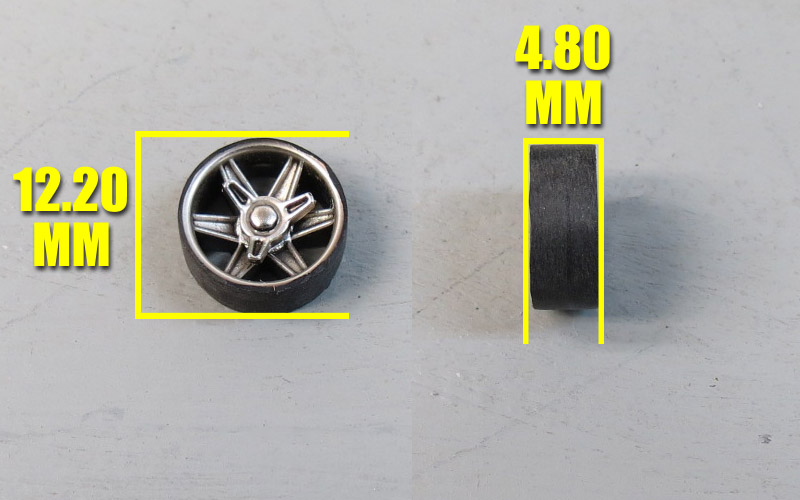
These are the sizes the insert will be give or take a few. You have to test fit as you work.
When finished you should be able to press fit the insert inside the wheel and it will look very close to original.
You can use a small amount of Testors glue to make sure it stays in place if needed.
REAR BUSHINGS

The above photo is easy enough to understand. Just snap in the bushings. Do NOT glue them.
You will want to make sure they are properly aligned before you decide to add any adhesive.
How do you do that? You have a couple options, the first is the preferred and that is to use an SCC Alignment tool.
You should watch the videos and they will educate you quickly on how to install bushings properly for the best performance.
In our model here we are using standard bushings. The reason? Because they work just fine. I am not into competitive racing and find that standard bushings work well enough for my home racing. These bushing also fit the FLY chassis very well. The Fly bushings have a diameter (inside the flanges) of 4.70 where these SCC bushings are 4.65. This means they seat in the pod with less stress and that helps prevent any cracking to the chassis.
What if you do not have this tool yet?
I have used my axle to align bushings countless times. I install the axle and move it back and forth until it is very smooth. Sometimes I flex the motor pod while the axle is still in place, then go back to side to side motion. Normally I can get it to where the axle will drop out if you turn it on it's side. Is it as good as what you see in the video? No. But it works very well and you should find good results until you pick up an alignment kit.
AXLE ASSEMBLY
When purchasing Slot.it axles I prefer getting the longest available. This way you can trim down the axle to fit a specific model.
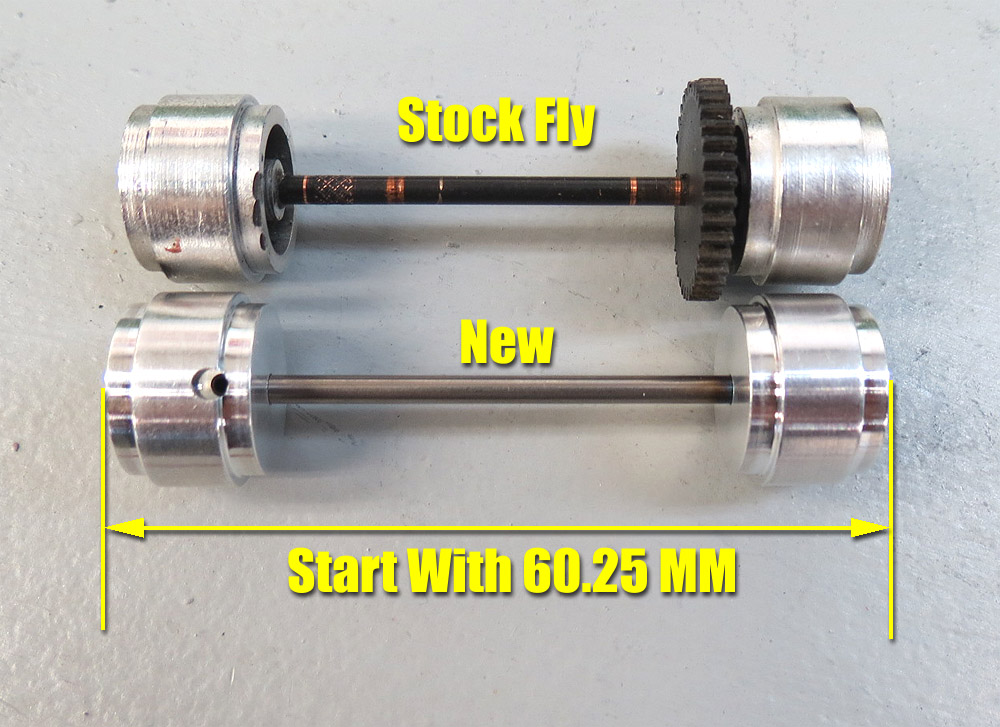
As a guide I set the wheels the same width as the stock Fly but there is room to adjust them.
Now it is time to test fit your assembly.
The shims I show are from SCC and you can get a large pack of them at a decent price. Could you cut your own using stock? Sure you could. But the first time you sit down to cut some you will know why I like them already cut and ready for use. You can also stack thinner shims and fine tune the width as needed.

Each Fly model is a little different. Just adjust the width to suit each model you work with.
Re-install the pod to the main chassis and test fit with motor in place. I like to test fit before I sand the tires to make sure there is plenty of clearance. Some like more powerful motors and even with tires glued onto the wheels you may get some expansion.
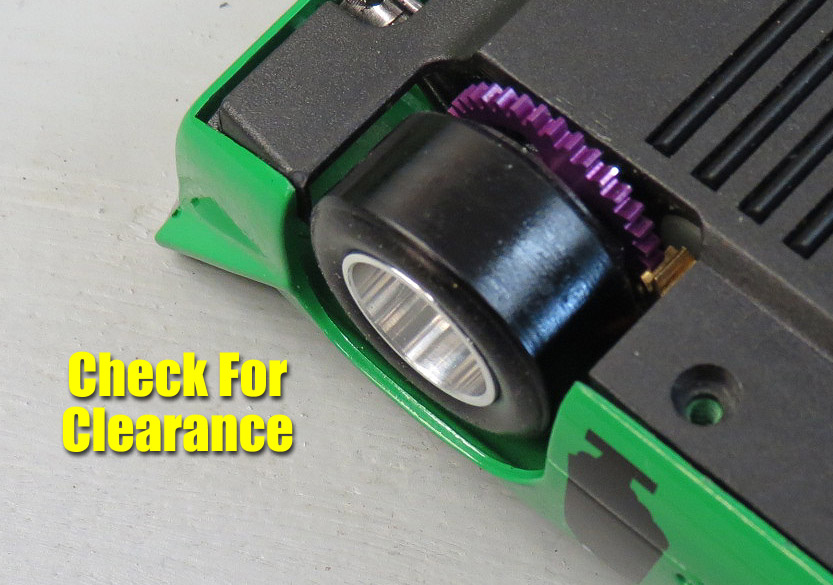
Just mount the body and check the tire to body clearances. If they are too close to rubbing the body then remove a shim.
I do NOT advise sanding the body. You can do what you prefer of course, but I must caution you on doing so. The few thousandths you might gain in sanding the body is not going to be the big difference between winning or losing a race. It can make the difference between a nice looking model or a boneyard candidate if you sand too far and ruin the body.
If there is excess flash molding in the wheel well area, carefully remove it with a Exacto blade. If you must sand then try using fine grit sandpaper and do it by hand and NOT with your Dremel. It is a tedious process but this helps decrease the chance of ruining the body.
TIRE SANDING
Remove the axle assembly WITH bushings and break it own to remove the spur gear. You might notice a little cupping effect on some tires but that is fine. This is why tire sanding is always a good idea even if you are using precision aluminum wheels.
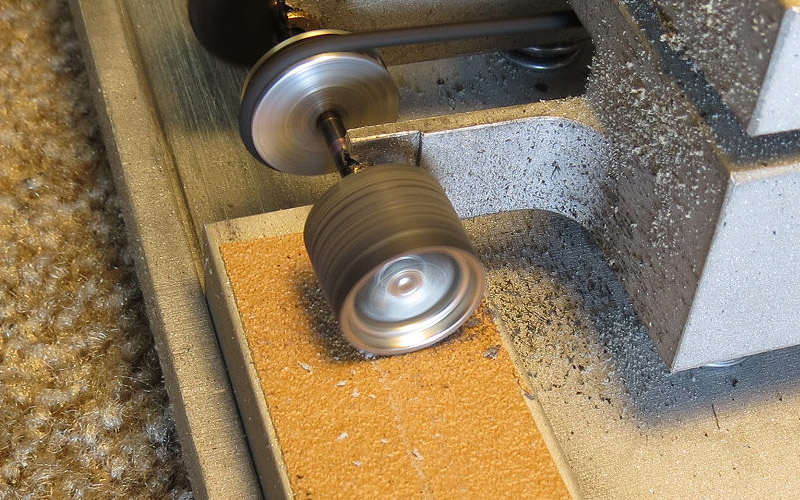
Mount your assembly with the bushings and attach to the tire machine.
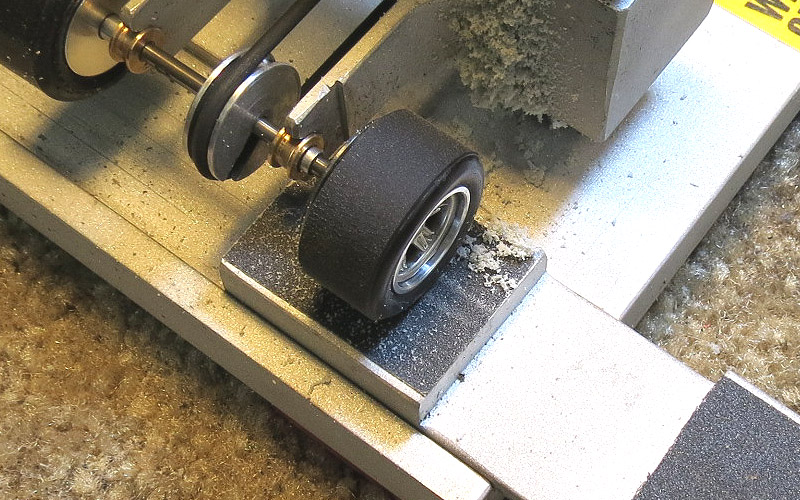
Some enthusiasts like doing both wheels at once. I do not. Just a personal preference. I sand one side at a time until the entire tire is fully scuffed. This shows you that you have fully trued the tire and ready for the track. You can always sand more if the diameter is not to your liking.
MOTOR
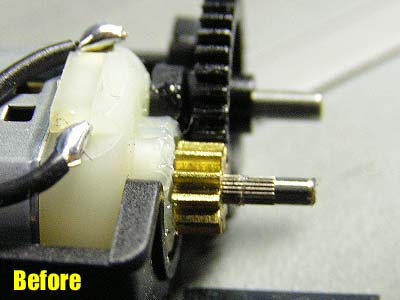
We are almost ready to install our rear axle assembly. First I want to show the quick mod we do on our stock motor and pinion. This is an old tech tip we have used for years and as a nod to those old days, here are the photos showing what we do. The reason you want to do this is the pinion and motor shaft come too close to the tire and you sometimes have some rubbing.
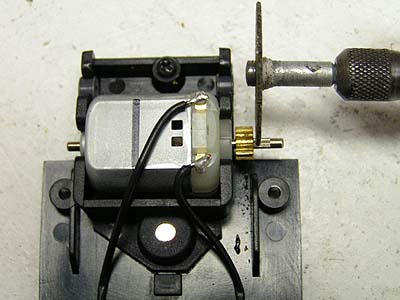
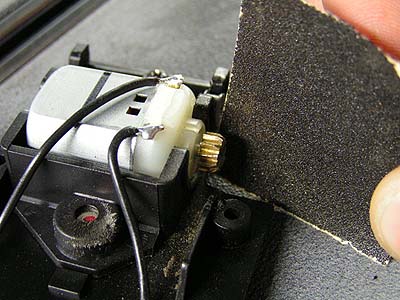
Using your Dremel, cut the motor shaft flush with the pinion. Add power to your motor using a battery or your track and use some sandpaper to bevel the pinion. It will not hurt anything as the new spur gear will only be touching the un-sanded areas.
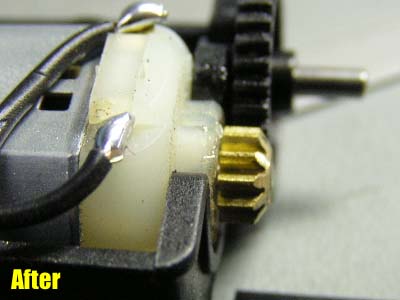
Pretty simple process. With all the parts available today you could swap it out for an NSR or MR Slotcar. For me there is no need as the stock Fly pinion is fine.
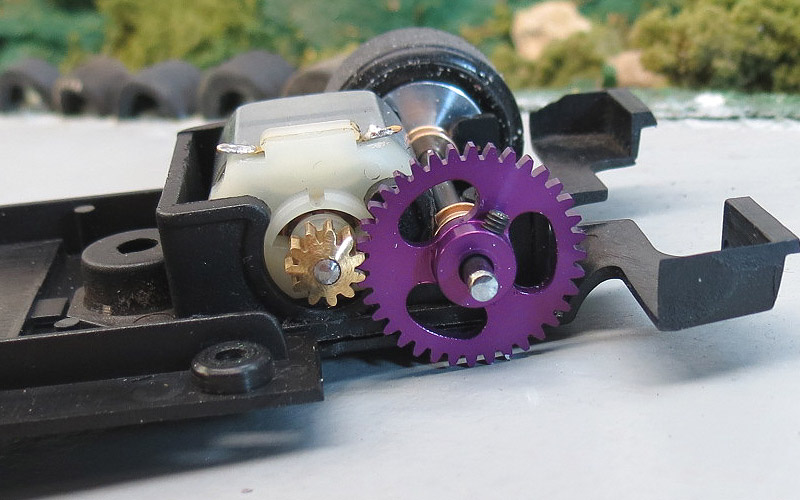
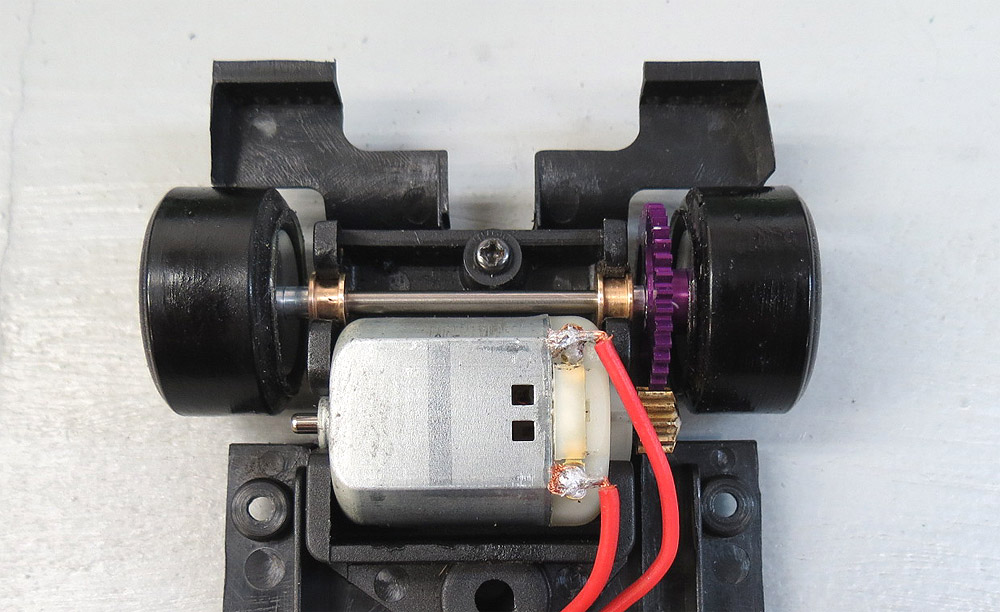
Snap in your assembly with the motor in place.
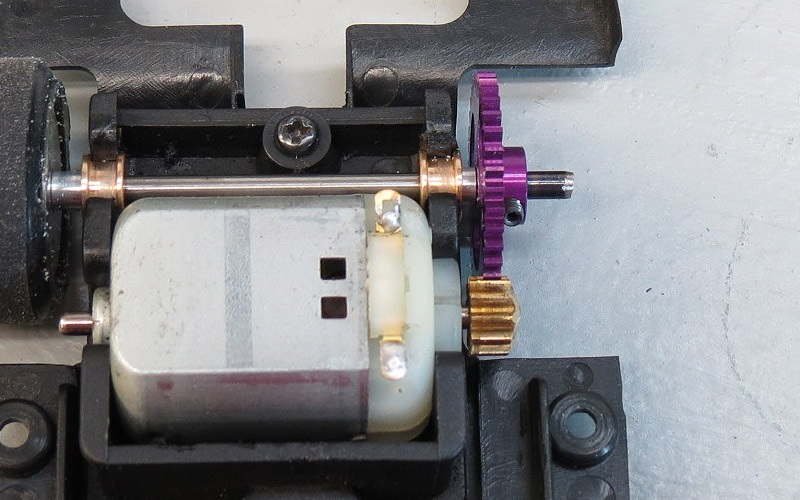
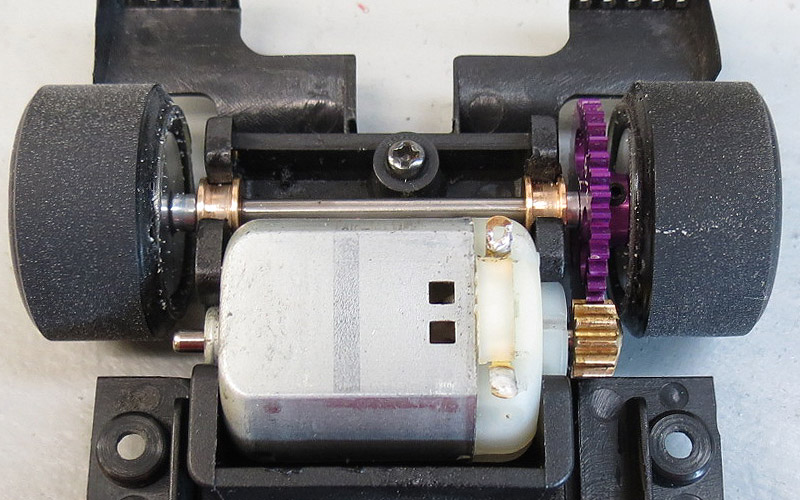
Add a drop of oil to each bushing and test your car by using a 9 volt battery across the tabs to make sure you have the width set correctly. While under power observe the axle assembly to see is any side to side free-play is present. If so, tighten it up to eliminate excess but still spins freely.
CLICK PAGE 2 TO CONTINUE