GTX mold thread
Re: GTX mold thread
![]() by proxieken » Fri Sep 06, 2019 4:57 am
by proxieken » Fri Sep 06, 2019 4:57 am
- proxieken
- HRW SlotCar Veteran!
- Posts: 403
- Joined: Sat Sep 08, 2012 1:22 pm
Re: GTX mold thread
![]() by cjperry81 » Fri Sep 06, 2019 6:21 am
by cjperry81 » Fri Sep 06, 2019 6:21 am
- cjperry81
- Posts: 3
- Joined: Wed Apr 17, 2019 4:15 pm
Re: GTX mold thread
![]() by 32lbking » Fri Sep 06, 2019 11:16 am
by 32lbking » Fri Sep 06, 2019 11:16 am
- 32lbking
- HRW SlotCar Veteran!
- Posts: 167
- Joined: Fri Apr 28, 2017 11:41 am
- Location: Base of the Thumb,mid Michigan
Re: GTX mold thread
![]() by slothead » Fri Sep 06, 2019 4:47 pm
by slothead » Fri Sep 06, 2019 4:47 pm
-

slothead - The Doctor is IN!
- Posts: 1560
- Joined: Sun Mar 17, 2013 7:04 pm
Re: GTX mold thread
![]() by proxieken » Wed Sep 18, 2019 5:17 pm
by proxieken » Wed Sep 18, 2019 5:17 pm
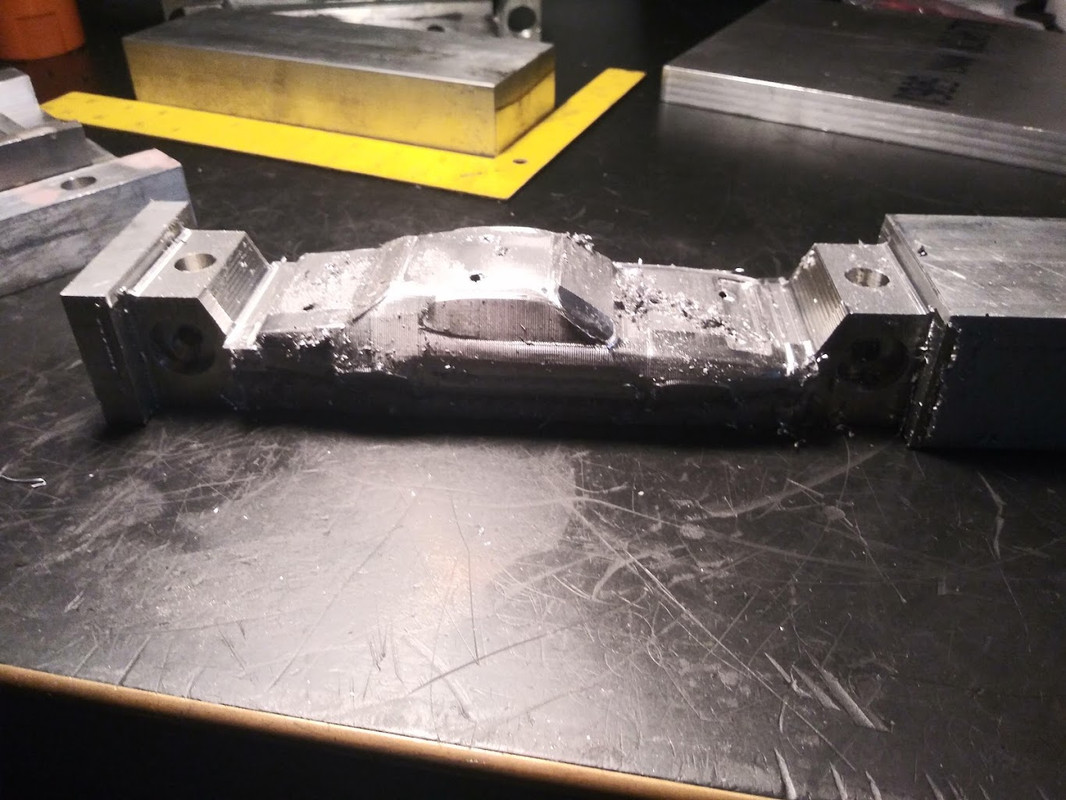
And the driver side plate is almost finished. Have to add the door handle and a little trim around the reflectors.

Notice how the roof part is higher than on the Mercury. I tried to run the seam where the vinyl top would have gone on the Merc but it is hard to trim the flash in that spot. This Plymouth has a vinyl top over only half the roof so no need to match that seam. I parted it higher up on the roof where the mold line would be easier to smooth.
A couple other things I am trying to do. There are no location spots in the underside. They were causing me sinking problems in the Mercury as the plastic cooled and contracted and really they are not that important.
Playing around with the mold design for the remaining parts and also trying to produce a more race style interior with roll cage.
The rear spoiler is going to be on the sprue if at all possible but there are no location on the car. I figure if you are a scratch builder you can make a guesstimate where to attach the rear pedestal spoiler.
Working on all 3 hoods to include if they will fit.
I need to do a little research on the wipers. On the Merc the wipers vanished behind the hood when not in use. I think this Plymouth was similar, but I could mold some wipers on to the front glass if they were visible.
The side mirror is not decided yet. I may copy an old 1970 Mustang kit from Revell where they had a protrusion that glued on the inside. I have to make that decision extremely soon because this side is almost done and if I need to put a post there I got to get to it.
One thing I greatly dislike about my normal slot cars I buy is how flimsy the side mirrors are. They usually end up lost within a few laps. I know I could remove them before racing but I already have a bag of mirrors collected from around the track. I do not want to have a spare parts bag for every car.
So if I am doing side mirrors they have to be solidly glued on so they do not come off in an accident.
Ok, so this is about 6 of the 16 steps finished.
Will post more pics as this project grinds ahead.
- proxieken
- HRW SlotCar Veteran!
- Posts: 403
- Joined: Sat Sep 08, 2012 1:22 pm
Re: GTX mold thread
![]() by waaytoomuchintothis » Wed Sep 18, 2019 8:15 pm
by waaytoomuchintothis » Wed Sep 18, 2019 8:15 pm
More news when I hear from them.
-

waaytoomuchintothis - "Seasoned SlotRacer"
- Posts: 7576
- Joined: Wed Aug 29, 2012 7:16 pm
- Location: Chesterfield, Virginia
Re: GTX mold thread
![]() by proxieken » Thu Sep 19, 2019 5:25 am
by proxieken » Thu Sep 19, 2019 5:25 am
- proxieken
- HRW SlotCar Veteran!
- Posts: 403
- Joined: Sat Sep 08, 2012 1:22 pm

Re: GTX mold thread
![]() by Wobble » Thu Sep 19, 2019 2:45 pm
by Wobble » Thu Sep 19, 2019 2:45 pm
-

Wobble - HRW SlotCar Veteran!
- Posts: 602
- Joined: Mon Nov 23, 2015 2:02 am
- Location: Christchurch, New Zealand
Re: GTX mold thread
![]() by waaytoomuchintothis » Mon Sep 23, 2019 1:15 pm
by waaytoomuchintothis » Mon Sep 23, 2019 1:15 pm
I ordered the Slot Car Fever decal set in 1/32nd, and the trunk number is left out. Apparently, the photo is of the 1/24th version. I emailed them and I haven't heard anything yet. Meanwhile, I am wondering how to make a white number 14 for the trunk of my car. I also think the very thin white "426" for the hood is extremely pale.
More news when I hear from them.
Here's the news:
Slot Car Fever appears to be so disorganized that they messed up their attempt to correct their error. Not only is the large red trunk decal and white number decal still missing everywhere except the picture on their website (ya know, that's the only thing we have to know what we are getting- or not getting as it happens), but they have sent me another unacceptably pale white decal with what I assume is supposed to be the trunk number they left out last time (waaay out of scale and the wrong font, not matching the rest of the car) with hood decals that I already had from the first set. If they survive the next few years, I'll give them another chance but until then, they are off my list, and I will warn others when they see this car with screwy decals and ask what happened.
-
waaytoomuchintothis - "Seasoned SlotRacer"
- Posts: 7576
- Joined: Wed Aug 29, 2012 7:16 pm
- Location: Chesterfield, Virginia
Re: GTX mold thread
![]() by slothead » Mon Sep 23, 2019 3:27 pm
by slothead » Mon Sep 23, 2019 3:27 pm
I was hoping to build that #14 Charger in the future (still need to get hold of another '69 Charger body), but I'll put that project on hold till I see what you're able to do.
-
slothead - The Doctor is IN!
- Posts: 1560
- Joined: Sun Mar 17, 2013 7:04 pm
Re: GTX mold thread
![]() by waaytoomuchintothis » Mon Sep 23, 2019 6:43 pm
by waaytoomuchintothis » Mon Sep 23, 2019 6:43 pm
-
waaytoomuchintothis - "Seasoned SlotRacer"
- Posts: 7576
- Joined: Wed Aug 29, 2012 7:16 pm
- Location: Chesterfield, Virginia
Re: GTX mold thread
![]() by slothead » Mon Sep 23, 2019 7:12 pm
by slothead » Mon Sep 23, 2019 7:12 pm
-
slothead - The Doctor is IN!
- Posts: 1560
- Joined: Sun Mar 17, 2013 7:04 pm
Re: GTX mold thread
![]() by Fathead59 » Tue Sep 24, 2019 11:02 pm
by Fathead59 » Tue Sep 24, 2019 11:02 pm
- Fathead59
- HRW SlotCar Veteran!
- Posts: 435
- Joined: Thu Aug 03, 2017 1:13 pm
Re: GTX mold thread
![]() by Wobble » Wed Sep 25, 2019 5:35 am
by Wobble » Wed Sep 25, 2019 5:35 am
-
Wobble - HRW SlotCar Veteran!
- Posts: 602
- Joined: Mon Nov 23, 2015 2:02 am
- Location: Christchurch, New Zealand
Return to The Marty Stanley Scratchbuilders Shop
Who is online
Users browsing this forum: No registered users and 2 guests

Powered by phpBB® Forum Software © phpBB Group